1963 Case 530CK Backhoe/Loader

   / 1963 Case 530CK Backhoe/Loader #1  

stans1

Silver Member
Joined
Apr 12, 2014
Messages
105
Location
Sparks, Nevada
Tractor
Case 530 CK
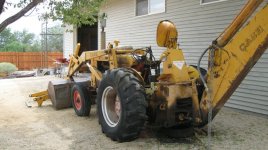
Just thought I would see if anyone here would be interested in my 1963 Case 530CK restore project. Been working on it for the last several months and have gotten quite a bit done, but still have a long ways to go! It will include pictures of all the processes that I am doing with before and after pictures. I bought the hoe in 1998 to build my shop and it had been rode hard and put away wet. Was not able to fix and repair all the stuff back then because I had a regular job and there just was not enough time to do it then. After I built my shop in 1998 I fabricated an overhead gantry crane that spans and runs the entire length of my shop with 2 ton electric Coffing hoist. The crane is really great for picking heavy parts off of the hoe and loader.

Since 2012 I have been retired and did not get started until this summer. I had to fabricate and machine a lot of parts, also flush off old welds and re weld and fit up some of the structural frames and such. I though some of you might be interested in a running account of my project.

Thanks, Stan
 
   / 1963 Case 530CK Backhoe/Loader #3  
Looking forward to it.

Sounds like quite a project.

PAGUY
 
   / 1963 Case 530CK Backhoe/Loader #4  
Sure... Have an old Deere 310C that needs some new pins & bushings. I'd like to see how you handled the hoe parts.
 
   / 1963 Case 530CK Backhoe/Loader
  • Thread Starter
#5  
Well, thanks for the interest.............will not send too much at a time, but I do have quite a few pictures that I have taken along the way and intend to take more as I finish more steps.

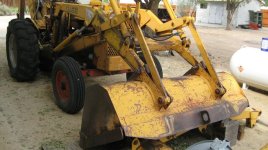
Here are a three to show how it looked as I started:

IMG_1095_rs.jpg
Here shows the stabilizer area after I removed them and before I cleaned it.
IMG_1101_rs.jpg
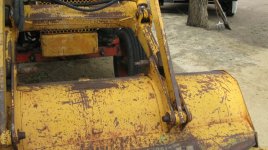
Here is one from the front.

IMG_1103_rs.jpg
This one shows what the previous owner had put in the bucket links.
 
   / 1963 Case 530CK Backhoe/Loader #6  
I'm sure by now you have a service manual, but in case you don't have them all, here's a pretty handy link that has about everything. Click on items in the menu at left side of page. Case 530CK - Tractor Specs

Found it about 4 years ago, while trying to find info on what I thought was a 530 I bought. Come to find out, it was a 310B.

None the less, maybe someone out there has a 530, and no manuals. If the thread title catches their eye, hopefully this will be of some use to them.
 
   / 1963 Case 530CK Backhoe/Loader
  • Thread Starter
#7  
Thanks for the information that you supplied. Yeah, I have seen this link before, in fact, I discovered this some time ago and saved it to my puter and I continue to reference it for important stuff. And you are correct about the service manual. When I first acquired the 530 I went to the local Case dealer and ordered both the parts and service manual. I also bought the owners manual for the hoe and loader.

I have been busy on my tractor and have not had the time to compose both pictures and explanations to upload to the site, I plan on doing that this weekend. I am not sure where to start with the things I think people on the site will want to see, but I have torn down the frames (hydraulic fluid sections) and structural pieces and all of the pins, cylinders, hoses, clamps, injection pump, fuel tank, lines etc. So if I present stuff that no one is interested in please leave feedback.
 
   / 1963 Case 530CK Backhoe/Loader #8  
I would enjoy watching your project. I actually spent a little time on a 530 years ago.
 
   / 1963 Case 530CK Backhoe/Loader #9  
I'm looking forward to your pictures/info. I really enjoy restoration threads, makes me wish I had time to restore my old tractor.
 
   / 1963 Case 530CK Backhoe/Loader
  • Thread Starter
#10  
Well this is the first installment with more to come. I decided to start with a cylinder rebuild for the stabilizers since it was one of many parts that I was trying to 電ry up the bleeding of hydraulic fluid. Almost everything on the tractor was leaking and not one of the cylinders would hold its position after shutting down the hoe. Also for those that have not rebuilt a cylinder; this will show you the components and maybe illustrate how simple a cylinder is.
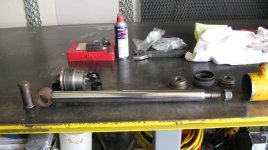
IMG_1006_rs.jpg
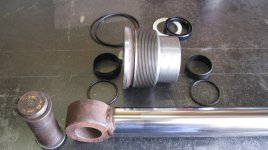
Here is the cylinder completely disassembled. Of course, the rod with the boss on the end where the pin connects to the stabilizer is front and center. On the left is the gland nut with an assortment of seals and wipers.
IMG_1007_rs.jpg
Close up of the gland nut and the seals and wipers

IMG_1009_rs.jpg
This one shows the metal washers that sandwich the packing which is spread out above. That center fibrous looking washer helps the piston (when installed in the cylinder) to ride gently on the cylinder walls and keeps it from binding up.
IMG_1032_rs.jpg
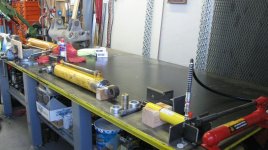
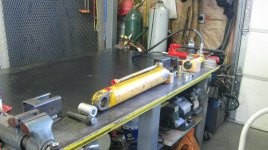
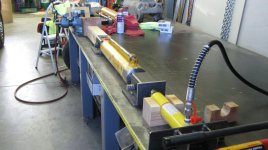
OK, this is the set up that I fabricated to assist in re-installing the piston back into the cylinder. The piston packing can be quite stiff and will resist normal efforts to push it back in, even with lots of lubricant. I used a port-a-power type horizontal jack and pump to facilitate the procedure. You will notice that at each end of the cylinder is an assortment of pins bushings and square tube boxes.
IMG_1033_rs.jpg
A view from the other end.

IMG_1034_rs.jpg
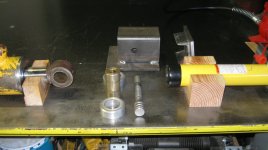
A close up with all the parts needed to hold the port end of the cylinder. You will note that I welded a shoe to the box tube so that the pin bore will always be oriented perpendicular to the axis of the cylinder. When re-installing the cylinder it just makes it so much easier to then install the pins. Once the piston packing is in the cylinder it is pretty hard to rotate it into position.
IMG_1036_rs.jpg
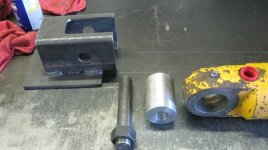
Since there are different sized cylinders on the loader/hoe it follows that there are different sized bosses connected the rods of those cylinders. So, I machined different sized bushing to fit the different sizes. You will note that I stitch welded a shoe or plate onto the sq. tube to keep the orientation with the port end.
IMG_1039_rs.jpg
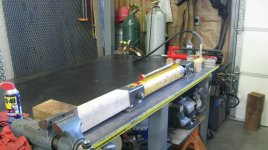
This is a view with the whole set up together to show you how I trapped the cylinder between the jacking device and one of my vises farther down the fab table. If I have a longer cylinder, I just unbolt the vise and move the block to the other vise even further down.
IMG_1040_rs.jpg
It is a simple set up and really saves time!
IMG_1049_rs.jpg
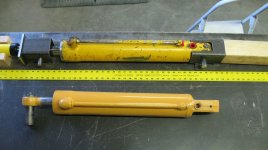
This one show an over view of a cylinder that I just finished and painted and one in the (set up) and a rule to give some perspective to the size. The metal tubes that connect the hydraulic lines were bent up like pretzels, but with a little work with mandrels (matched the I.D. of tubing) and a machinist vise and small hammer I was able to straighten them out again. I have had to chuck up in my lathe most of the gland nuts and re-face the ends then re-bore the シ holes because of the damage caused by others that did not use a spanner to unscrew the gland.
 
 
Top