Another Firewood Processor

   / Another Firewood Processor #111  
Ill throw up a pic of my cyl mounts. 0822151909.jpg. Of course my mounts are for 2 cyl instead of one, but my pusher block is the same 20in tall as yours. Past experiences on a few other splitter builds and I found pretty much the same thing you have with high cyl mounts. The higher you mount the cyl, the more the base mount is going to flex. While my top cyl is mounted at about the same height as your single cyl, I mounted the bottom cyl as close to the hbeam as possible. I also chose to use to side plates for the base instead of one center mount which will give a little more support when pushing. I havent boxed my beam yet, but your pic's of boxing the beam is pretty much exactly what I had planned. I also intend to plate the top of my beam. Plating the top of the beam will provide a lot of support when it comes to bending/flexing the hbeam under load. My thought for you are to lower your cyl mounts as low as possible. Make your slide/pusher plate as long as possible and then brace the pusher to keep it from bending backwards. My current splitter has a 5in bore cyl and is mounted with a single 1 in plate at the base like yours, and the sides of the web are plated with additional 3/4 plate, both sidesbut it only extends about 6 or 8 inches toward the front of the hbeam. I have never noticed my hbeam flexing at the base of the cyl. The wedge end of my beam is plated on both side with 3/4 plate and 6in channel on both side. securedownload.jpg, I have seen it flex and I actually think I bent the hbeam where the plateing ends. My wedge is 24in tall adjustable and a 6way. If your not able to lower the cyl mounts, you might consider just welding ome sqtube between the cyl and beam. You can sandwich the base mount between the tube to give it some extra support at the same time. probably the cheapest, easiest fix and will really give your hbeam a boost of strength
I think the URL is a little off, Your not a dumbass, dumbasses dont build what you have built.
 
   / Another Firewood Processor
  • Thread Starter
#112  
Thanks for the info muddstopper. I had seen your dual cylinder design somewhere on here but had forgotten about it. Very interesting indeed!

Update: We processed about 6 full cord this weekend and found some issues that need to be addressed.

Issue #1 Bending the pusher plate forward.

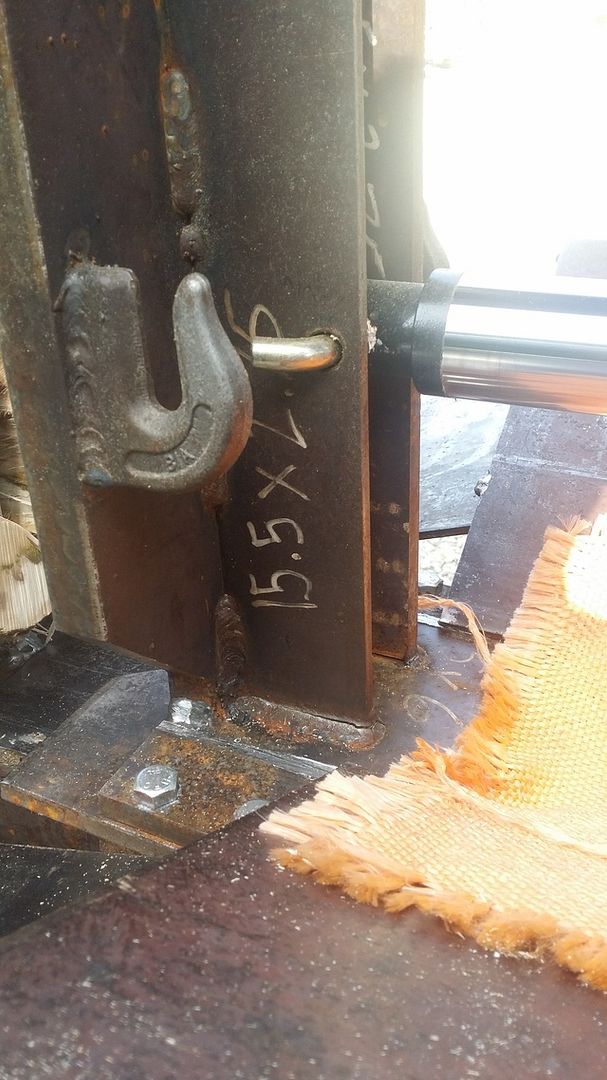
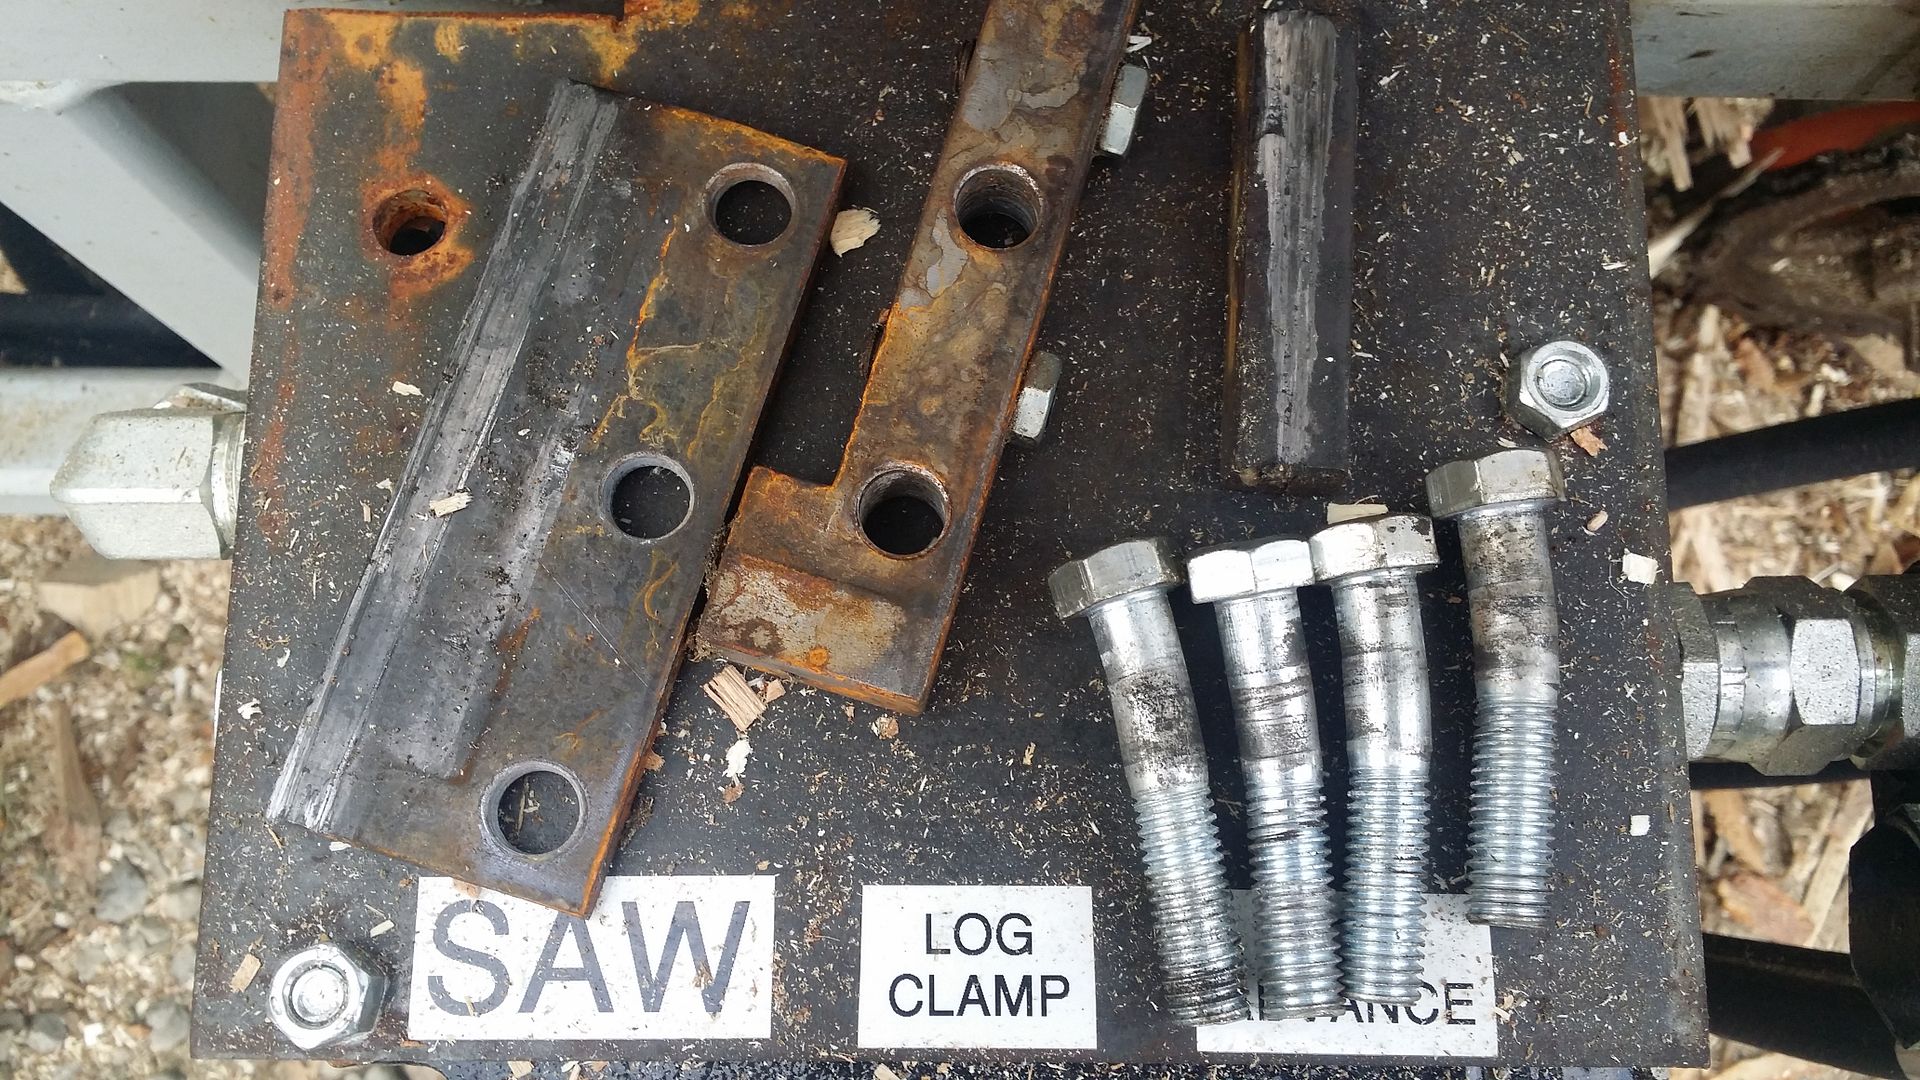
Since our load of logs had so many that were small in diameter it showed us just how easy the pusher could break its welds. They cracked right down the middle. The cylinder being mounted 8-1/2" above the beam and us not having larger gussets in there caused this issue.


We then put a log cross ways at the top of the wedge and tried to push it as far back into position as we could. We re-welded the vertical members and are planning on adding gussets. Unfortunately in this picture you also see the results of our second issue. The pusher lifting off of the beam.


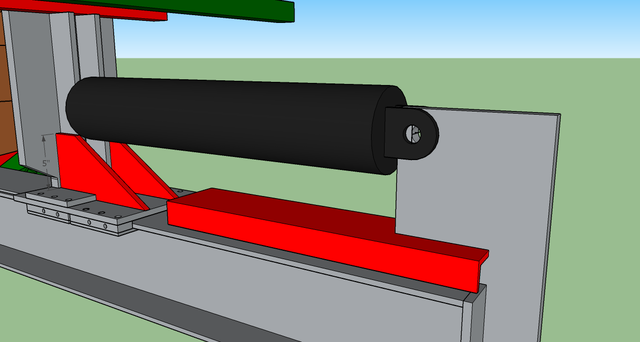
This pic shows the gussets we plan on adding to the back of the pusher as well as a piece of C-channel we want to add to support the cylinder mount some more.

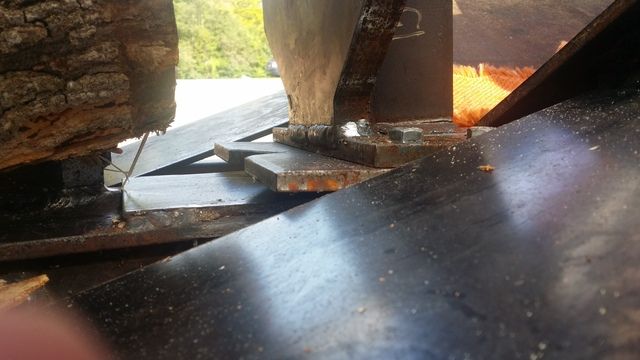
Issue #2 Lifting of the pusher plate.


Here you see how the plate lifted.

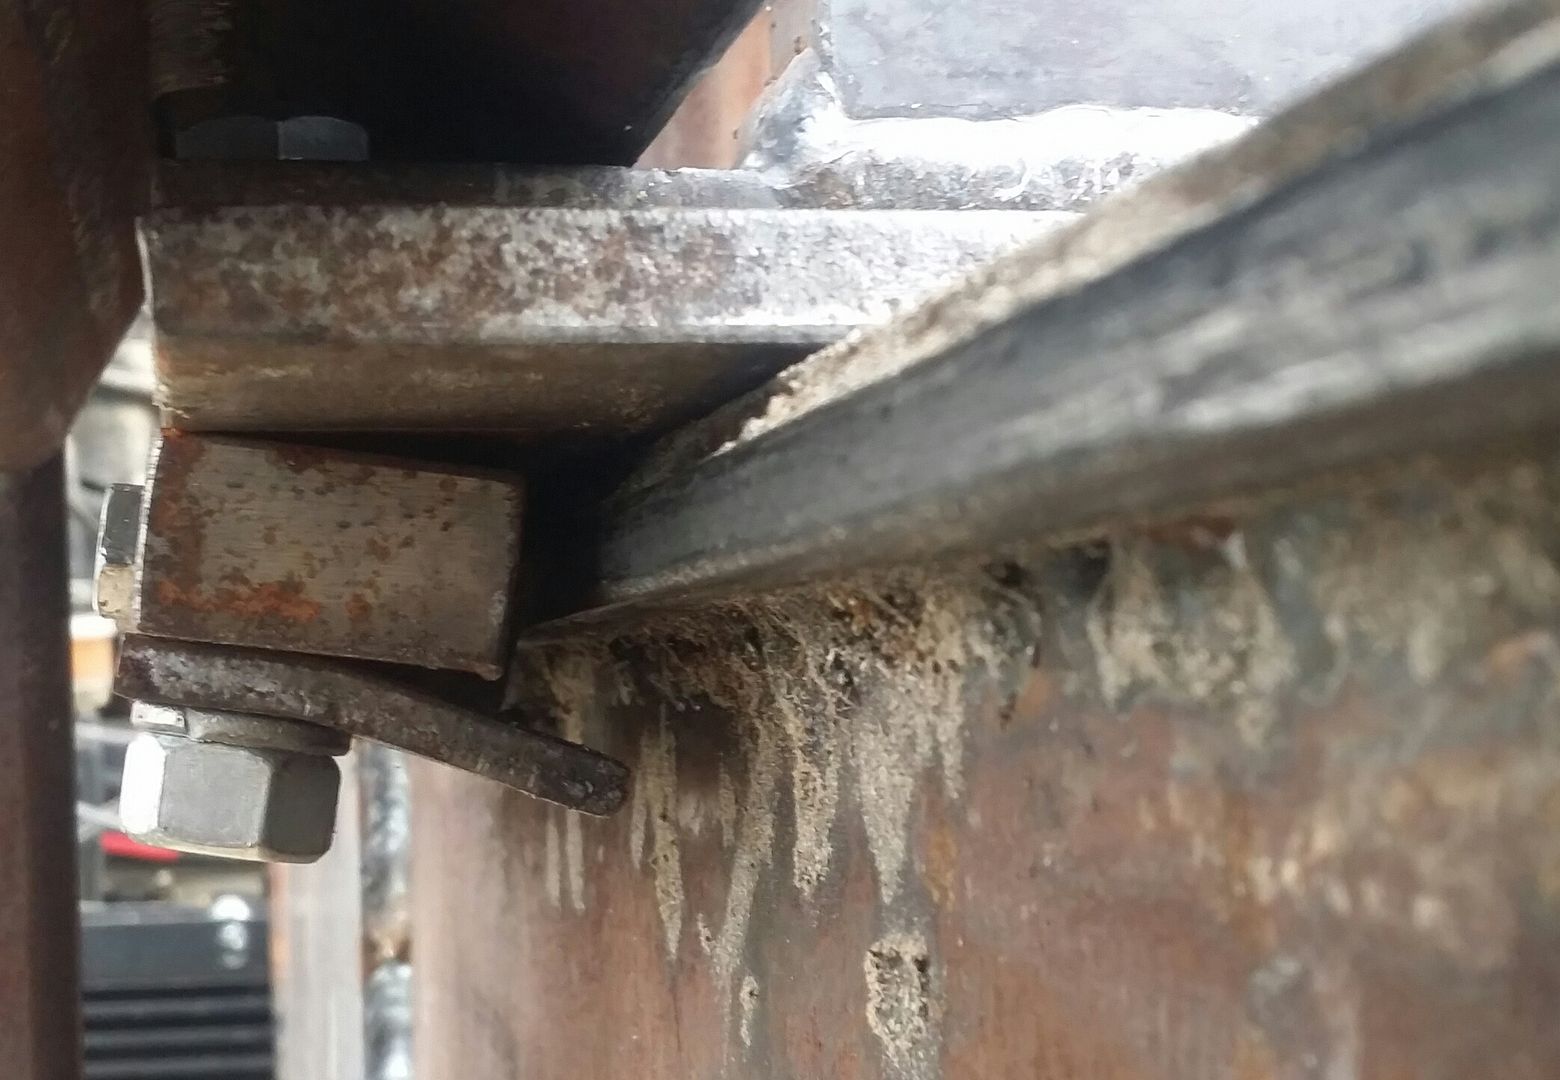
The spacers in between the pusher sled and the lower plates was left a little too thick. We have since machined them down and hope that if things are tighter they wont start to bend quite so quickly. Again, we feel that this is mostly due to having the cylinder mounted higher.

So to fix a lot of this we will need to drop that cylinder. But right now the top of the pusher plate leans forward towards the wedge. A bit over 1/2" difference over 20 or so inches. With this lean now welded into place we have an issue. If we drop the cylinder now, whenever we run larger diameter logs we will be pushing the pusher plate up at the front similar to what is shown in the 2nd picture . So for now we are just going to add the gussets and try to get this years wood done. Over the winter we plan on squaring up the pusher to the pusher sled (likely building a new one) and dropping the cylinder by 3 inches. We are thinking that we would not make the pusher plate nearly as high so we keep the forces lower. We will run the splitter roof supportsfrom behind the pusher plate.

Issue #3 The splitter engine...

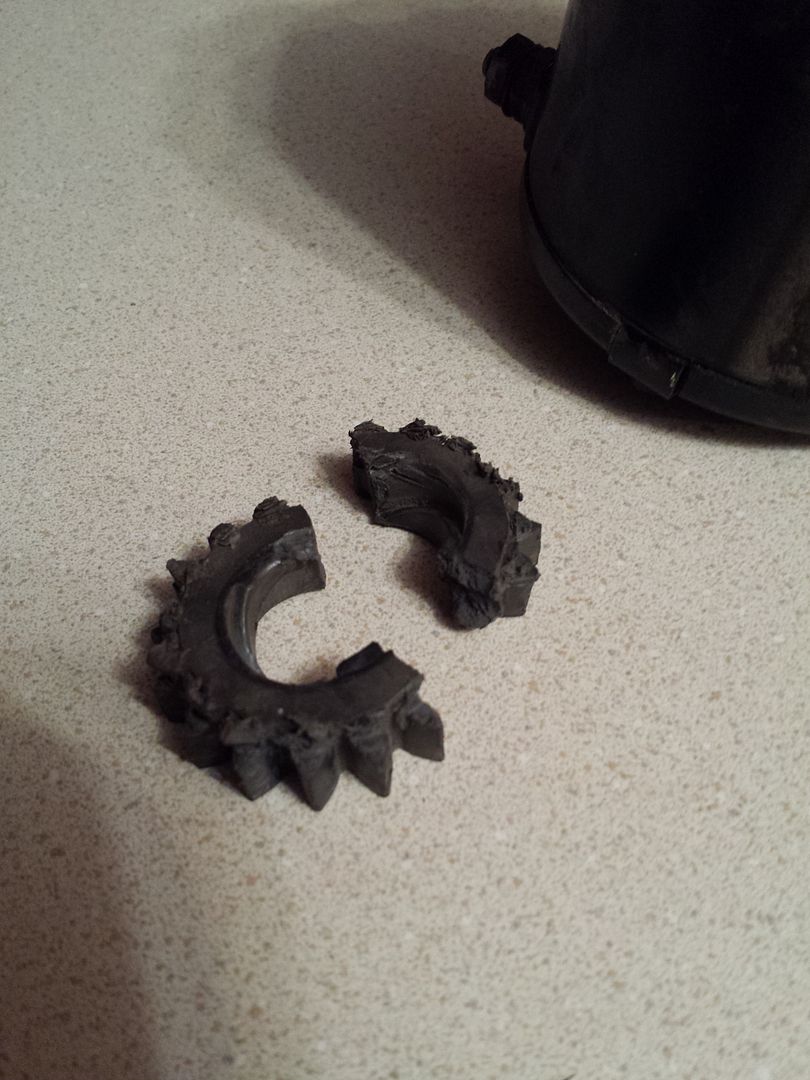
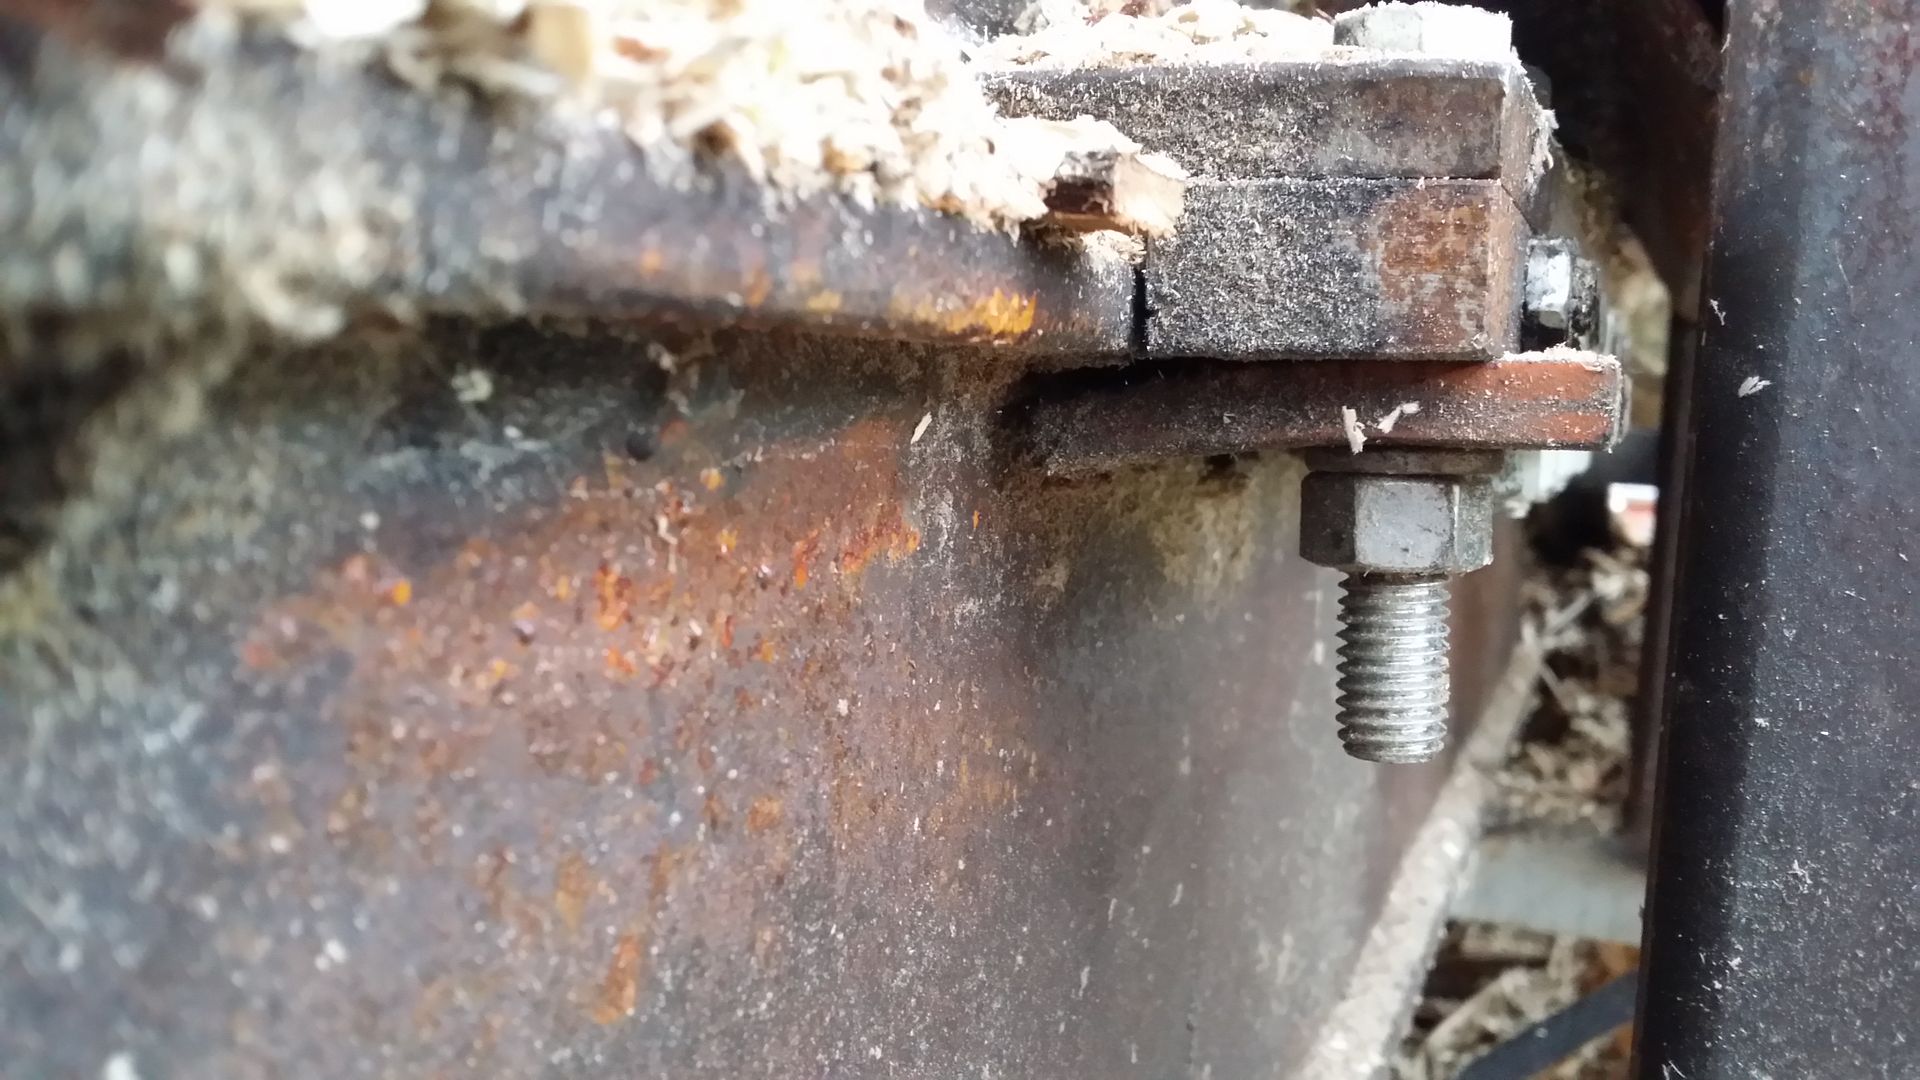
When we got the engines going, we initially had issues with the starter on the 22HP saw engine. Miraculously that engine fixed itself and we no longer need to jump the starter solenoid on it. However, the starter on the 18HP decided to take a dump on us. We believe it got hot from being next to the exhaust on the 22HP. The gear that engages the flywheel looks like this. Off to find a new one. We also got 2 box fans to help move some additional cool air to the engines.

Issue #4 Hydraulic oil temp.
We decided to use AW32 oil so that we can use the system year round. Given that oil, our operating window is 85 to 130 degrees with an ideal temp of 104. On a sunny day with an ambient temp that made it into the mid 80s we had to stop several times to let the oil cool as it crept over 130. (55+ gal of oil in the system) We would leave the saw engine/pump running at idle and turn the splitter engine off to slowly push fluid through the oil chiller. With things running like that it would cool down about a degree a minute. (rough guess) So apparently we need a larger cooler than 32K BTU/Hr if we want to run continuous throughout the summer with that oil. The next time we run it I will log the temp rise over time to see how much additional heat is being generated.

Other than that it's running great!
 
   / Another Firewood Processor #113  
Well, first, congratulations on processing 6 full cord, that's a big accomplishment.

If you're going to reconfigure your cylinder mount, don't just drop it 3 inches, drop it all the way to the bottom and brace the top of the pusher plate. Here's a picture of my pusher plate that's lying on it's side. The cylinder is as low as possible with bracing to support the top of the plate. I've had no issues.

IMG_20150215_121441.jpg

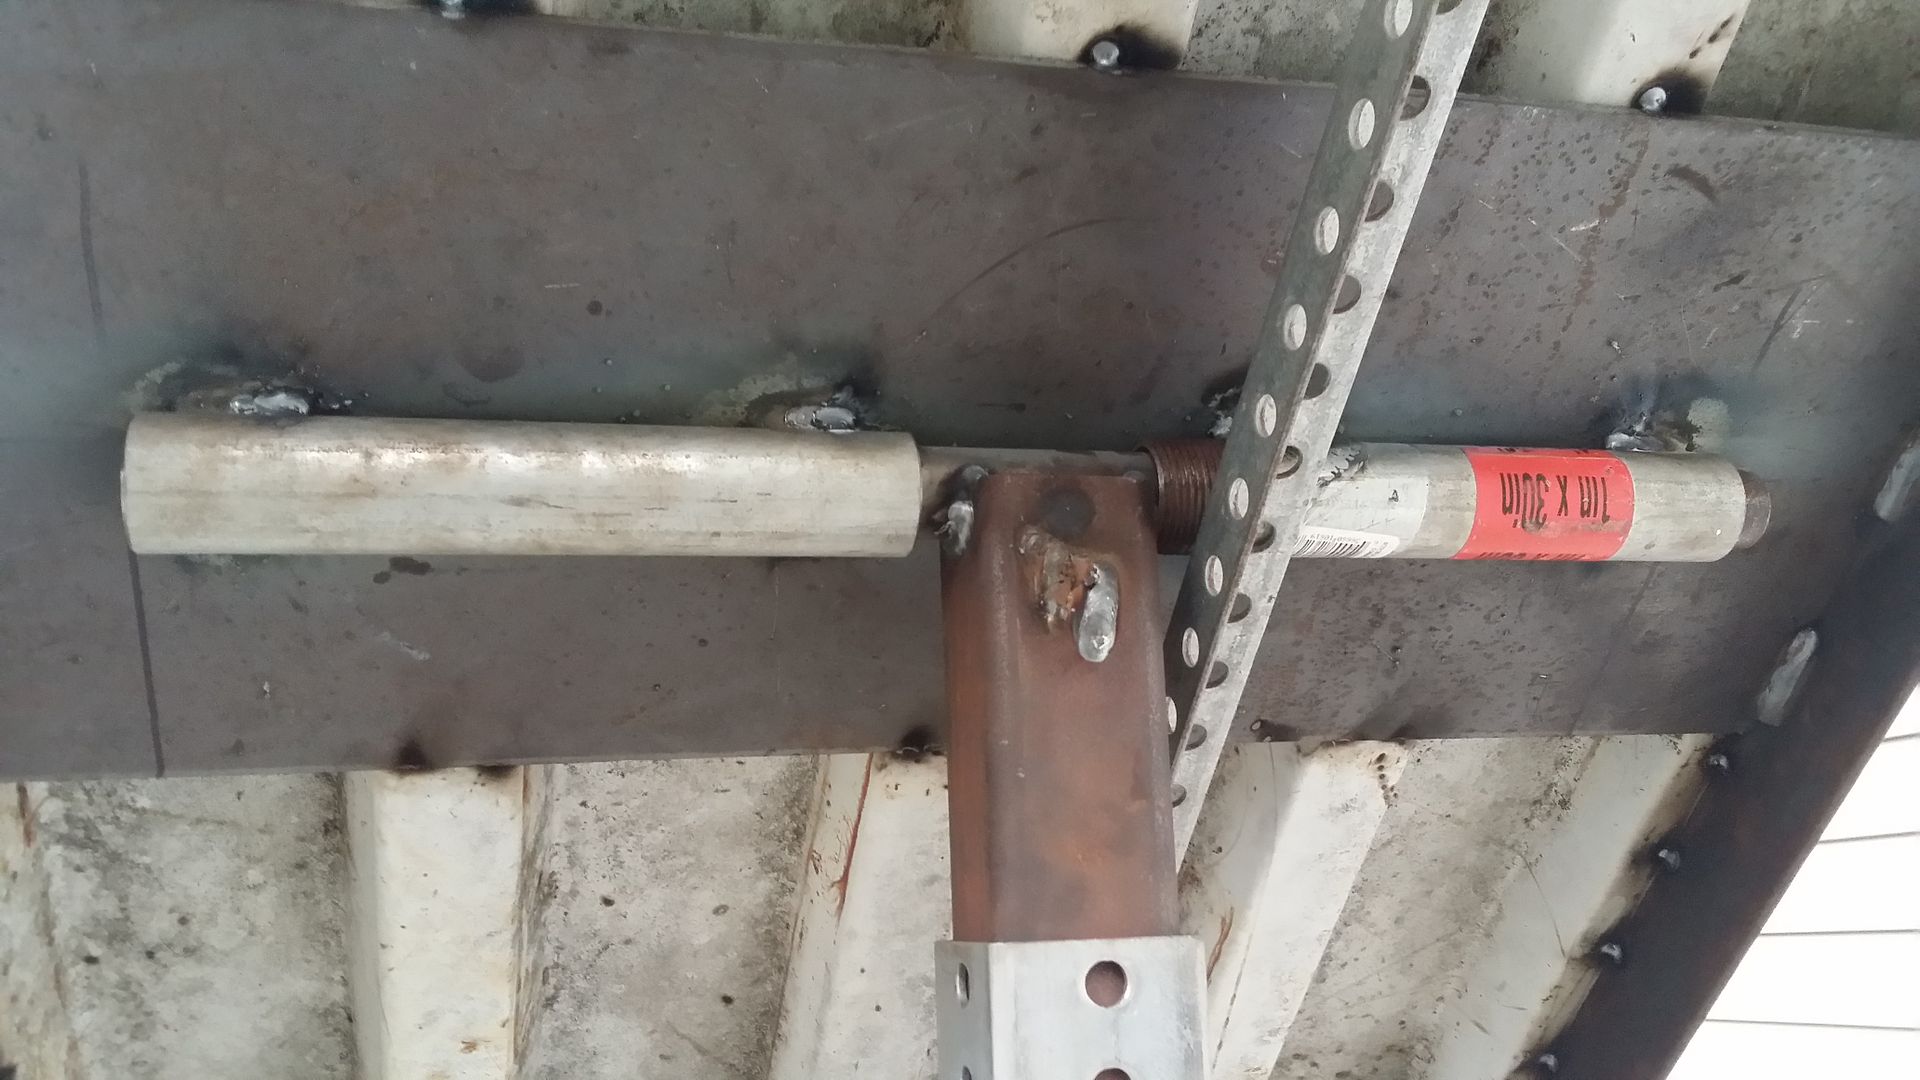
I don't think machining the spacers is going to be enough. "Where's the beef man!!!" The steel guides need to me much stronger and it looks like you need several more bolts and you should make them grade 8. As you know, my machine works a little differently but the guide is made of 1/2" steel and is continuous from one side to the other. A picture from the bottom should show what I mean. If possible, I'd use the underside of the beam, otherwise, I'd beef that up significantly. I think if the guide had been strong enough to resit the upward force, you may have bent the top of the I beam, it may be a good thing if failed where it did.

IMG_20150215_163205.jpg

I haven't posted an update in a long time in my thread, but I'm still not processing large amounts of wood either. My big problem is also heating. I too am using 32 weight hydraulic fluid since I never plan on using the machine in the summer again. I ended up having to buy an oil cooler this week and will install it for the weekend. Mine is also rated for roughly 32K BTU/hr but they also list it with a max heat removal of 10 hp. Since you're running 40hp, you either need another cooler or a much larger one. How are you powering yours? That's my next issue, my little 15hp engine can't supply enough 12V power. Did you add an alternator to one of the engines?

There are bound to be issues building something like this for the first time. It's going to be an awesome machine when you get through them.
 
   / Another Firewood Processor
  • Thread Starter
#114  
Thanks for your info Ken, I've been wondering how things have been going for you. These things do take a bit to get the bugs worked out. One of our guys suggested that when we get everything worked out we sell it and use everything we've learned to make our 2nd one even better. :eek: I don't know if I could take that...

If you're going to reconfigure your cylinder mount, don't just drop it 3 inches, drop it all the way to the bottom and brace the top of the pusher plate. Here's a picture of my pusher plate that's lying on it's side. The cylinder is as low as possible with bracing to support the top of the plate. I've had no issues.
I was planning on adding that upside-down piece of C-channel on top of the beam to strengthen it a bit more. My Troy-Built 33 ton unit has that setup. Dropping the cylinder 3" would put it 1/2" above that channel.

I don't think machining the spacers is going to be enough. "Where's the beef man!!!" The steel guides need to me much stronger and it looks like you need several more bolts and you should make them grade 8. As you know, my machine works a little differently but the guide is made of 1/2" steel and is continuous from one side to the other. A picture from the bottom should show what I mean. If possible, I'd use the underside of the beam, otherwise, I'd beef that up significantly. I think if the guide had been strong enough to resit the upward force, you may have bent the top of the I beam, it may be a good thing if failed where it did.
We made those bolts and bottom plates weak on purpose to do just what they did. Obviously the last thing we want to do is bend the beam. We are in the process of making a bunch extra bottom plates. For the time being they will be a wear item that is checked daily That is until we drop the cylinder and get the pusher angle fixed or end up replacing it.

If that does not fix things then we will need to regroup. Maybe making something that wraps under the entire beam will be the solution. I never thought of that. I think we'd need to move one of the beam supports but that is not the end of the world. Is that nylon that you are using to reduce friction? How is that holding up?

My big problem is also heating. I too am using 32 weight hydraulic fluid since I never plan on using the machine in the summer again. I ended up having to buy an oil cooler this week and will install it for the weekend. Mine is also rated for roughly 32K BTU/hr but they also list it with a max heat removal of 10 hp. Since you're running 40hp, you either need another cooler or a much larger one. How are you powering yours? That's my next issue, my little 15hp engine can't supply enough 12V power. Did you add an alternator to one of the engines?

I ran some calculations on the heat removal required and I came up with 30K BTU/HR. I unfortunately missed the fact that it was with a delta T of 100*f. With a delta T of 40 degrees we need 84K BTU/HR. I have my eyes on the Thermal Transfer Systems MA-32-4. I want to log the heat rise over time to make sure it is big enough before we do anything.

The 18 HP engine only has a 3 amp unregulated charging circuit and a 5 amp lighting circuit. Fortunately the 22HP engine has a 16 amp regulated charging circuit. That saved us. We have a fuel pump for the bar oil that has an unknown amperage draw. I have a 7.5A fuse on it so I know it is under that. The oil cooler draws 12.5A. So between the fuel pump and the fan we have the 22HP maxed out. I may try to move the fuel pump over to the 18HP lighting circuit and see if that works. That would open up a bit more headroom but the fan on the 90K BTU/HR unit pulls 22A, still a bit too much. Not sure what to do there. 16" 120VAC exhaust fan could be an option but is not desirable due to the tether. Other versions of the 18HP engine have a 16 amp regulated power supply as well so maybe we buy the parts for that.
 
   / Another Firewood Processor #115  
Thanks for your info Ken, I've been wondering how things have been going for you. These things do take a bit to get the bugs worked out. One of our guys suggested that when we get everything worked out we sell it and use everything we've learned to make our 2nd one even better. :eek: I don't know if I could take that...

:laughing: I had the exact same thought!! Man, if I could do it all over again, I could build one kick @$$ processor!

I was planning on adding that upside-down piece of C-channel on top of the beam to strengthen it a bit more. My Troy-Built 33 ton unit has that setup. Dropping the cylinder 3" would put it 1/2" above that channel.

Not sure I fully understand, but if it's currently 8.5" above the beam and you drop it 3", my quick calculations tell me it's going to be about 5.5" above the current beam, and that's too high. If you're raising the beam 5" with the new C-channel, you're going to have all sorts of issues with the cutting head, which can't be raised accordingly. It should make no difference to the overall strength if you add that C-channel to the top or bottom of the beam. Adding to the bottom means you don't have issues with the height of the cutting head but means you need to lower the cylinder more than 3". I really don't think you need to strengthen the beam, just lower the cylinder.

We made those bolts and bottom plates weak on purpose to do just what they did. Obviously the last thing we want to do is bend the beam. We are in the process of making a bunch extra bottom plates. For the time being they will be a wear item that is checked daily That is until we drop the cylinder and get the pusher angle fixed or end up replacing it.

If that does not fix things then we will need to regroup. Maybe making something that wraps under the entire beam will be the solution. I never thought of that. I think we'd need to move one of the beam supports but that is not the end of the world. Is that nylon that you are using to reduce friction? How is that holding up?

If using the bottom of the beam is an option (you can move the beam support), I highly recommend going that route.

I'm not sure if it's nylon or some other plastic. My neighbour used to run a plastic manufacturing company and sold me a large chunk that I cut into a blade for the bottom of my snowblower. The blower is about 1500# and it's used on a paved driveway. I've used it 3 seasons without any noticeable wear. I've only processed 6-8 face cord with my processor, but there is no noticeable wear there either. I don't think it's 100% required, but I had the material and I think, if anything, it will help. I had to cut some of that material away so that it didn't act as a brake against the bottom of my beam and I cut a little too much so I do get a little upward movement on my pusher plate, but everything has held up well so far.

IMG_20150217_220514[1].jpg


I ran some calculations on the heat removal required and I came up with 30K BTU/HR. I unfortunately missed the fact that it was with a delta T of 100*f. With a delta T of 40 degrees we need 84K BTU/HR. I have my eyes on the Thermal Transfer Systems MA-32-4. I want to log the heat rise over time to make sure it is big enough before we do anything.

The 18 HP engine only has a 3 amp unregulated charging circuit and a 5 amp lighting circuit. Fortunately the 22HP engine has a 16 amp regulated charging circuit. That saved us. We have a fuel pump for the bar oil that has an unknown amperage draw. I have a 7.5A fuse on it so I know it is under that. The oil cooler draws 12.5A. So between the fuel pump and the fan we have the 22HP maxed out. I may try to move the fuel pump over to the 18HP lighting circuit and see if that works. That would open up a bit more headroom but the fan on the 90K BTU/HR unit pulls 22A, still a bit too much. Not sure what to do there. 16" 120VAC exhaust fan could be an option but is not desirable due to the tether. Other versions of the 18HP engine have a 16 amp regulated power supply as well so maybe we buy the parts for that.

I'm already on a tether. I originally resisted the idea so I understand your reservations. I have a 120VAC winch to raise and lower my conveyor system along with the electric motor I stole from my cement mixer to turn the belt on the conveyor. I went to buy a 350W 120VAC - 12VDC step down transformer to run the cooling fan but balked when they told me it was $150. I had expected $20-$30 and thought I was being taken. After shopping online, it's not a great price but it's not unreasonable and they have it on the shelf, so I think I'll pick it up tonight. My plan is to hook the hydraulic cooler up tonight or tomorrow and process the rest of my logs this weekend. My processors smokin' :laughing: Literally, but once I finally deal with the heat issue, It's working extremely well. I did do something stupid, got frustrated then did something stupid again. Needless to say, if you get it jammed (by forcing a bunch of rounds through at the same time), using the forks of you tractor to ram the stuck round is not a great idea! I will permanently mount my cooler when I repair the damage, for now, I'll do what it takes to get it done :laughing:
 
   / Another Firewood Processor #116  
Man oh Man, I love reading about all the mistakes. Not wishing anything bad for anyone that made those mistakes, but more looking at it as a lesson I can learn from on my own processor build. I am paying attention and trying to learn what will work and what doesnt work. I am the sort that likes to overbuild everything, I mean, why use 1/2 in steel when 1 in will work just as good, and so what it it makes the blasted thing so heavy I cant move it, I'll just get a bigger truck. Sorry to hear about the mishaps, but glad everyone is sharing their mistakes as well as their successes.
 
   / Another Firewood Processor
  • Thread Starter
#117  
Not a problem, that is what its all about, helping others. Can't be self conscious showing off only your successes and hiding your failures... I mean, opportunities for improvement.

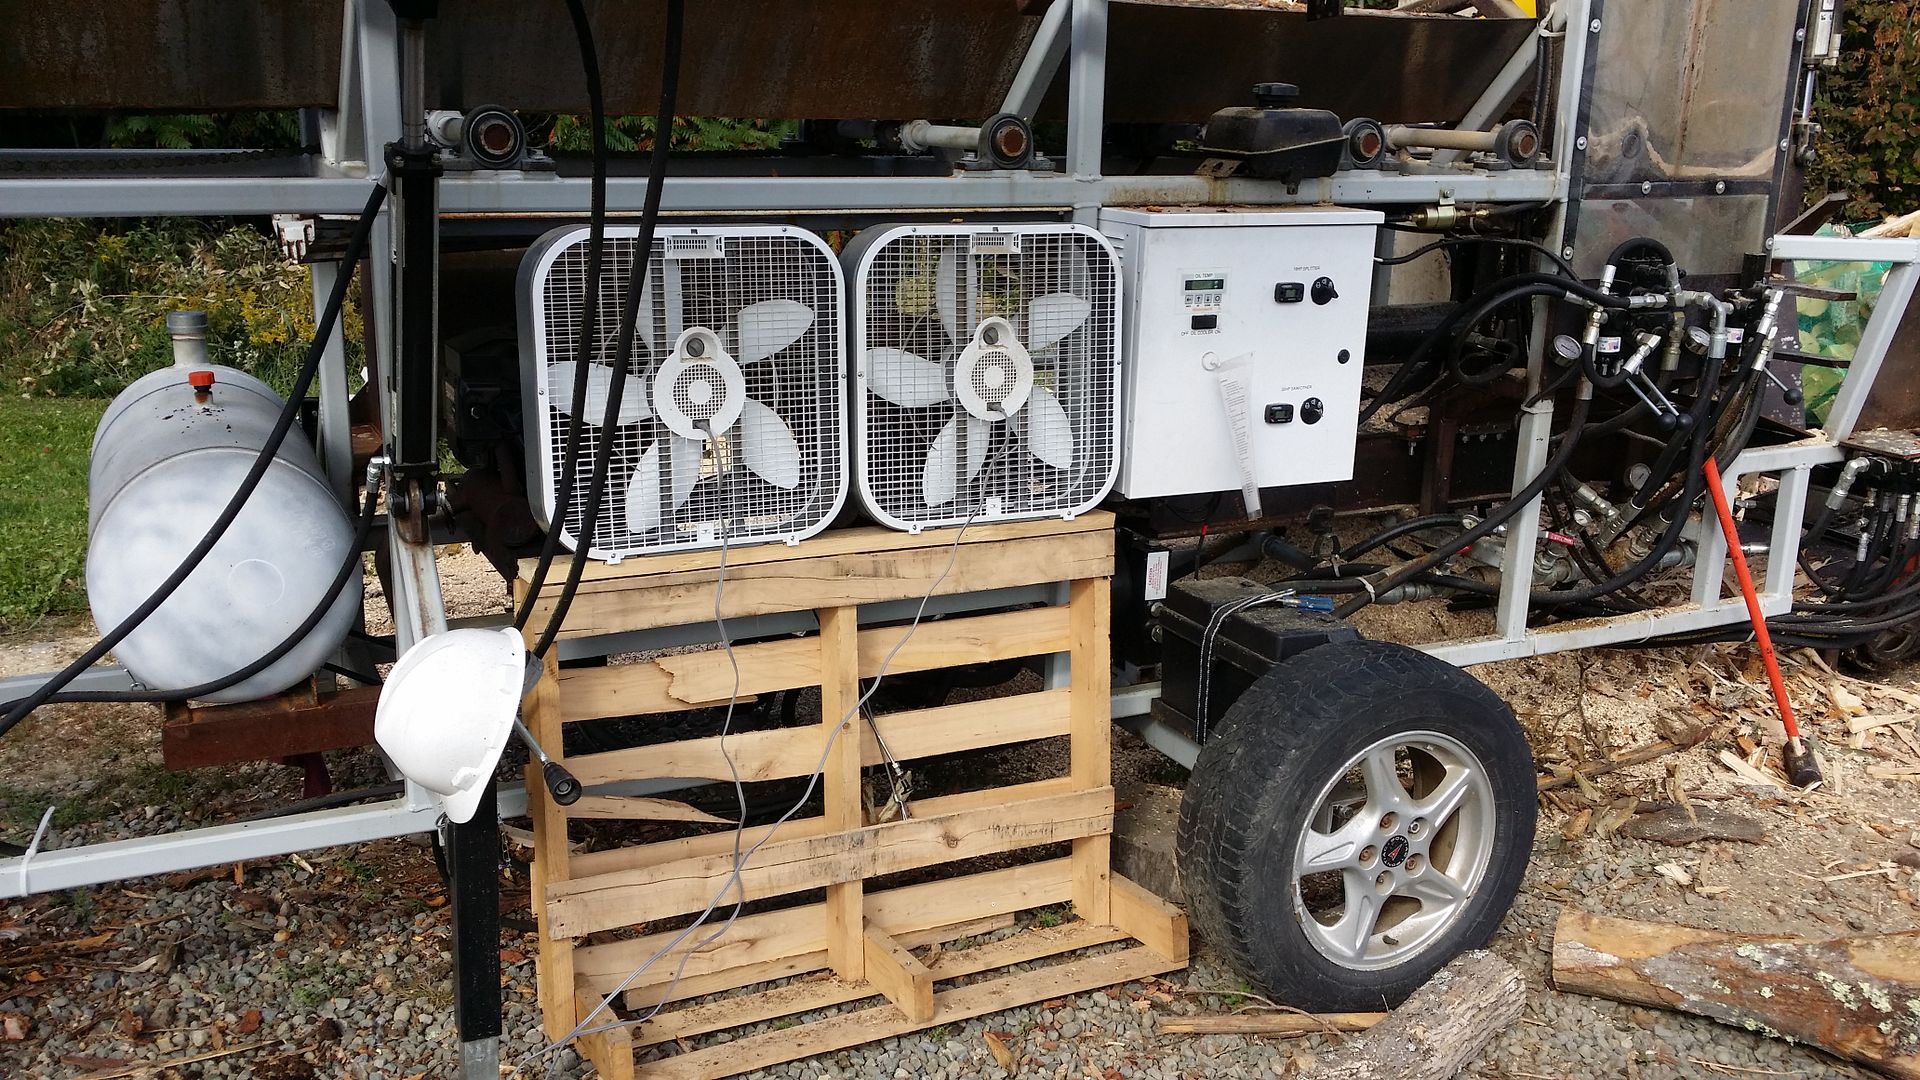
Tonight we fixed the starter on the 18HP, added gussets to the pusher, and made a mount for our 2 box fans to blow cooler air onto the engines. Won't be much of any work going on this holiday weekend. Everyone is out of town or has plans.

Not sure I fully understand, but if it's currently 8.5" above the beam and you drop it 3", my quick calculations tell me it's going to be about 5.5" above the current beam, and that's too high. If you're raising the beam 5" with the new C-channel, you're going to have all sorts of issues with the cutting head, which can't be raised accordingly. It should make no difference to the overall strength if you add that C-channel to the top or bottom of the beam. Adding to the bottom means you don't have issues with the height of the cutting head but means you need to lower the cylinder more than 3". I really don't think you need to strengthen the beam, just lower the cylinder.

We have 1 major issue with moving the ram super low. Our ram presses directly on the back of the pusher plate. So that means when the cylinder is fully retracted any meaningful gussets will hit the cylinder. We don't have the length on our H-beam to set the cylinder back further and run gussets forward from the point the cylinder meets the pusher. I really like that aspect of your pusher. A good design consideration for future builders!!!

Sorry to hear that your attempt of an easy split extraction turned into a repair Ken. We put chain grab hooks on the back of the pusher for extractions but we've not yet made a J-hook that will attach to them. We're just using steel bars and sledge hammers if the need arises. Not fun,or even remotely enjoyable...
 
   / Another Firewood Processor #118  
Not a problem, that is what its all about, helping others. Can't be self conscious showing off only your successes and hiding your failures... I mean, opportunities for improvement.

Tonight we fixed the starter on the 18HP, added gussets to the pusher, and made a mount for our 2 box fans to blow cooler air onto the engines. Won't be much of any work going on this holiday weekend. Everyone is out of town or has plans.


We have 1 major issue with moving the ram super low. Our ram presses directly on the back of the pusher plate. So that means when the cylinder is fully retracted any meaningful gussets will hit the cylinder. We don't have the length on our H-beam to set the cylinder back further and run gussets forward from the point the cylinder meets the pusher. I really like that aspect of your pusher. A good design consideration for future builders!!!

Sorry to hear that your attempt of an easy split extraction turned into a repair Ken. We put chain grab hooks on the back of the pusher for extractions but we've not yet made a J-hook that will attach to them. We're just using steel bars and sledge hammers if the need arises. Not fun,or even remotely enjoyable...

Here's what comes to mind, it would solve 2 of your problems, possibly 3. Does the diameter of the splitter cylinder fit in the width of the I beam, it looks like it does in your pictures. If so, I would weld 1/2 plates under the base of your pusher plate to box the I beam in. This will allow you to use the bottom of the beam as a guide and prevent the issue you're having with the pusher plate rising. I would make those side pieces much longer than the base of the pusher plate so that I could run a brace from the pusher plate to the side pieces. When fully retracted, the cylinder will fit between those two braces. If you make all this out of 1/2" plate, it will be plenty strong enough to resit all the forces you're putting on it. I'd also guess it would move the forces enough and be strong enough that you wouldn't need to lower the cylinder.

haha, I obviously didn't look at you're sketch up drawing! I understand the C channel now, I though you were putting it the full length of the I beam, which would obviously be an issue!
 
   / Another Firewood Processor #119  
Thanks for your info Ken, I've been wondering how things have been going for you. These things do take a bit to get the bugs worked out. One of our guys suggested that when we get everything worked out we sell it and use everything we've learned to make our 2nd one even better. :eek: I don't know if I could take that...


I was planning on adding that upside-down piece of C-channel on top of the beam to strengthen it a bit more. My Troy-Built 33 ton unit has that setup. Dropping the cylinder 3" would put it 1/2" above that channel.


We made those bolts and bottom plates weak on purpose to do just what they did. Obviously the last thing we want to do is bend the beam. We are in the process of making a bunch extra bottom plates. For the time being they will be a wear item that is checked daily That is until we drop the cylinder and get the pusher angle fixed or end up replacing it.

If that does not fix things then we will need to regroup. Maybe making something that wraps under the entire beam will be the solution. I never thought of that. I think we'd need to move one of the beam supports but that is not the end of the world. Is that nylon that you are using to reduce friction? How is that holding up?


I ran some calculations on the heat removal required and I came up with 30K BTU/HR. I unfortunately missed the fact that it was with a delta T of 100*f. With a delta T of 40 degrees we need 84K BTU/HR. I have my eyes on the Thermal Transfer Systems MA-32-4. I want to log the heat rise over time to make sure it is big enough before we do anything.

The 18 HP engine only has a 3 amp unregulated charging circuit and a 5 amp lighting circuit. Fortunately the 22HP engine has a 16 amp regulated charging circuit. That saved us. We have a fuel pump for the bar oil that has an unknown amperage draw. I have a 7.5A fuse on it so I know it is under that. The oil cooler draws 12.5A. So between the fuel pump and the fan we have the 22HP maxed out. I may try to move the fuel pump over to the 18HP lighting circuit and see if that works. That would open up a bit more headroom but the fan on the 90K BTU/HR unit pulls 22A, still a bit too much. Not sure what to do there. 16" 120VAC exhaust fan could be an option but is not desirable due to the tether. Other versions of the 18HP engine have a 16 amp regulated power supply as well so maybe we buy the parts for that.

I'm not sure how mush power they consume but what about a automotive electric cooling fan they use to cool the radiator on most cars now. Most have two fan motors, some three and they move a lot of air. You could hook them up in series to come on, one at a time as the oil heats up by some sort of thermostat control. They would run right off your engine battery and as long as the charging system on your two engines is up to snuff no need for 120V AC or transformers. They already have their own box they fit in all you would have to do is mount it to the front of the cooler.
 
   / Another Firewood Processor
  • Thread Starter
#120  
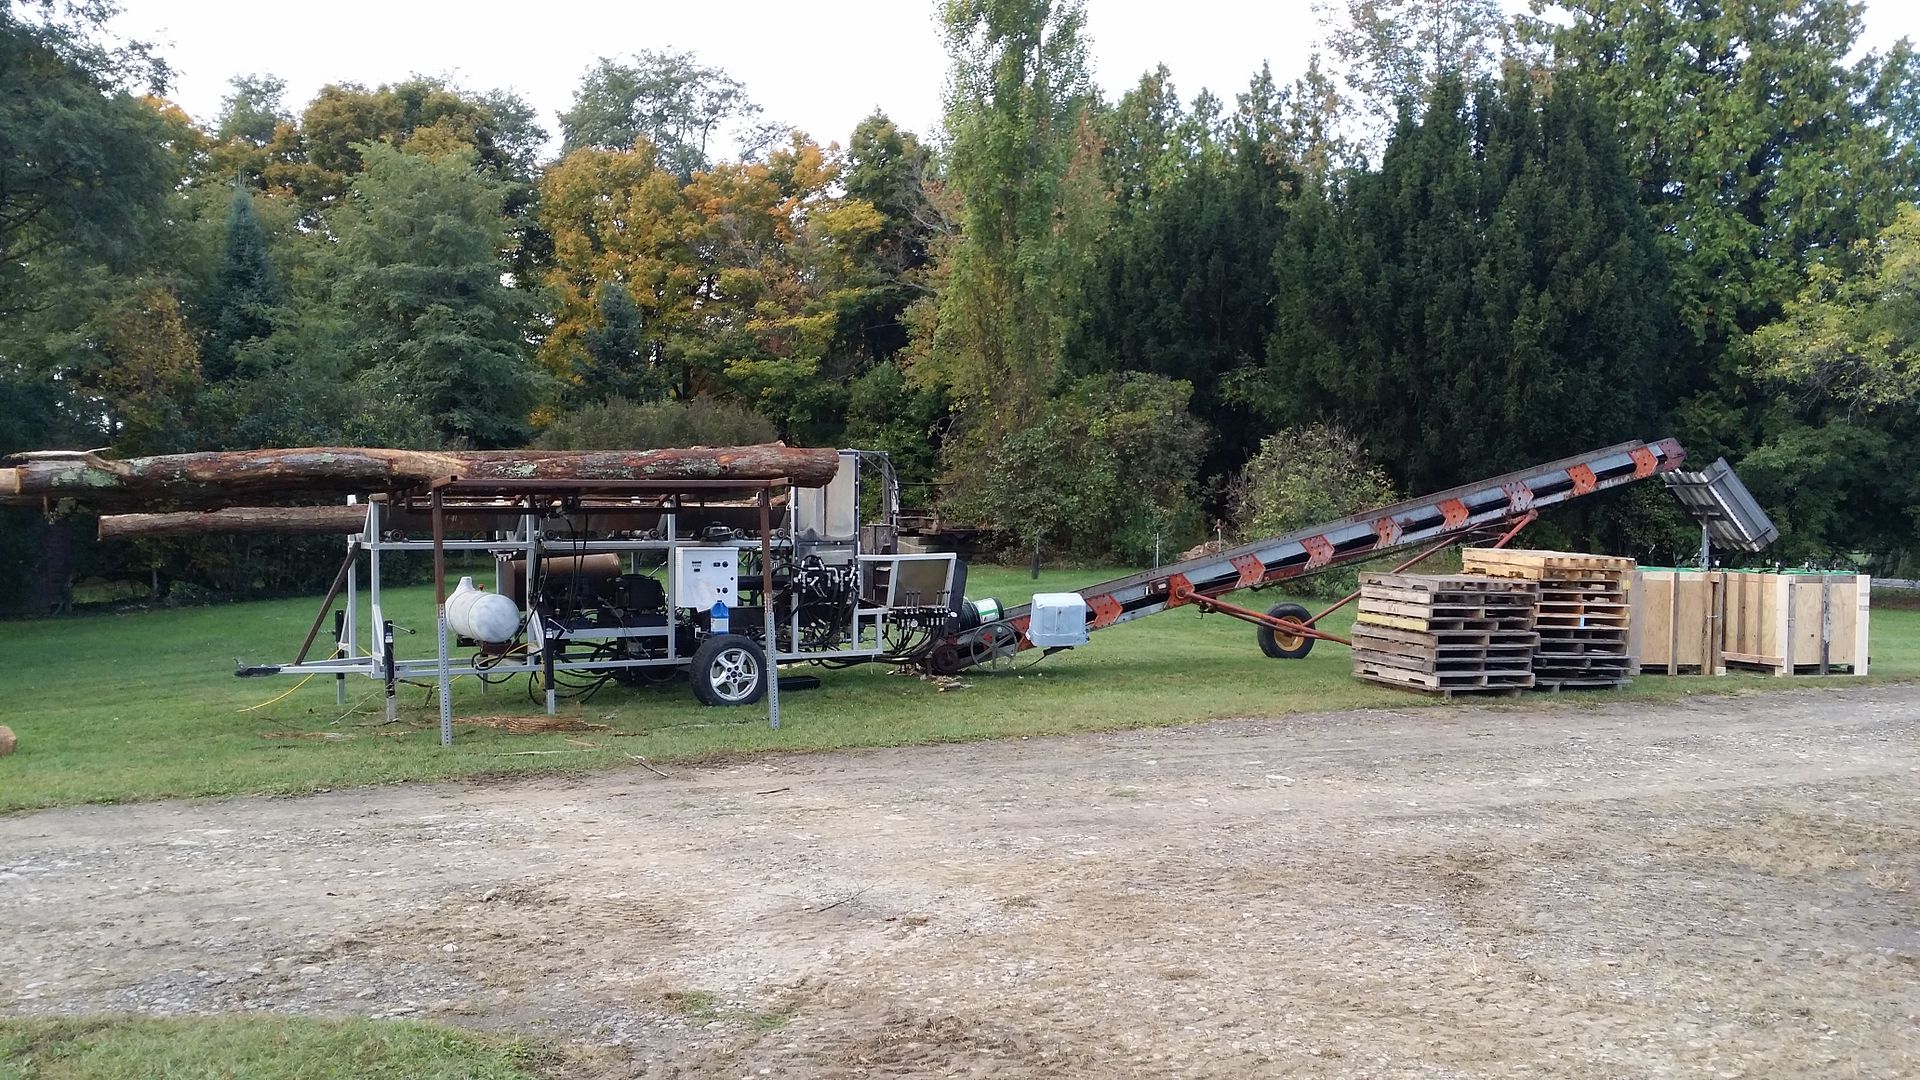
Long time since I've updated things. So far we've processed 24 full cord.


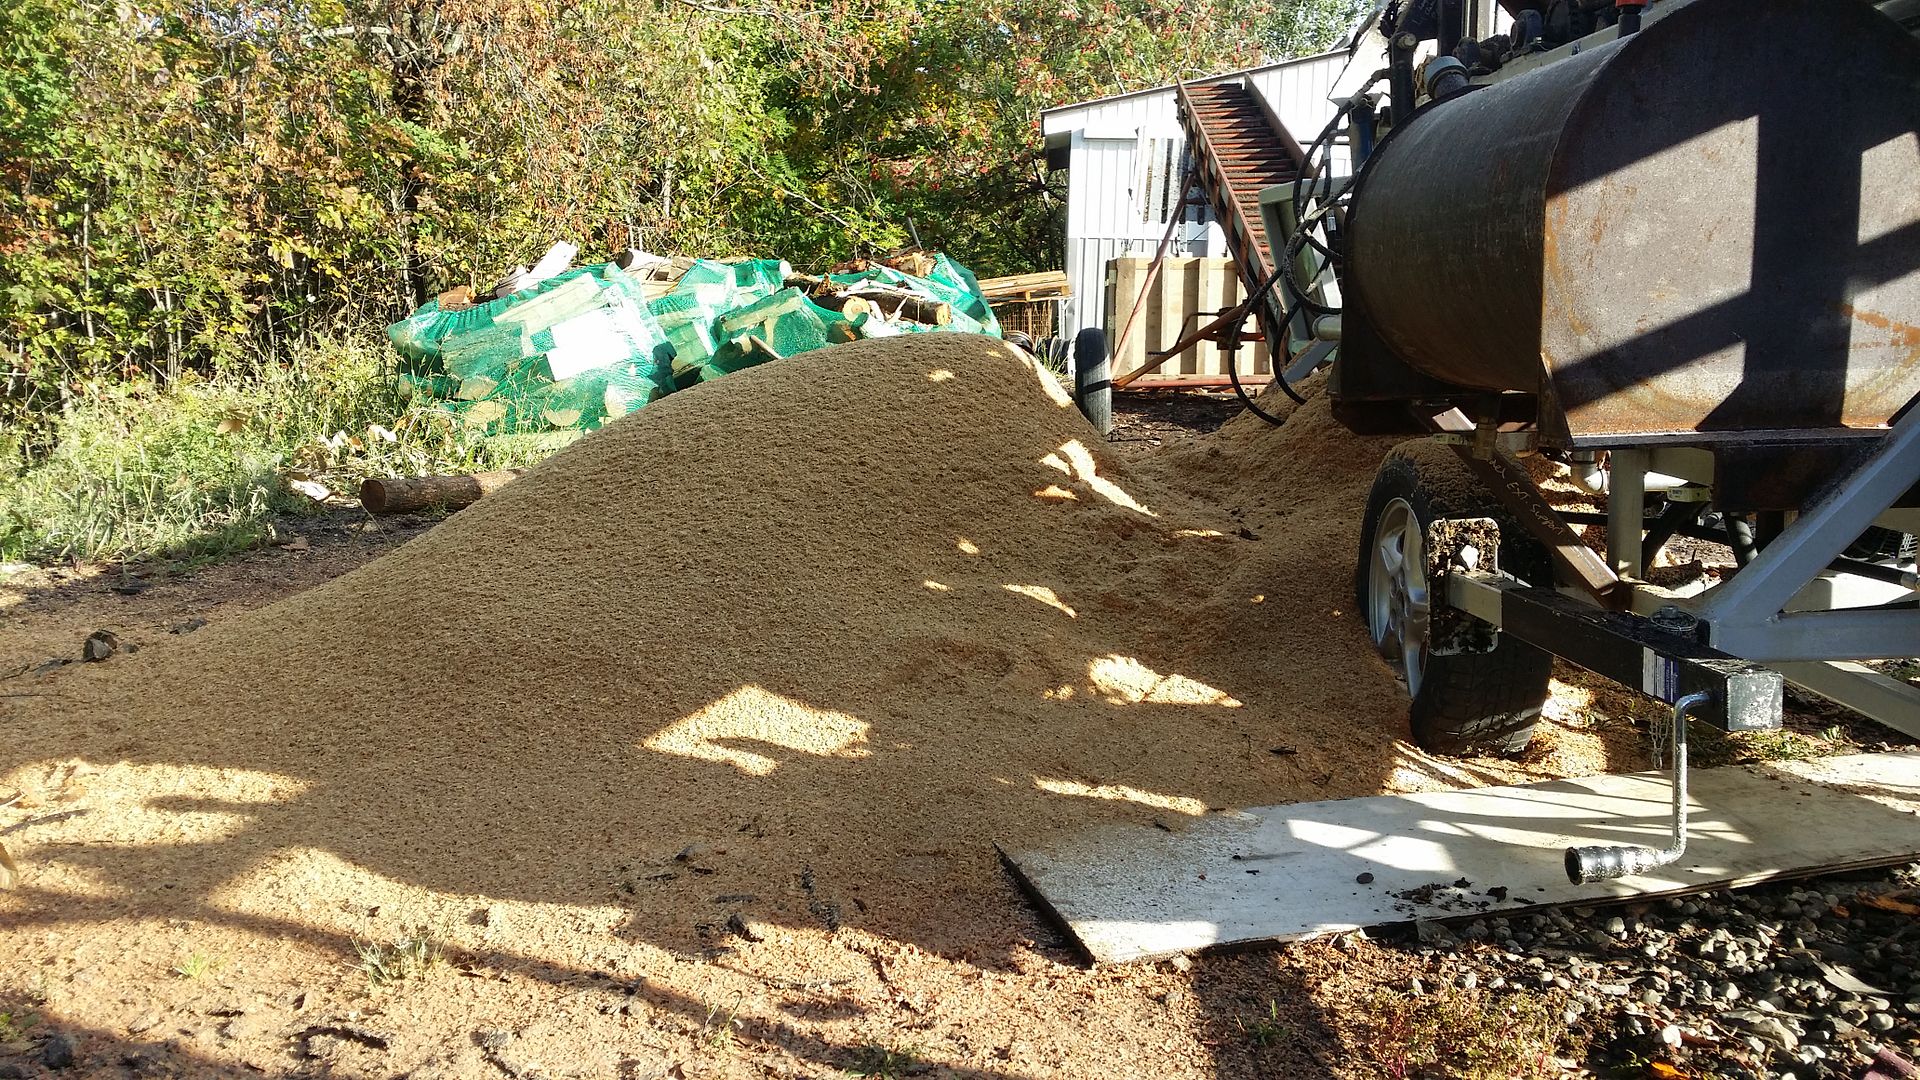
Here is the pile of sawdust after 18 cord. The low spot between the pile and the processor was the walking path.


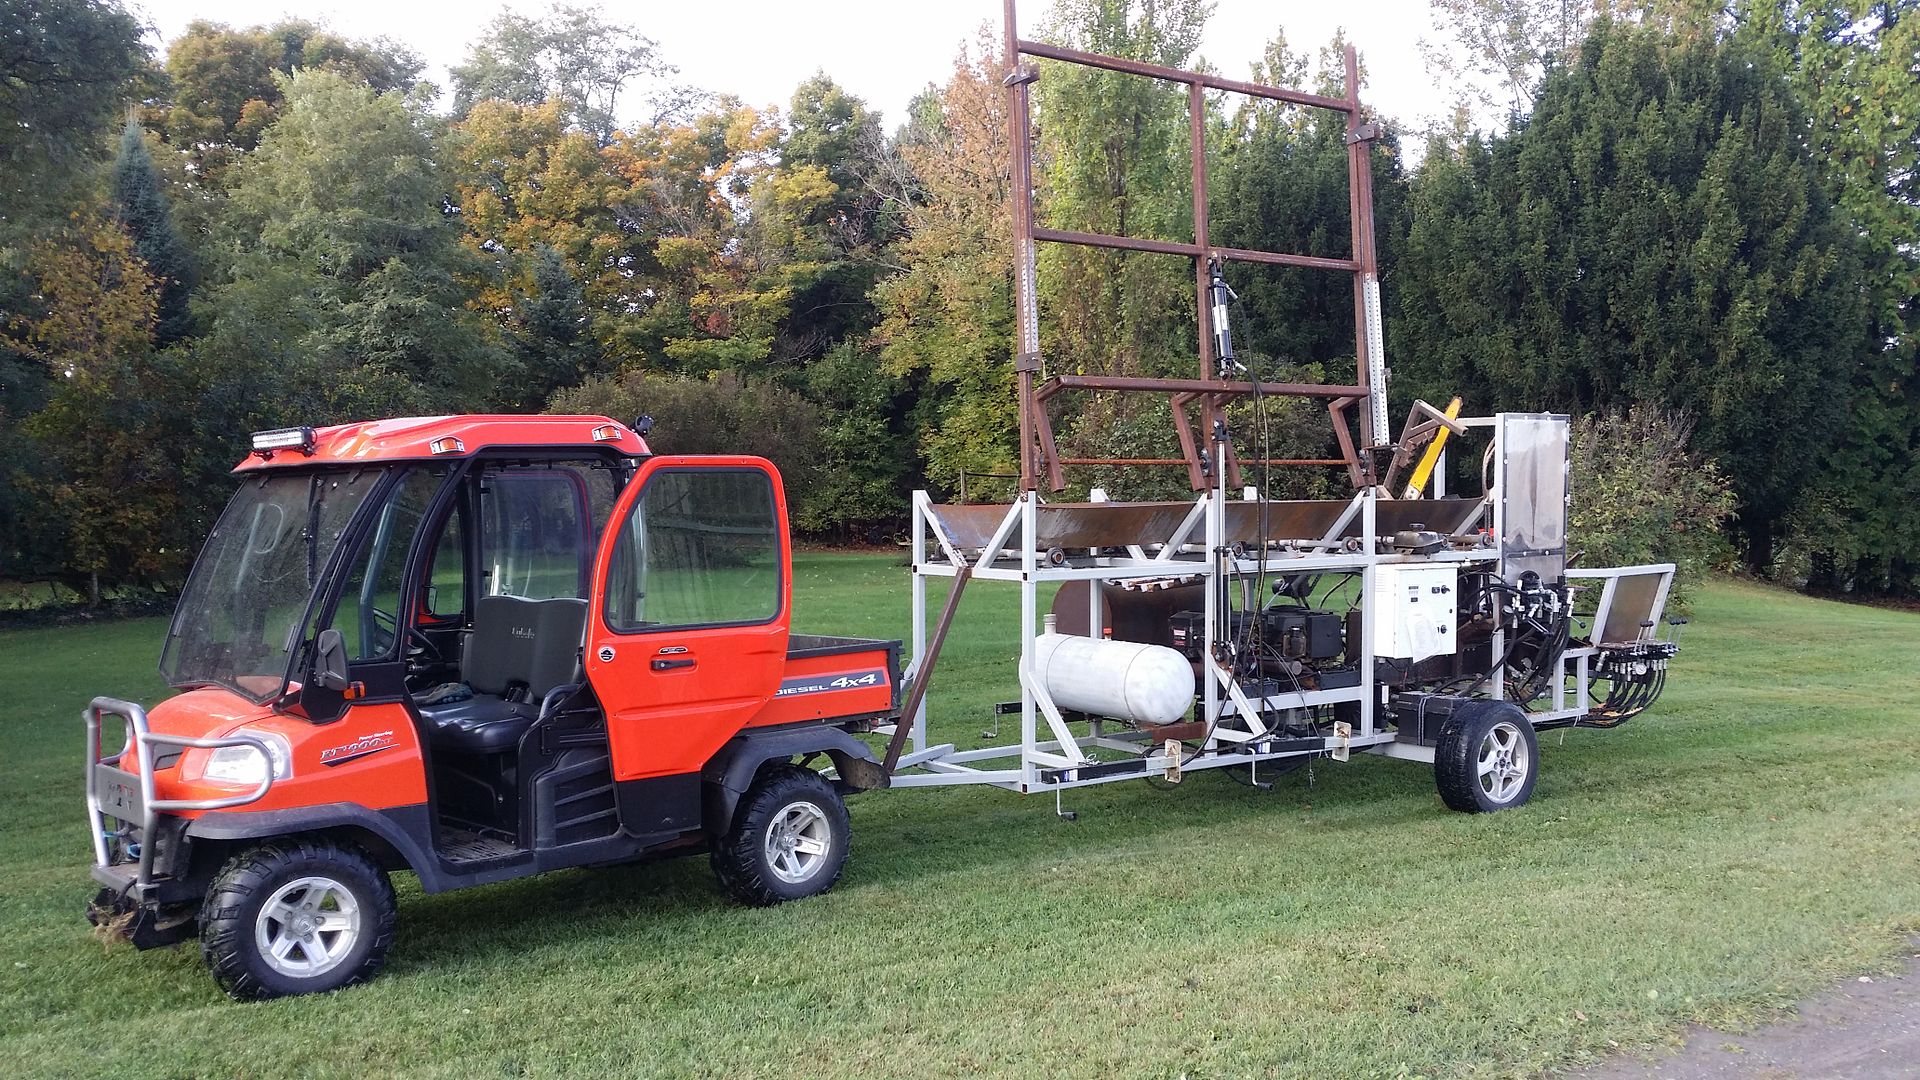
I finally got it over to my place this Sunday. RTV pulled it with no problems but I will say that you knew there was some weight back there.


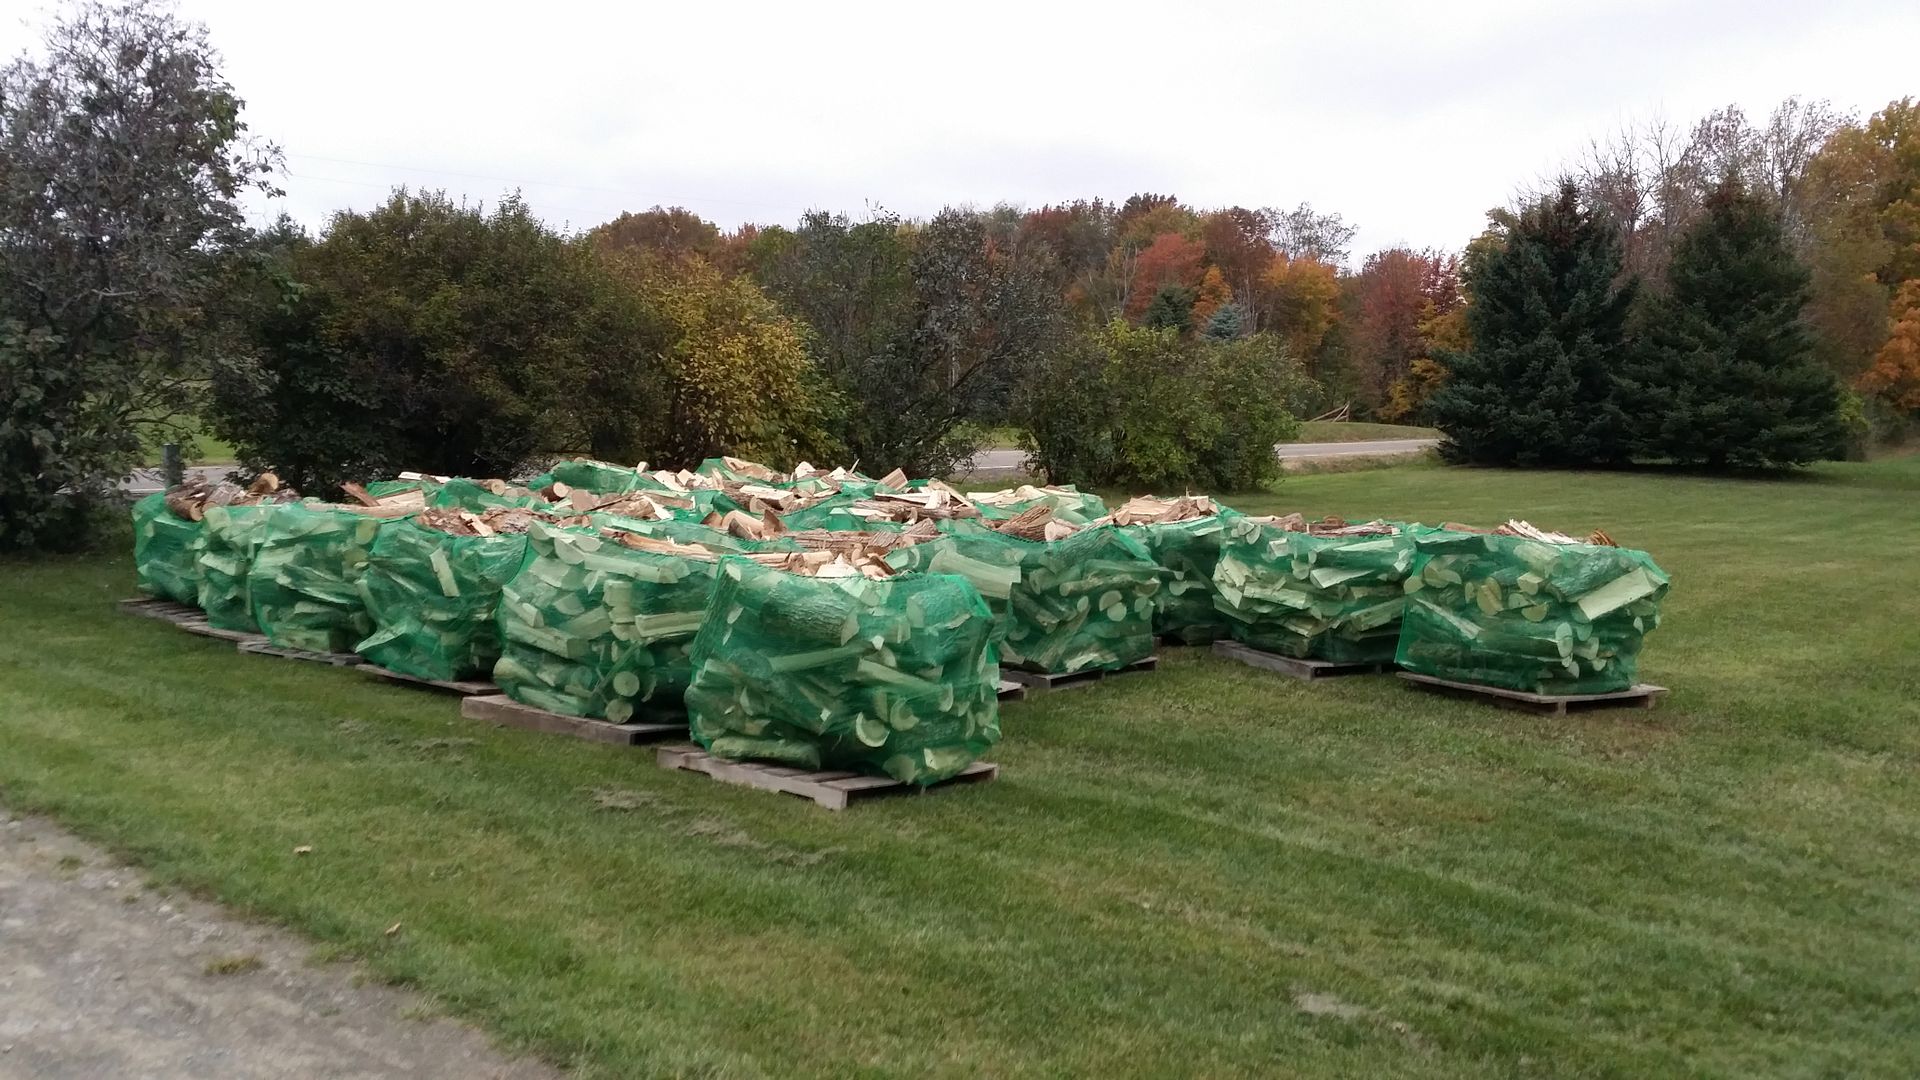
I've gotten 24 bags done since Sunday.

We've broken down a few times but haven't broken the same thing twice.

Had a bearing ride out of its bore on the conveyor. Caused it to eat part of itself. Fixed that up and we now watch that bearing like a hawk.


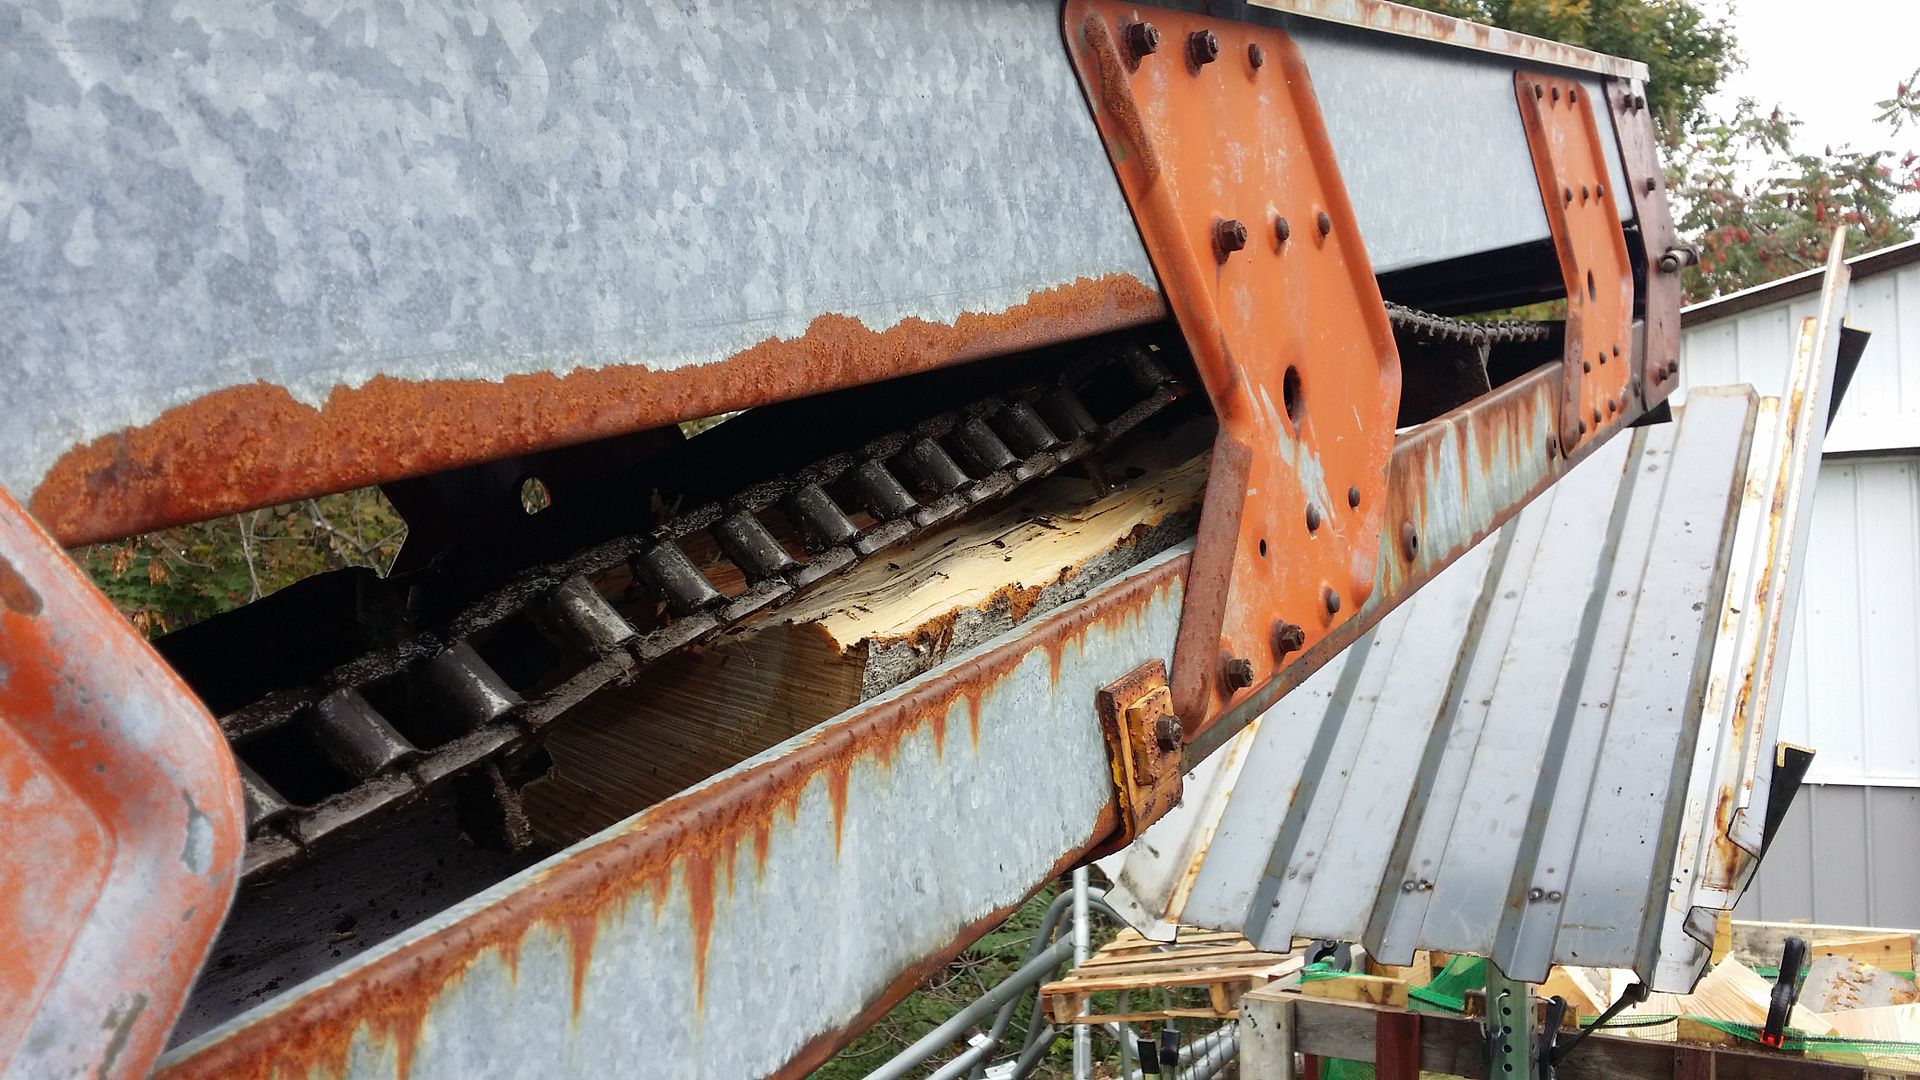
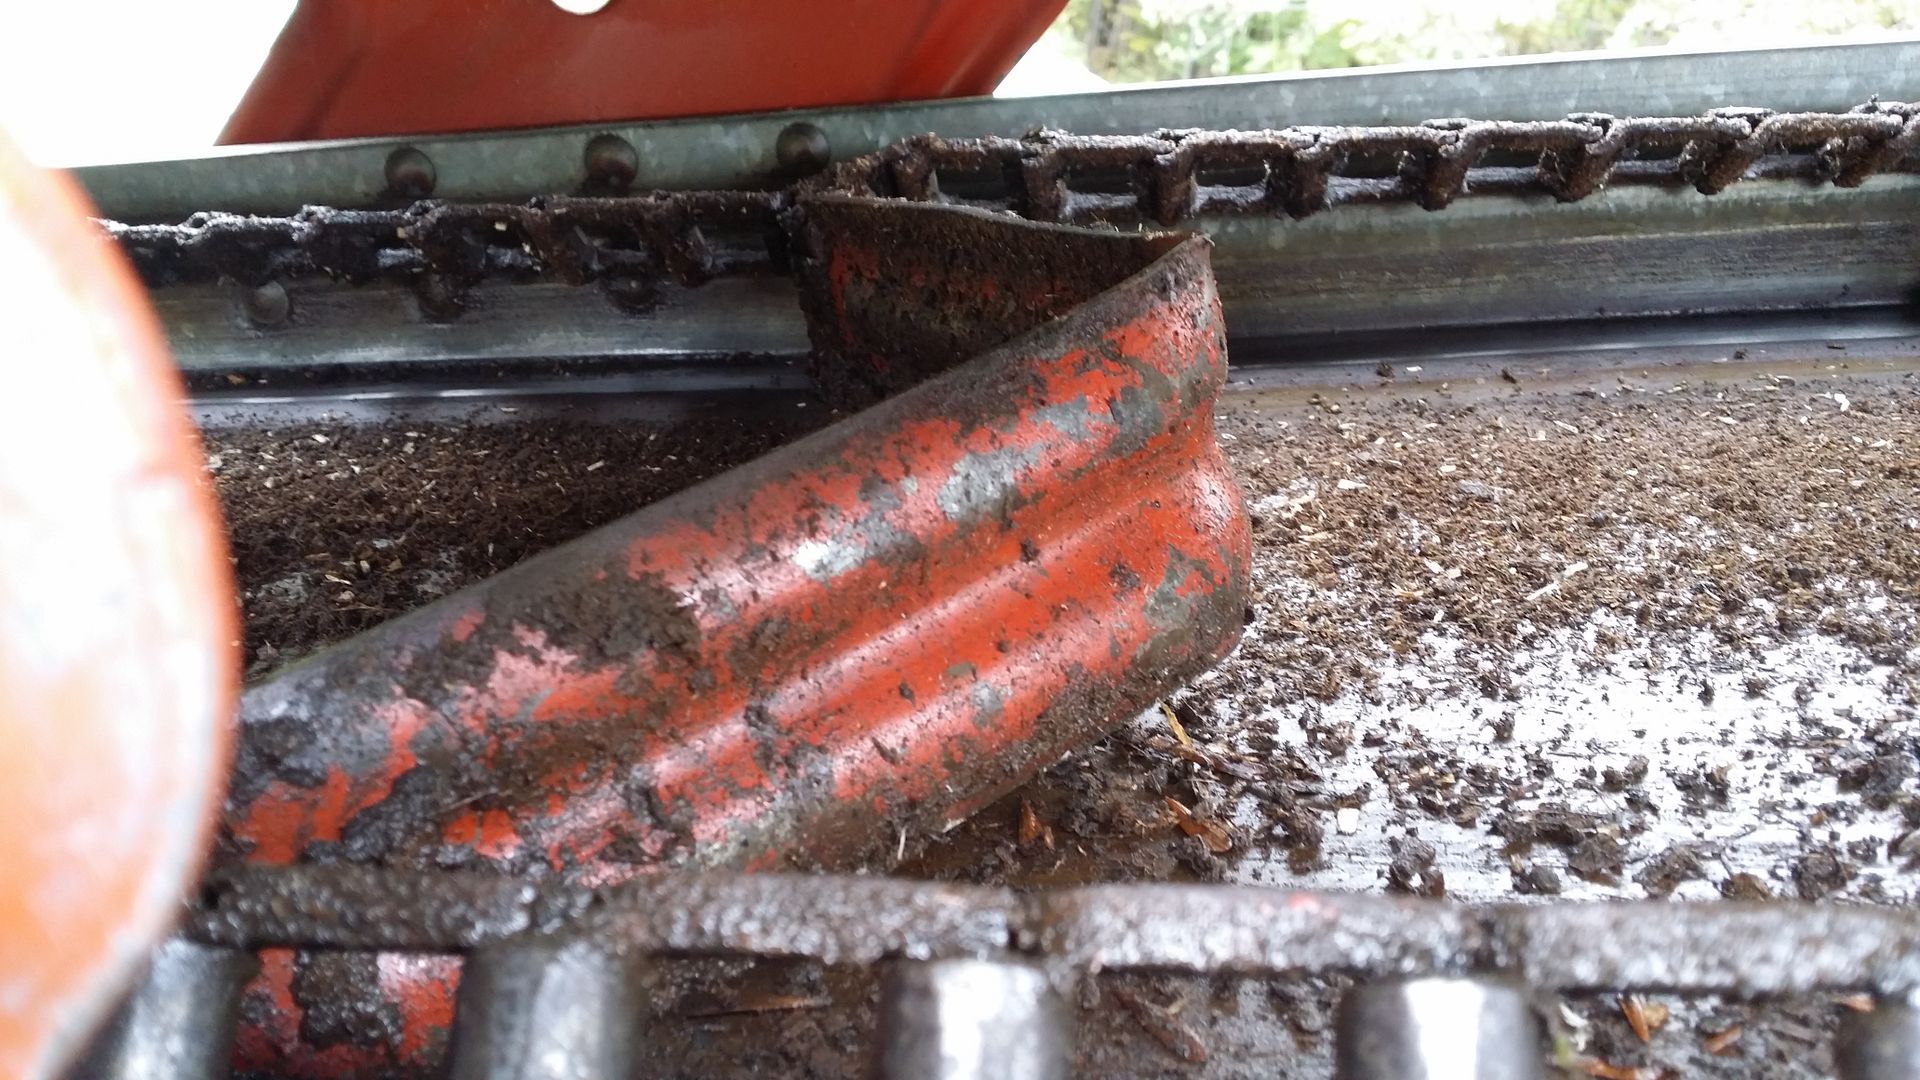
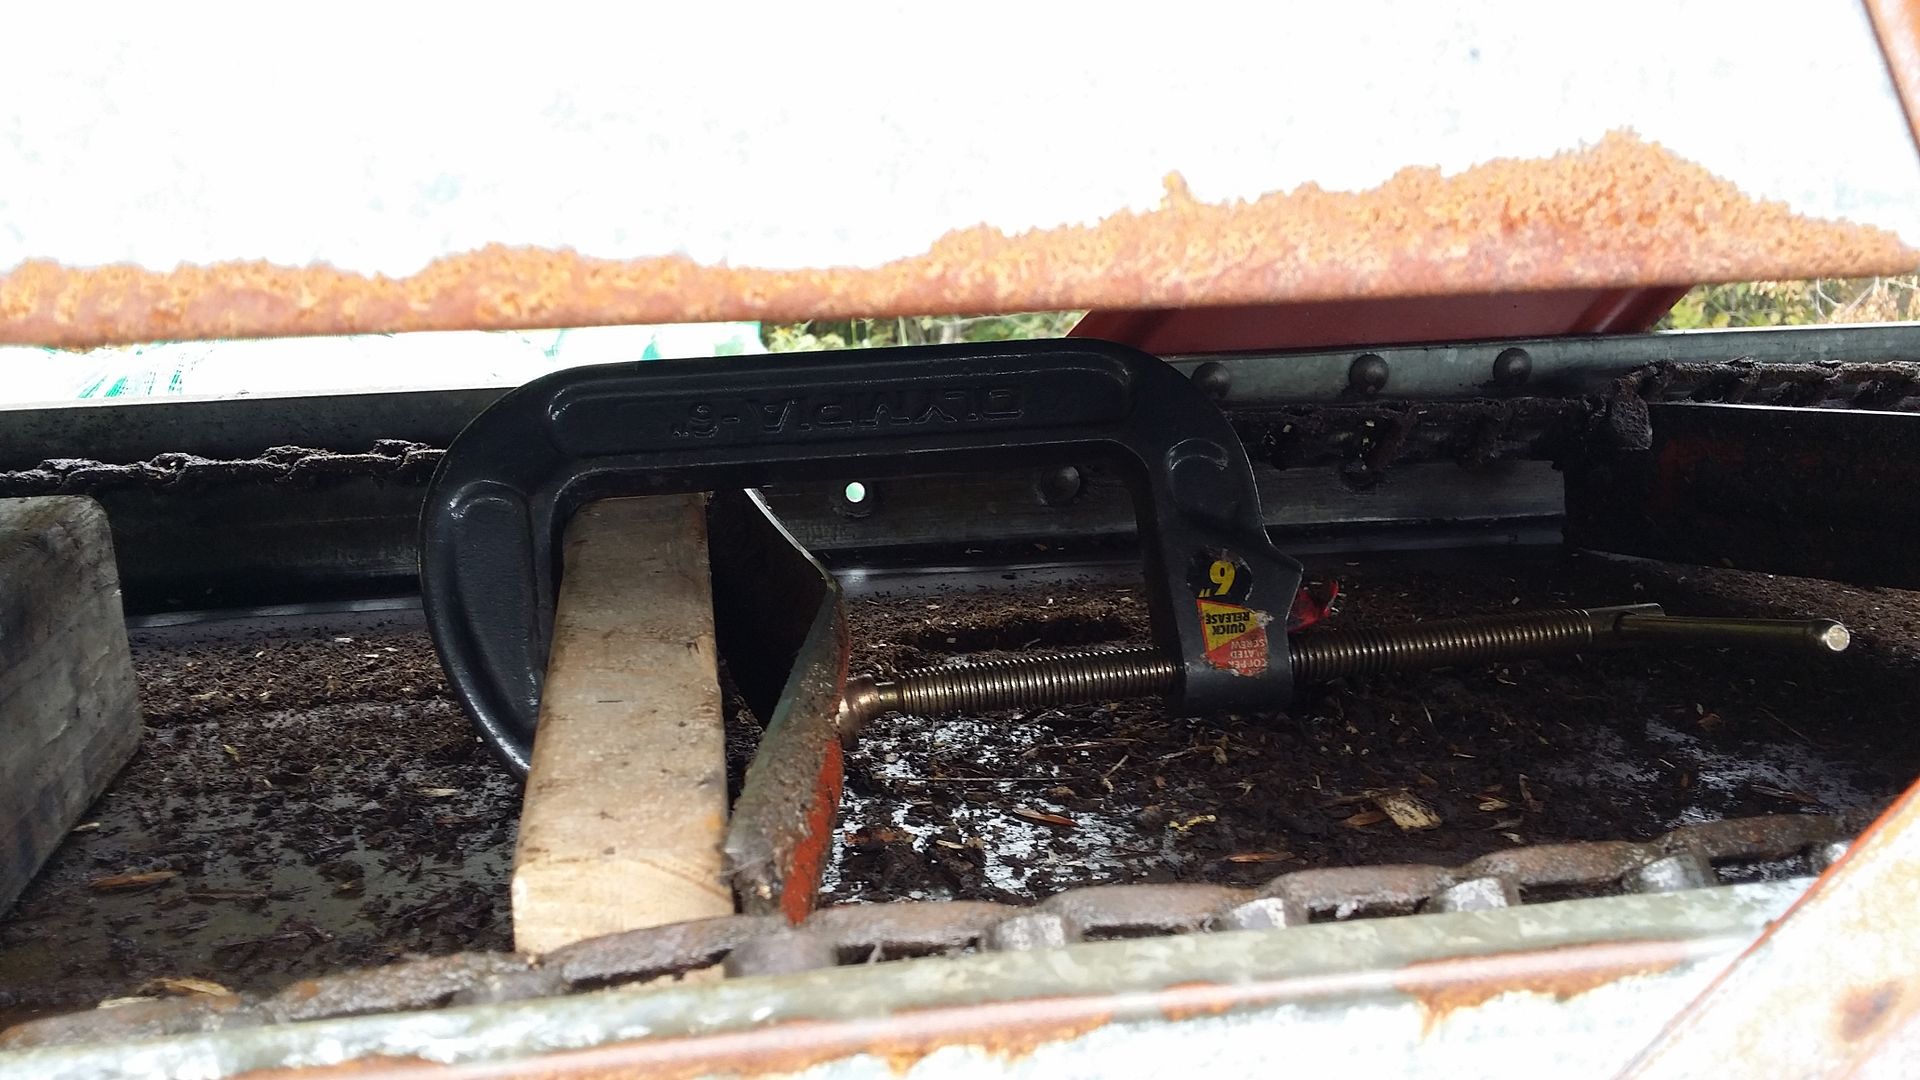
Had the conveyor eat a piece of wood that was supposed to be ejected down the tipper chute. It went for a ride part way back down the underside. It bent up three paddles real bad. Had to straighten them on the underside to even roll it over. Fun


The box fans have solved the motor overheating issue, haven't had any issues since. We may try to do something different to avoid having the 120V tether. Maybe heat shields and ducting, maybe an automotive alternator driven off one of the engines. Then we'd have the available amperage to use 12v radiator fans.


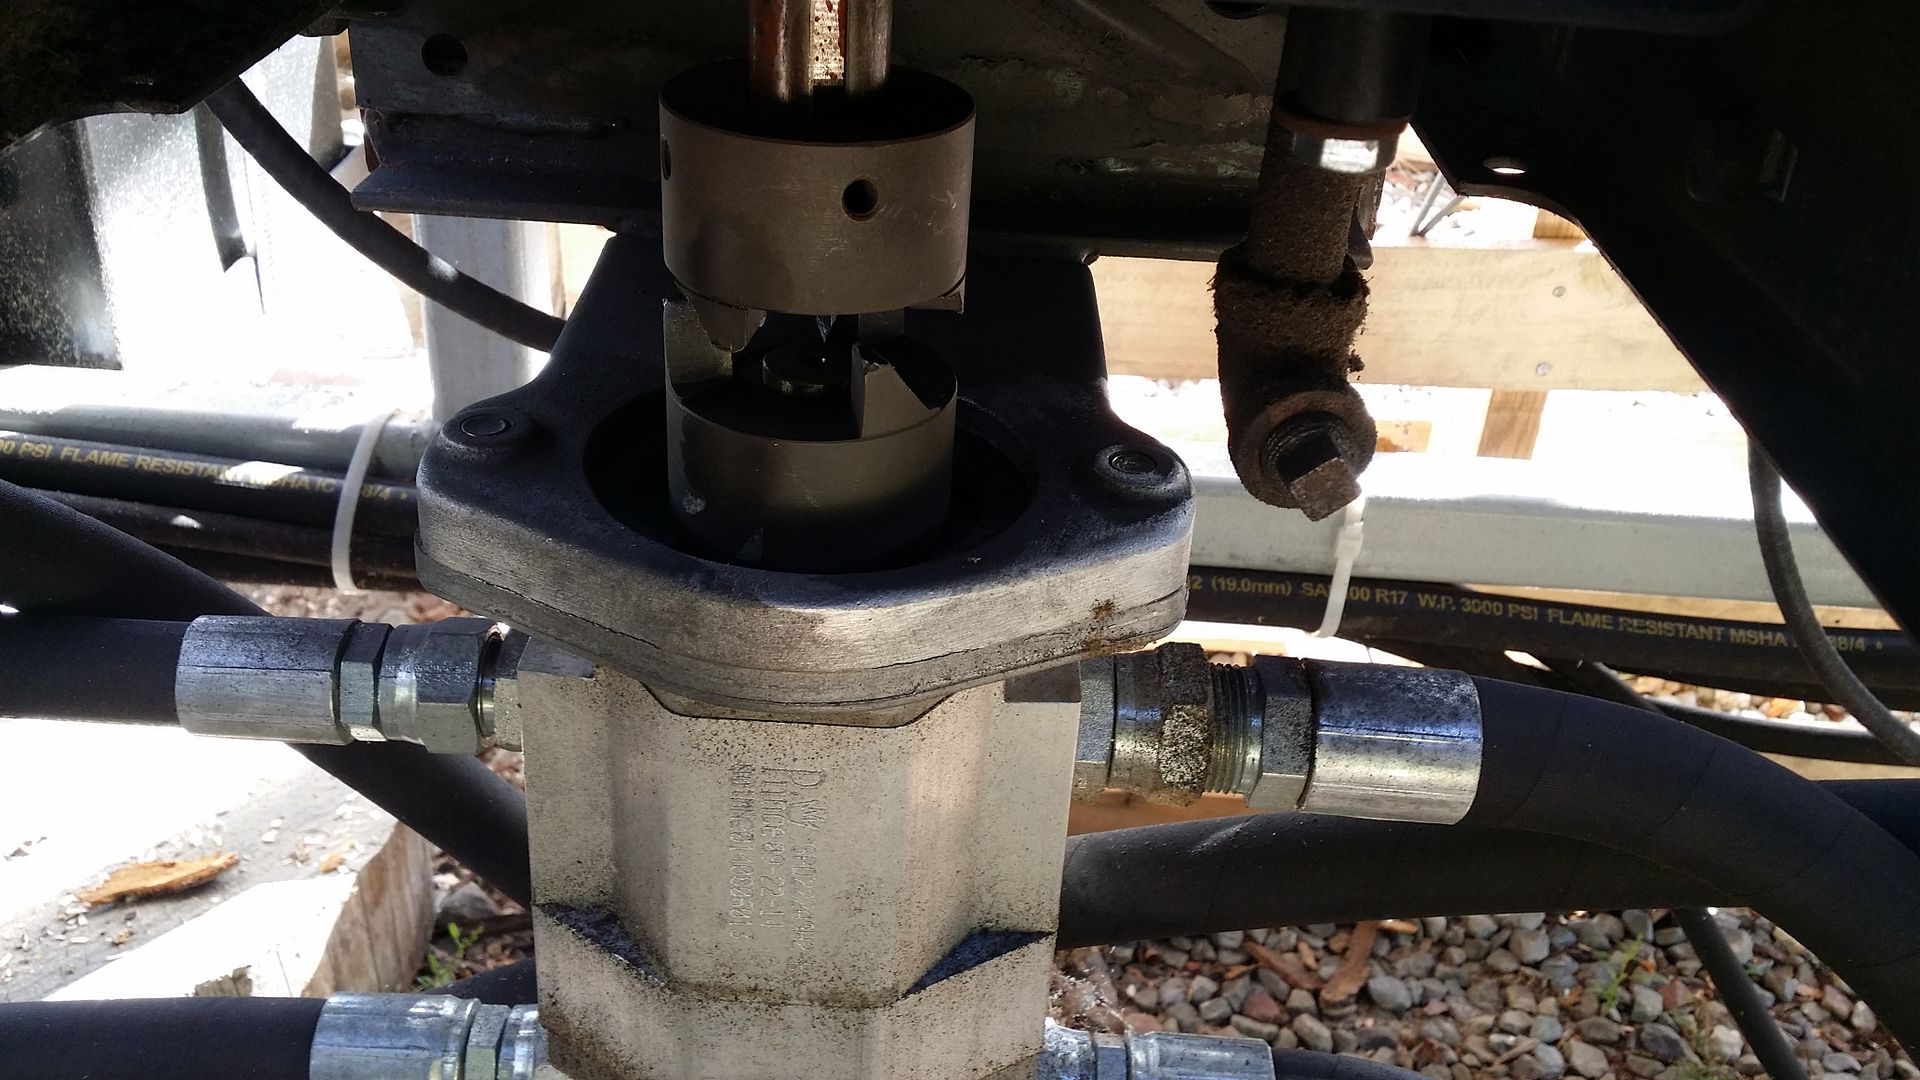
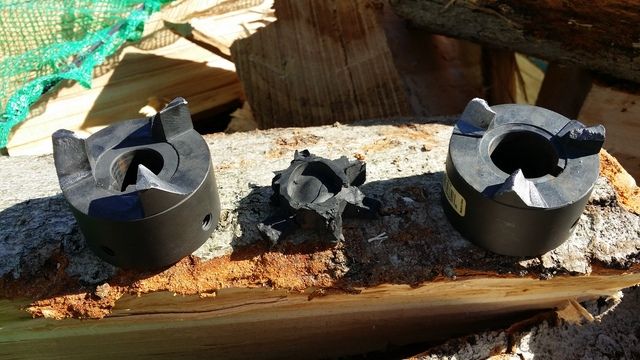
FYI, A 22hp engine is too much for L-100 jaw couplings with a buna insert. It's actually borderline for the L-100 jaws themselves. We decided to try another set of L-100s anyway, this time with a urethane insert. That way we have the same size for both engines and hopefully continue to have universal parts. If we clean off the jaws again I guess we will have to step up to L-110 series couplings.


While we were down for the weekend with the failed motor coupling we decided to get the tipper built. We still need to add a gas spring to make switching directions easier but for now bungee cords will work.


General observations of the machine so far:


Firewood bags are great but my cobbled together bag holder was not. The biggest issue is that the slats could not handle the impact of wood falling from 10 feet in the air. We also found that we needed to upgrade to plywood walls. Especially with the tipper chute some chunks would fly down and tear holes in the bags when they hit between the slats. I also rebuilt the bag holders so that the sides are 6 inches off the ground. This allows us to use wider pallets (used to be 45 x 48 max).


We've had two issues using the plastic spring clamps to hold the bags in the holder. One, we had a bunch of them break when hit by firewood, and two if they don't break they often disappear down into the bags never to be seen from until they are unloaded. We are in the process of upgrading to metal clamps and now we're tethering the clamps to the box so we don't lose them.

When running with two people we ran 7 bags in two hours. So that is a little over a full cord an hour. The load of logs we were running was definitely on the small side so that number could go up with some larger diameter logs. Right now I'd say that something in the 14 to 16 inch range is ideal. That really keeps the person unloading bags and loading logs running!

As mentioned, the oil cooler will need to be upgraded from 30k to an 85k or 90k BTU model. We still have issues maxing out the oil temp on 60 degree days. I think this issue will become more prevalent now that we have the tipper and two bags going. We have electrical capacity issues so adding an automotive alternator as mentioned before would help us out with the larger fan.

We seem to have issues with the bar oiler. The fuel pump we're using has issues keeping prime with the really thick bar oil from TSC. It did fine in the summer. Might be that the oil is thicker than what the pump can handle now that it is cooler. Saturday I used a turkey baster to remove most of the thick oil and then filled the tank with Sthil winter bar oil. Huge difference as far as consistency goes. It ran well on Sunday for me but I'm not sure if that is due to the lighter oil or the fact that it was 65 degrees. Time will tell.


We beefed up the bottom plates under the pusher plate to 3/8" steel. They bent slightly right after the install but have remained on there for at least 18 full cord. The old ones made of 1/4" steel would have to be replaced pretty much daily. We are pretty darned happy with that!
Note: We have NOT moved the splitter ram down as we were talking before.

We are planning on adding a live deck this winter. As expected, the gravity log feed does not really work well. We'll likely use the circuit for the log stop to run the hydraulic motor.

Some of the logs we get in our loads are 20 feet long and our machine was only designed to handle 16 footers. The longer ones will usually balance okay on the rack if the butt end is towards the business end of the machine. However, when we drop them down into the infeed trough some of them will tip down out the back end to the ground. We're thinking about adding a 3 or 4 foot extension on the machine to better handle the longer logs.

Logs drop haphazardly into the splitter trough. Some logs drop right in place, hammer the splitter levers, and go. Others you need to wrestle with each piece as they drop. Not sure what to do there yet but we will probably try to do something.

That's pretty much it. Working pretty darned well as far as we're concerned.
 

Tractor & Equipment Auctions

2015 Ford F-250 4x4 Crew Cab Pickup Truck (A46684)
2015 Ford F-250...
2012 Jaguar XJ Sedan (A46684)
2012 Jaguar XJ...
2009 Cadillac Escalade ESV (A47307)
2009 Cadillac...
2014 UTILITY 53X102 DRY VAN TRAILER (A45678)
2014 UTILITY...
2025 Swict 66in Bucket Skid Steer Attachment (A46683)
2025 Swict 66in...
2008 Ford F-250 XL (A47307)
2008 Ford F-250 XL...
 
Top