Another Restoration Project

   / Another Restoration Project
  • Thread Starter
#21  
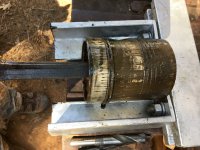
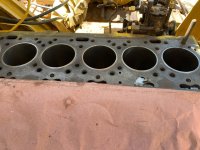
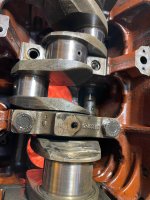
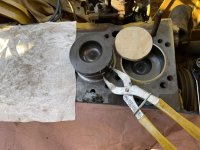
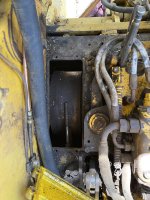
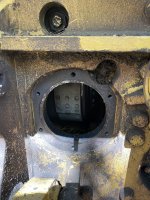
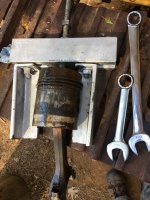
Here is the latest update. I finally got them all out. No.1 was the most challenging. It moved so slowly I had to measure progress with the dial caliper. Here is that movement log. Started with a measurement from the piston to the top of the sleeve. I would tighten the puller to maximum tension I felt safe without pulling out the threads I put in the piston, then go under with a 3/4" diameter punch and a 20 ounce hammer using 10 blows, then taking the measurement, then I removed the bearing insert so I could drive the piston down further to clear more rust. Measurements: 4.011- 3.965- 3.925- 3.820- 3.786- 3.745- 3.650- 3.410 then it kept moving just with the puller. The other ones all came out just with the puller but would not allow me to turn the crank until numbers 1,2,5,6 were out, then I moved it enough to allow me to pull no.3, with just no.4 remaining I could move the crank only slightly, so I put the puller on it and finally they are out.
I measured the crank and it is perfect size, round and nicely polished. The sleeves are next.
 

Attachments

  • IMG-2967.JPG
    IMG-2967.JPG
    3 MB · Views: 192
  • IMG-2966.JPG
    IMG-2966.JPG
    2.8 MB · Views: 199
   / Another Restoration Project
  • Thread Starter
#23  
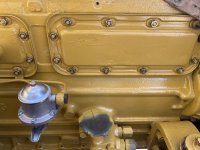
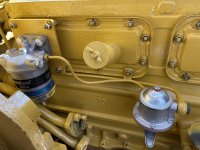
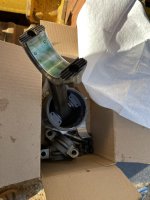
Slow but sure, things are being done almost daily. Sanding, sand blasting priming and component painting. Replacing fuel linkage ball joints with Heim joints. Chasing all threads. Removing the sleeves, scraping gaskets, cleaning the connecting rods and transferring them to the new pistons. I repaired and put new bushings in the throttle control clutch assembly. New hardware was used in most places. I also replaced the water separator with a separator filter combo. Many more small but time consuming tasks.
I am picking up some dry ice in the morning for installing the sleeves.
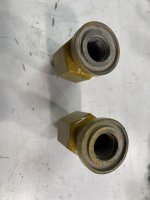
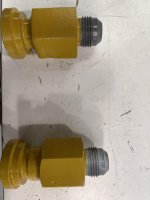
Also I made a couple fittings to convert from metric O-ring type to JIC and purchased some other fittings to adapt from metric internal seat to JIC also. The JIC fitting conversion makes it easier to get or make hoses from my own stock of hose and fittings.
 

Attachments

  • assembly front.jpg
    assembly front.jpg
    2.7 MB · Views: 150
  • assembly.jpg
    assembly.jpg
    2.6 MB · Views: 144
  • o-ring fitting.jpg
    o-ring fitting.jpg
    1.4 MB · Views: 143
  • fitting.jpg
    fitting.jpg
    1.7 MB · Views: 144
   / Another Restoration Project #24  
I sometimes think that I would enjoy doing something like this, then I read what you are doing, and quickly realize that it's a lot more complex and time consuming then I imagine. It's more fun watching you do this then trying to do it myself!!!!
 
   / Another Restoration Project
  • Thread Starter
#25  
Just like TV they make it look easy.
Today was miscellaneous, replace main bearings even though they look and measure perfect. I used my dial bore gauge and the cylinder sleeves all checked well within specifications. Those main bearing cap bolts call for 180 ft lbs of torque and laying on my back between two tracks is a challenge at my age. Maybe I can get my wife to help me put the pistons in tomorrow, if not I will just have do a little more crawling in and out.
 

Attachments

  • image1.jpeg
    image1.jpeg
    2.1 MB · Views: 135
  • image0.jpeg
    image0.jpeg
    2 MB · Views: 135
   / Another Restoration Project
  • Thread Starter
#26  
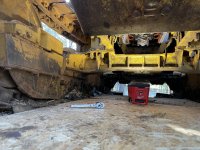
I got all the pistons in and the pan back on by myself. The weight of the rod and piston assembly allowed me to just push them down part way and from below pull them down the rest of the way. The rod bolts have to be installed after the rod is seated on the crank journal. I did 2 at a time. I spot glued the pan gasket to the block and put in 2 guide studs, lifted the 80 lb pan onto a floor jack, the rest is obvious. All very simple stuff. There are three bolts in the back of the pan that thread into the bell housing that are quite hateful. They can only be turned with an open end wrench and and one partial turn at a time. They are blocked by a large cross support that holds the front of the machine. All the bolts are fine thread on this engine. Pretty typical British like the Jaguar engines I have rebuilt.
 

Attachments

  • rod.jpg
    rod.jpg
    1.8 MB · Views: 152
  • pistons.jpg
    pistons.jpg
    2.5 MB · Views: 150
  • under view.jpg
    under view.jpg
    3.1 MB · Views: 153
   / Another Restoration Project
  • Thread Starter
#27  
I have been putting the engine together and I filled it with oil through the oil galley with the pressure tank in the picture. I like to fill newly assembled engines this way, then everything is filled.
I also drained the hydraulic tank and replaced the filter and breather.
I am also draining the transmission and other oils while I am inspecting and repairing things as I go.
IMG_3205.JPG
IMG_3206.JPG
IMG_3207.JPG
IMG_3209.JPG
IMG_3210.JPG
 
   / Another Restoration Project #28  
I have been putting the engine together and I filled it with oil through the oil galley with the pressure tank in the picture. I like to fill newly assembled engines this way, then everything is filled.
I also drained the hydraulic tank and replaced the filter and breather.
I am also draining the transmission and other oils while I am inspecting and repairing things as I go.View attachment 697189View attachment 697190View attachment 697191View attachment 697192View attachment 697193
Very impressive!
 
   / Another Restoration Project
  • Thread Starter
#29  
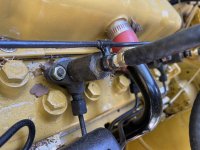
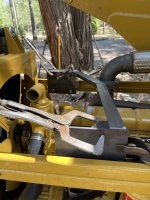
I am still working on this project as time allows. I have finished the water pump, fan and alternator. I had make 2 special banjo bolts for the bleed off line. I couldn’t locate the ones that have a connection on top for return to the tank and one to the filters. I drilled a couple stock bolts and tapped them 1/16” npt. Then I used a 1/4” barbed hose fitting in them. (Picture)
I have removed the brake bands and sent them in for relining.
I am also fabricating brackets for the air filter which I didn’t get with the machine. I have also been re-threading numerous holes and removing broken bolts.
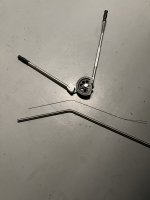
I started bending the stainless tubing for the fixed hydraulic lines on the loader boom.
 

Attachments

  • C17DA35B-1726-4EE8-A37D-33EF5CF57F2B.jpeg
    C17DA35B-1726-4EE8-A37D-33EF5CF57F2B.jpeg
    2.6 MB · Views: 155
  • 59A6FAE7-6AF9-43A0-B5E1-159288D86485.jpeg
    59A6FAE7-6AF9-43A0-B5E1-159288D86485.jpeg
    2.5 MB · Views: 147
  • 77B89830-54F2-4E88-BB40-8B2A5C4CDCE0.jpeg
    77B89830-54F2-4E88-BB40-8B2A5C4CDCE0.jpeg
    3.1 MB · Views: 146
  • 413D936D-5524-4EF7-A781-A104C5BDD0D6.jpeg
    413D936D-5524-4EF7-A781-A104C5BDD0D6.jpeg
    3.8 MB · Views: 137
  • 84F35A08-95D8-48B3-8A5B-ECDA4FEE2A35.jpeg
    84F35A08-95D8-48B3-8A5B-ECDA4FEE2A35.jpeg
    2.5 MB · Views: 144
  • CF53C844-5D94-4747-9BFC-B0EB2E1F455A.jpeg
    CF53C844-5D94-4747-9BFC-B0EB2E1F455A.jpeg
    1.8 MB · Views: 153
   / Another Restoration Project
  • Thread Starter
#30  
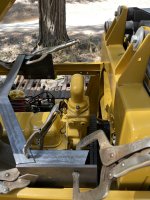
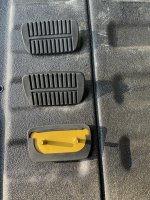
Here is the latest, I couldn’t find pedal pads so I made these plates to fit a readily available pad close to the same size. I welded some 5/16” flathead bolts on them then just drilled the steel plates on the machine.
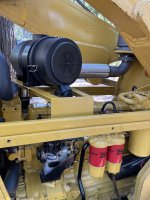
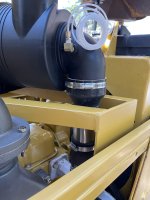
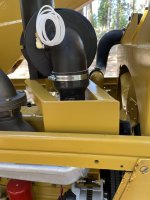
Then I finished fabricating the air filter mount. I got the filter assembly and the pre-cleaner from the Donaldson catalogue. I sized it from their chart using engine displacement.
Lees time to work on it with so many summer projects. I had some epoxy stored in my basement that was approaching shelf life so I switched to that for a bit.
 

Attachments

  • 1616B9E7-63D0-4345-900B-B5259A2699C2.jpeg
    1616B9E7-63D0-4345-900B-B5259A2699C2.jpeg
    5.1 MB · Views: 148
  • 3714A8F4-593C-4D9D-9BD9-3AA64D20F718.jpeg
    3714A8F4-593C-4D9D-9BD9-3AA64D20F718.jpeg
    2.6 MB · Views: 132
  • B50EB388-A871-47EA-B648-778463F6174D.jpeg
    B50EB388-A871-47EA-B648-778463F6174D.jpeg
    2.2 MB · Views: 133
  • 5EA6057B-19C6-4A10-8EB3-A6D381404BA5.jpeg
    5EA6057B-19C6-4A10-8EB3-A6D381404BA5.jpeg
    2.1 MB · Views: 132
  • 5334D236-223C-43B0-8EC3-84245A5FA43A.jpeg
    5334D236-223C-43B0-8EC3-84245A5FA43A.jpeg
    3.8 MB · Views: 138
  • 3830F293-DFA2-421D-ABEC-19DD7AF8F872.jpeg
    3830F293-DFA2-421D-ABEC-19DD7AF8F872.jpeg
    3.2 MB · Views: 141
 
Top