Barn to workshop

/ Barn to workshop
  • Thread Starter
#101  
Finally get to augering and get about 2 feet down. Whoops, with the nose a little low on the tractor and the PHD settings 2 ft was as low as I got. Had to reset the top link, auger boom, and 3pt lower links.

Here is the start of the first try..... /forums/images/graemlins/laugh.gif
 
/ Barn to workshop
  • Thread Starter
#105  
Went back and tried again, soil on this side was remarkably easy to drill. The fence posts I had set before were quite alot more work as I hit wet clay about a foot down and it just gummed up the bit and sent it into an out of balance frenzy. Sank it to the cover, bit is 3 1/2 Ft long. /forums/images/graemlins/grin.gif
 
/ Barn to workshop
  • Thread Starter
#106  
Last pic tonight, pulled the bit, soil was pretty dry all the way down. Should, and I say should make for fairly straight forword work. I guess we shall see........ /forums/images/graemlins/cool.gif
 
/ Barn to workshop #107  
Not sure what the problem is, but the last several photos are not showing up. /forums/images/graemlins/confused.gif
 
/ Barn to workshop #108  
Same here. Can't get any to load. /forums/images/graemlins/confused.gif /forums/images/graemlins/smirk.gif
 
/ Barn to workshop #109  
I have tried several times over the morning and still have not been able to download the photos. I am having the same problem with a few other threads and thought the problem was mine. Guess it may be the TBN's problem. I can down load older photos on this thread. Strange.
Farwell
 
/ Barn to workshop #110  
Larstan, Your going to have to reload your last batch of pictures due to a server "Glitch" I just did mine and now they work, click edit on your post to reload pics.... /forums/images/graemlins/wink.gif

Wow after posting all those pics , Ya have to do it again /forums/images/graemlins/frown.gif I guess that just kinda goes with the way your day started out...
 
/ Barn to workshop
  • Thread Starter
#111  
So last night as I was posting I noticed a message at the top of the web page after I would submit, it said "chmod unsuccesful directory does not exist....." but it was posting the text and I did not check any of the pictures, Sorry. That is a unix command trying to write my image file to the server they store the images on, obviously the server was down last night either maintanance or some other issue but it was on TBN side. I should have realized what was happening as that was my profession for a long time. It will not let me edit the posts now so I will repost them again "sorry everyone /forums/images/graemlins/tongue.gif"

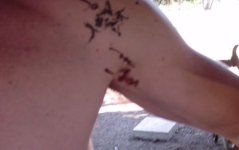
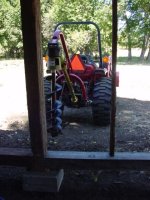
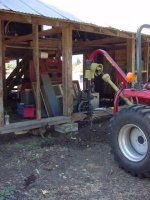
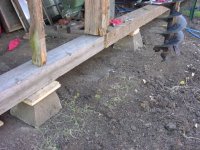
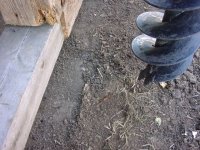
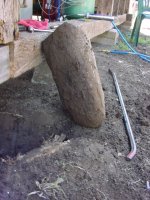
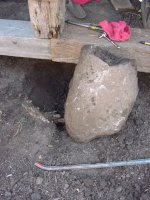
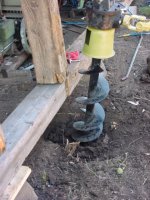
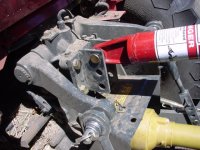
</font><font color="blue" class="small">( Today was one of those days, you know the kind where there is an obstacle at every turn. I did not get started till early afternoon and I have so much to do I had a hard time figuring out where to start. So I decided to take a shot at augering a hole for a pier. Ahhhh, I get to play with the tractor while working today So I hook up the PHD which has been setting dorment for a couple of months. I notice the oil breather on the gear box has some congealed lumps on it so I figure I will change the gear oil and grease it before I dig in Does anyone have any idea why you would paint the level plug? And why 7mm (this is a Howse) I got it with the tractor and had only used it breifly once before to set a couple of fence posts so I had not done the obligatory pre-use service to it. After much grumbling and back and forth to the tool box I get the gear oil changed and start on the u-joints, can you make those safety covers any cheaper? After scraping the paint off the zurk fitting I start banging away with the pneumatic grease gun, obviously none is going in the joint because it is all right there ON the joint after more fiddling it starts taking grease but none is coming out the seals then 'Splat'. Now I am not a mathmatics genious by any stretch, but there are 4 seals with 360 degrees around each. What are the chances that you would be standing in the path of release, answer is 'pretty good' See attached...... )</font>
 

Attachments

  • 706968-GreaseSpit.jpg
    706968-GreaseSpit.jpg
    12.3 KB · Views: 308
/ Barn to workshop
  • Thread Starter
#112  
</font><font color="blue" class="small">( So I position the PHD to get an idea of how much space I will need to dig and how far apart to set the new supports so i can remove the one I am digging under. )</font>
 

Attachments

  • 706972-PHDready.jpg
    706972-PHDready.jpg
    65.2 KB · Views: 289
/ Barn to workshop
  • Thread Starter
#113  
</font><font color="blue" class="small">( Outside looking in...... That's Penelope checking my positioning from under the beam to the left Always helps to have 2 sets of eyes on a project... )</font>
 

Attachments

  • 706975-PHDreadyOutside.jpg
    706975-PHDreadyOutside.jpg
    61.3 KB · Views: 259
/ Barn to workshop
  • Thread Starter
#114  
</font><font color="blue" class="small">( Close-up after I have set the new supports and removed the one under which I will dig. The 2 beams don't match up imagine 2 6x8 beams that are different dimensions. The rough cut original beam is 5 7/8 x 7 7/8 while the replacement comes in about 5 1/4 x 7 1/4 is that what they call dimensional lumber? Why is it that wood is getting smaller while retaing the same dimension label but the price is going up? )</font>
 

Attachments

  • 706978-BaseandAuger.jpg
    706978-BaseandAuger.jpg
    78.7 KB · Views: 257
/ Barn to workshop
  • Thread Starter
#115  
</font><font color="blue" class="small">( Close-up of the hole to be. If you look close you will see the next surprise )</font>
 

Attachments

  • 706980-BaseandAugerClose.jpg
    706980-BaseandAugerClose.jpg
    88 KB · Views: 271
/ Barn to workshop
  • Thread Starter
#116  
</font><font color="blue" class="small">( Here is a hint....... Obviously I missed one )</font>
 

Attachments

  • 706983-HelloRock.jpg
    706983-HelloRock.jpg
    70.3 KB · Views: 275
/ Barn to workshop
  • Thread Starter
#117  
</font><font color="blue" class="small">( So a little more work before the digging, guess what? Some digging and hacking as there were some roots from my friendly trees out front also. I am a little irritated at this point thinking this hole should already be in the ground and I should be on at least the second or third ......

That's a 4 foot pry bar by the way.... )</font>
 

Attachments

  • 706989-Rockout.jpg
    706989-Rockout.jpg
    73.6 KB · Views: 266
/ Barn to workshop
  • Thread Starter
#118  
</font><font color="blue" class="small">( Looking on the bright side, I have a pretty good pilot hole started here is a front shot.... )</font>
 

Attachments

  • 706990-RockoutB.jpg
    706990-RockoutB.jpg
    73.4 KB · Views: 245
/ Barn to workshop
  • Thread Starter
#119  
</font><font color="blue" class="small">( Finally get to augering and get about 2 feet down. Whoops, with the nose a little low on the tractor and the PHD settings 2 ft was as low as I got. Had to reset the top link, auger boom, and 3pt lower links.

Here is the start of the first try..... )</font>
 

Attachments

  • 706993-HoleStart.jpg
    706993-HoleStart.jpg
    68.4 KB · Views: 277
/ Barn to workshop
  • Thread Starter
#120  
</font><font color="blue" class="small">( first the top link all the way to the top.... )</font>
 

Attachments

  • 707013-TopLinkHoles.jpg
    707013-TopLinkHoles.jpg
    64 KB · Views: 257

Marketplace Items

JOHN DEERE 331G SKID STEER (A62129)
JOHN DEERE 331G...
2012 DIAMOND C  40FT GOOSENECK TRAILER (A58214)
2012 DIAMOND C...
2007 FREIGHTLINER M2 106 4X2 26FT BOX TRUCK (A59906)
2007 FREIGHTLINER...
2019 BOBCAT SKIDSTEER T740 (A60736)
2019 BOBCAT...
2025 JMR 36in Bucket Mini Skid Steer Attachment (A59228)
2025 JMR 36in...
2018 Freightliner M2 106 AWD Altec AA55 56ft. Insulated Material Handling Bucket Truck (A60460)
2018 Freightliner...
 
Top