OP
Tractors4u
Elite Member
- Joined
- Mar 10, 2002
- Messages
- 2,540
- Location
- Athens Alabama
- Tractor
- Deere 4310, Kubota L355, John Deere SST18 Spin Steer, 2006 Polaris Ranger
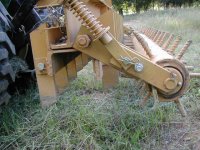
Re: Building a Pulverizer, Painted Version
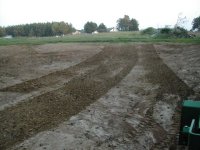
I will have to let it dry out around here before I can try it out. We have been getting 2 days of rain and then 2-3 days without rain and then more rain again. It doesn't make for good tractoring.
I will have to let it dry out around here before I can try it out. We have been getting 2 days of rain and then 2-3 days without rain and then more rain again. It doesn't make for good tractoring.