BX25D. Mod #1 and continued.

   / BX25D. Mod #1 and continued. #871  
Ahh sh*t just sitting down with a drink thought I'd see what you been up to all day, Now you tell me I have to wait till morning?

Man I know. Its tough but now you'll have something to look forward to tomorrow :laughing:

And if he keeps on drinking till morning he won't remember what he was waiting to see!!!
 
   / BX25D. Mod #1 and continued. #872  
I'd be interested in any photos or details on the bucket level device for the B25. When you have time of course. :)
 
   / BX25D. Mod #1 and continued. #873  
Ditto on the leveling device! Also, it's tomorrow in Ontario and no photos of the box yet? It's like going to watch your favorite TV show and finding out its been delayed. I will pour another coffee and check back in!:confused3:
 
   / BX25D. Mod #1 and continued. #874  
ok it is mourning and I have coffee in hand I am waiting
 
   / BX25D. Mod #1 and continued. #875  
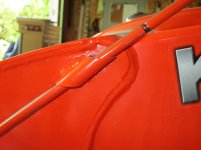
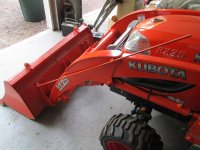
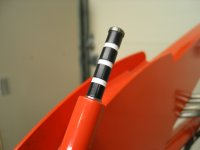
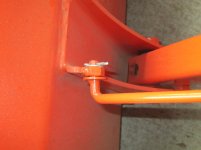
bucket leveler 001.jpgbucket leveler 002.jpgbucket leveler 003.jpgnot to hijack, but here is my bucket level indicator. I needed to make one because I removed the factory one to install angle iron for bucket hooks. It is just a length of 1/4" rod and a stub of pipe for it to travel through. I welded a nut for the rod to pivot on the bucket arm. I also ground a small notch in the rod and gave it some black paint to indicate level. I like it better than the factory one.
 
   / BX25D. Mod #1 and continued. #876  
Yours is very nice WaxMan, as you can see, mine rubs alittle when the bucket is in full pivot.
 
   / BX25D. Mod #1 and continued. #877  
Yours is very nice WaxMan, as you can see, mine rubs alittle when the bucket is in full pivot.

Thanks, I used a full tube so it does not have to be so long like Kubota's style. I also machine the end so it's smaller then the tube and won't rub off.
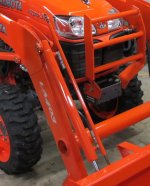
I attached the tube and rod to the fel piston pivots. I center drilled and tapped the piston pins. The tube is attached to the top pin and the rod is attached to the bottom pin. You can find the level mark if the bucket is up in the air or on the ground. Since the BX only has one piston what you did works best for you. I will be replacing the long Kubota rod on my new 3240
 

Attachments

  • fel guide.JPG
    fel guide.JPG
    214.8 KB · Views: 275
  • IMG_2445.JPG
    IMG_2445.JPG
    240.2 KB · Views: 323
Last edited:
   / BX25D. Mod #1 and continued. #878  
In my experience, sometimes its easier to get something premade and modify it to fit your needs vs starting from scratch.

Aaron Z

DITTO!

Cool. Wasn't sure if you guys were getting sick of this BX stuff. Anyway I've been in the shop all day at this ballast box. Glad you guys aren't here because the first thing you'd say is "Why did you buy a box if you were going to cut it up? Can't help it guys. Every time I buy something I realize there's a way to make it better or at least in my deranged mind it seems that way :laughing:
Progress is going good but the ideas keep coming up and I follow through.

SmileyCry.jpg


Man I know. Its tough but now you'll have something to look forward to tomorrow :laughing:

Ahh man!! you are such a tease!!! We BX and kubota lovers cannot wait to see, hear more!!! wee cant get sick of mods, no matter how trivial .. lol ! :laughing::thumbsup:
 
   / BX25D. Mod #1 and continued.
  • Thread Starter
#879  
Sorry for the delay guys. Wifey wanted to go out for breakfast :rolleyes:

Nice job on the bucket lever guides. Enjoyed seeing them and thanks for posting the photo's.

OK. Seeing you all waited longer than usual I'm posting 25 photo's of the ballast box and it's mods. First of all the friggen ballast box wasn't even built square. Then one lower pin wasn't even straight so that made for a few adjustments. The reason I did anything with the ballast box was because it really couldn't work comfortably with the Quick Hitch. The ballast box pins were to close to the body of the box and hooking up the QH to it was to tight so I made new adapters and welded them to the existing mounts. I filled in the original holes that the pins were in as well.

While I was doing this job I figured I may as well put a tow receiver in the box as well so I did that. I also fabricated a stand for the box with castors on it that rated at 250# each. They were given to me so the cost was right on. The stand was built out of some 1" angle I had laying around the shop. Later on I might make a stand that will push into the receiver instead of the stand but this will work for now.

I also decide to add a shovel, hoe, and rake holder to the top I fabricated out of 1/8th plate. I used exhaust pipe for the holders and capped the bottoms. I use a hole saw to cut the holes but the pipe was a bit undersized so I swelled them on the pipe bender to make them fit nicer then mig welded them to the underside of the cover.

The Cat 1 pins were sloppy in the QH so I had some end pieces of round stock here so I used those to machine adapters to go over the OEM pins and reduce any slop in the QH. The top pin ended up with a bronze pin because that's what I had that was close to what I needed.

The box now weighs 101.2 lbs. Another 400 lbs should do it. May use just sand yet but not sure. Anyway, here's a few photo's. I took many more but I can't post them all but these will give you an idea of how I did it.


Tractor & Equipment Auctions

CAT 420F2 IT (A50854)
2018 PETERBILT 579 DAY CAB (A51222)
2018 PETERBILT 579...
5th Wheel Dolly (A49461)
5th Wheel Dolly...
2013 John Deere 608C Corn Head (A50657)
2013 John Deere...
2017 DITCH WITCH RT30 (A51243)
2017 DITCH WITCH...
2006 GENIE GTH6622 TELESCOPIC FORKLIFT (A51242)
2006 GENIE GTH6622...
 
Top