Container Weld Shop build -

   / Container Weld Shop build - #161  
(Notice the sneaky way I tossed in some OLD pics just to keep ya happy til I get off my tush and actually PRODUCE sumthin' ??!?) ...Steve)<<<<We'll if I haven't seen these pictures, there new to me and your talking to someone who will watch the same movie 3 times in 3 nights in a row, if it's good, example Star Trek ll, the last Rambo the last Expendables, Battleship, and the last one I watched 3 times in a row was Central Intelligence, that one really cracked me up.

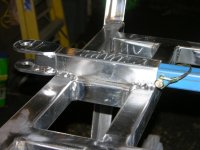
Side note, I did a tremendous amount of welding on the USS John Paul Jones. So in the movie just in case you seen it, the welds held up, it's the steel that failed and got shredded by the alien invasion, probably because the steel came from recycled Toyotas, here an example of my weld done this week>>>>>
IMG-0057.JPG
 
   / Container Weld Shop build -
  • Thread Starter
#162  
I'm that way with movies I like, including some on your list; hadn't seen a couple of those, hafta check 'em out...

Your weld looks incredible - to my (mostly untrained) eye, it looks too purty/even to not be a machine weld (if it's NOT, consider that a COMPLIMENT for sure) - mainly it looks multi-pass (straight line down the center) and maybe ground down in the middle (pattern along the sides, less down the crown) - I've got maybe 5 MINUTES experience with SPRAY, and it didn't look like that (no real pattern, looked more like the joint was CAULKED with a really smooth bead) -

Sooo, now that you accomplished your "shock and awe" mission, how 'bout some DETAILS??!?

I managed to get maybe 1/3 of the small pieces (for the mod to the HF crane) de-scaled yesterday, too much "horizontal rain" goin' on to try blasting out in the driveway, had fair luck using the front roller on the 6x10 belt/disc sander and constant movement to minimize "divots" - wore one of these the entire day
Lumbar Support Belt - Huge Savings on this Lumbar Belt
Seemed to help (a LOT) - I could actually still MOVE when it wuz time to come in fer supper :thumbsup:

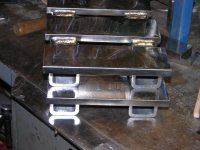
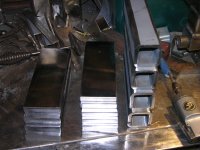
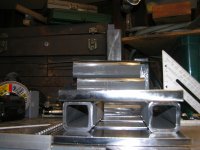
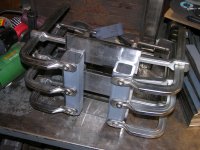
Got a couple "before" pics (cut and stacked) of the pieces, I'll get "shiny" pics when that's done - as hard as that mill scale is I don't wanna take a chance it'll dull expensive annular cutters so scale's gotta go BEFORE holes get "installed" -

More "horizontal rain" today, good day for semi-INSIDE work - daughter's BD today so if she comes down all bets are off... Steve
 
Last edited:
   / Container Weld Shop build -
  • Thread Starter
#163  
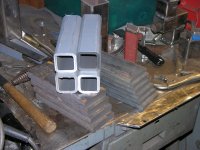
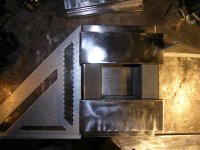
OK, little progress today - got the rest of the pieces de-scaled, insides of the tube ends shined up where nuts will be welded, layout of the 3 3" pieces of FB ('cause I don't have any 1/2 plate) laid out along with the 2 pieces of tube that'll be the "beam channel" -

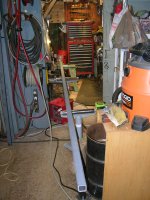
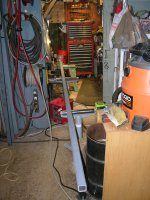
First, looking into the 8'x10' "phone booth shop" where I do most of the fab work (unless it won't fit :rolleyes:) -
DSCN3064.JPG -
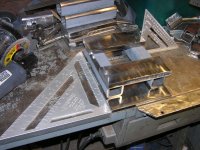
Next, rough-cut pieces - DSCN3066.JPG
The cleaned up pieces, including insides of tube for weld nuts - DSCN3067.JPG
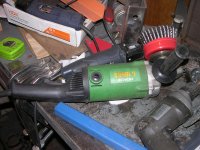
Then, the "back breaker" I mentioned a couple posts back - that cup brush weighs almost as much as one of the smaller grinders :thumbdown: - DSCN3068.JPG
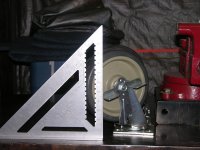
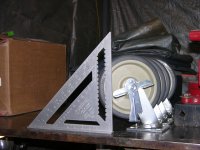
The caster "upgrade" for the HF crane - 8", zerks on wheels and swivels, all 4 lock instead of HF's only 2 locking - Surplus center, $17 each (but UPS finished ruining a $100 bill) - I'm still working on gravel, plus my old cherry picker needs new shoes so the 5" off the crane will go there - DSCN3070.JPGDSCN3071.JPG -
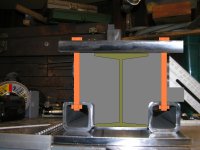
Layout - the 3 bottom pieces of 1/2" FB will get tacked to ONE of the 2" tubes, then that'll get clamped to the actual I beam with a 16 ga. "shim" between the tube and the beam (so it still fits after full weld) - then the SECOND tube will get clamped to the other ends of the 1/2" FB's, the whole assembly will get HARD clamped to the big weld table (1" thick, 3'x7') and won't get UN-clamped til everything's welded out and cooled - finally, mag drill will take care of holes thru the base that match the posts on the HF crane; also holes in both ends of both tubes for weld nuts to go inside - I did a little editing in Paint on the last one for clarity -

DSCN3072.JPGDSCN3073.JPGDSCN3074.JPGDSCN3074b.JPG

'Sposed to be dry tomorrow afternoon and Monday morning, and warm enough for paint - keeping fingers/eyes/toes crossed :laughing:... Steve
 
   / Container Weld Shop build - #164  
I'm that way with movies I like, including some on your list; hadn't seen a couple of those, hafta check 'em out...

Your weld looks incredible - to my (mostly untrained) eye, it looks too purty/even to not be a machine weld (if it's NOT, consider that a COMPLIMENT for sure) - mainly it looks multi-pass (straight line down the center) and maybe ground down in the middle (pattern along the sides, less down the crown) - I've got maybe 5 MINUTES experience with SPRAY, and it didn't look like that (no real pattern, looked more like the joint was CAULKED with a really smooth bead) -

Sooo, now that you accomplished your "shock and awe" mission, how 'bout some DETAILS??!?

I managed to get maybe 1/3 of the small pieces (for the mod to the HF crane) de-scaled yesterday, too much "horizontal rain" goin' on to try blasting out in the driveway, had fair luck using the front roller on the 6x10 belt/disc sander and constant movement to minimize "divots" - wore one of these the entire day
Lumbar Support Belt - Huge Savings on this Lumbar Belt
Seemed to help (a LOT) - I could actually still MOVE when it wuz time to come in fer supper :thumbsup:

Got a couple "before" pics (cut and stacked) of the pieces, I'll get "shiny" pics when that's done - as hard as that mill scale is I don't wanna take a chance it'll dull expensive annular cutters so scale's gotta go BEFORE holes get "installed" -

More "horizontal rain" today, good day for semi-INSIDE work - daughter's BD today so if she comes down all bets are off... Steve

Yup you caught on, that weld was done by machine, one of these time's I'm gonna sneak out a video of it. Now that I'm getting up in years and half worn out, my favorite kind of welding is with buttons, switches and knobs.

So that's how you been lifting 20' I-beams, got a black belt in lifting. You must be HF No.1 customer, most of your links go to HF, is there one near by or are you an online shopaholic? I never would've thought the'd have them back belts, I might try one.

You doing all that cutting of steel square stock with that Jet band saw or are you also using one of them cold cut chop saws?

I was most of yesterday at my granddaughter's first BD, think my daughter just wanted a party.
 
   / Container Weld Shop build -
  • Thread Starter
#165  
"got a black belt in lifting" - I like it :thumbsup: - Oh, if you get one of them black belts, you'll probly want one size bigger than their numbers show - my waist is 34-35" so I got the medium - went back and got the next size up, couldn't BREATHE with the medium one fastened :eek:

Yeah, been buying stuff from HF since the only store they had was in Camarillo Kalifornika - that was when most of their stuff came from Taiwan, little did I guess I'd be wishin' that was true TODAY :rolleyes: in fact, at the far end of the tube in this pic
DSCN3064.JPG - that little green saw is one of their first 4x6 band saws, had it since '80 or '81 - still going strong, better made than their newer stuff...

They put a store in only 40 miles from me (back roads) 'bout 12-14 years ago, but their $7.99 FedEx shipping was cheaper than driving 80 miles round trip; then about 4 years ago they put one in Albany, which is where we usually shop anyway. I like bein' able to "kick a tire" and know I should run away, better than finding out I shouldnt've ordered that thing at all...

Cutting - bigger stuff gets the Jet, smaller stuff gets the "Ole reliable" HF bandsaw - no cold/dry cut yet, later on I'll either get one of those or the Grizzly swivel band saw; might be a while though - I got both band saws tuned up so you can lay a square across a cut in any direction and not see daylight, hard to ***** about that...

Kids are so cute at that age, usually more interested in the wrapping than what's inside :laughing: - Then later on it becomes clear that God wuz just tryin' to prepare Job for TEENAGERS :eek:

Spent about 4 HOURS this afternoon learnin' how to do the SECOND crane post top in maybe 20 MINUTES (or more correctly, how NOT to do it AGAIN the same way :confused: - anyway, first one's ready to tack manana - DSCN3076.JPG

Once that's done the second one will get clamped to the heavy table with the 3 1/2" FB's and ONE of the tubes, trued up, tacked THEN taken to the 12' I beam in the other shelter (for "fit-up"), the SECOND tube clamped up with a 16 ga. "shim" between it and the beam, then MORE clamps and back to the big table - then I'll hard clamp BOTH post tops and weld 'em out, let 'em cool, then set up "maggie" and drill all the holes, then weld the nuts inside the tubes.

Then finally paint, then it'll be time to put the rest of the MOBILE crane together and move on... Steve
 
   / Container Weld Shop build - #166  
Hey thanks for the heads up on back belt size, so is the next size up Large? My waist is also 34-35. Been several times I've bought stuff that that ended up being to small around the waist, Carhartt bibs for one.

I've been banging around the idea of a cold cut saw or one of them HF band saws<<<1-5 stars, what you give the newer ones?

("Kids are so cute at that age,")<<<<<<Your not kidding, got another granddaughter turning 2 in a couple weeks and she's already into everything.
 
Last edited:
   / Container Weld Shop build -
  • Thread Starter
#167  
Yup, the Large is the one you want; fits as tight as you can stand it, or looser. Gives you a pretty good range of fitting.

Newer small HF bandsaw - I give it about a 1.03 - I bought one to make an "off-road" version, spent my usual OCD amount of time building this - DSCN1495.JPGDSCN1496.JPGDSCN1498.JPGDSCN1502.JPGDSCN1503.JPG
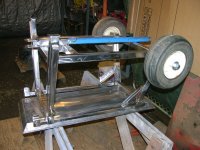
That's when I discovered that my OLD saw (early '80's) has CAST IRON blade guides and holders, but the NEW ones are POT METAL. Won't hold a setting, can't get it to cut straight for more than a few cuts if that :mad:

Fortunately for me, that chip pan was part of ANOTHER mistake - bought an older saw off CL, foolishly thought the only reason it didn't cut straight was 'cause the PO didn't know how to set one up - but it DID have that chip pan and an actual FRAME of angle under it - the saw itself rapidly turned into a "parts machine" - turned out the thing I did NOT notice was the crappy welded break in the saw frame :eek: - so no alignment, but that saw IS OLD ENOUGH not to be pot metal on the blade guides, so hopefully I can swap some parts and get my "off-road" saw going some day...

So, my advice to you is either find an OLD version on CL and make sure you actually watch it cut something, and check the cuts in both dimensions for SQUARE - if it's close and priced right, and (this is REAL important) you check to make SURE the castings that hold the guide bearings will attract a MAGNET, then it can probably be a good saw. Otherwise, you'd probably have better luck payin' a little more for the Jet version of the 4x6; not sure about Grizzly's version...

You might wanna save this pdf file if you're gonna get ANY one of those saws - View attachment Basic_blade_adjustment_and_tracking_-_rev-1.pdf

Dry cut - I've pretty much settled on the Evosaw 380, a bit less than other "real" saws in that class, and built pretty solid - Evolution EVOSAW38 | Evolution Power Tools | Evolution 15

If I get another band saw, it'll most likely be this one
5" x 6" Metal-Cutting Bandsaw w/ Swivel Head | Grizzly Industrial

Definitely more $$, but some of the angles I try to cut (like matching a 2/12 pitch) get REAL tricky, involving removing the movable vise jaw and the angle adj. bolt on main vise jaw, using 3-4 clamps (that won't hit the saw frame when cutting), using a digital angle gauge to set the cut, etc....

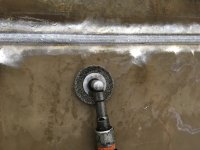
Oh, BTW I got a little more done on the HF crane mod - got all welded up EXCEPT for the nuts inside the square tube, need to drill for those FIRST - DID get hole locations punched - used the original I beam end plate for a guide, clamped to MY "sliding clamps", 1/2" transfer punch, 4 whacks per slider, done - DSCN3077.JPGDSCN3080.JPG - Sorry for hurtin' yer eyes with those "sloppy HUMAN welds :laughing:
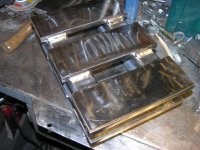
So manana I'll "wake up Maggie, I think I got sumthin' to say to you" :D - 8 11/16" holes at ends of those square tubes for 5/8" weld nuts, 4 21/32" holes in the ends of those 3/4" FB lockdown bars, 8 17/32" holes for bolting to the legs (plus opening up the stock holes in vertical post plates to match) then it should be time for degreaser (carb cleaner) and paint... Steve
 
   / Container Weld Shop build - #168  
("Newer small HF bandsaw - I give it about a 1.03") <<<<<<<<<<<<<<<<<<<<<<1.03 stars! WOW your not working on commission are you, now I'm leaning back to cold cut saw like that Evolution one you linked, bandsaws that I've seen elsewhere are pricy, I'll check Grizzly out later.
Just ordered the back belt, Large and last time I was on HF site 6 months ago, only noticed two stores 60-70 mi away, tonight I see they have two more new stores 30 mi away, when that happen.

Transfer Punch?????????<<<< Oh boy, I'll save that story for tomorrow.

Hand welds? we already look over you resume and previous welding, no question you have some welding skills, dont compare your hand welds to machine welds, your hand welds are as good as mine and a lot better than some of the welds down the shipyard that I had to repair. Instead of 21/32 holes I'd go with 43/64", holes drilled in 64s" are more rust resistant.
 
   / Container Weld Shop build -
  • Thread Starter
#169  
"two more new stores 30 mi away, when that happen." - probly when you were asleep, they seem to be breeding like rabbits :rolleyes:

"Transfer Punch?????????" - Nuthin' fancy, just really handy when you're needing to match holes EXACTLY in 2 different pieces - Transfer Punch Set - 28 Piece

"Instead of 21/32 holes I'd go with 43/64", holes drilled in 64s" are more rust resistant."

Guess I'll hafta settle for rusty holes :confused: - my cutters of choice only come in 1/64" increments in a few sizes, intended for tap drills. Same with 1/32" increments, only a couple of those. When I want a slight clearance for normal inch sized bolts I can usually find a METRIC just a few thou bigger - here's the list of cutters I have so far; mine are highlighted in red on pages 15 and 16 - p.16 bottom of the page is all tap drills, but I use 'em anywhere I need that size. I like that their charts are arranged in increasing diameters, whether inch or metric. That's also the order I keep mine in - DSCN1966.JPG
View attachment AnnularStevePg-15-16.pdf

Next up: "Maggie gets to come out and play"... Steve
 
   / Container Weld Shop build - #170  
("probly when you were asleep,")<<<<<<<<<<<<This happen alot to me like right now, your post say on my page says today 3:15am, now either your staying up late or getting up early so what would be the time your time on your post? almost a tongue twister.

Are you implying that maggie will be using some sort of cutters instead of drill bits?

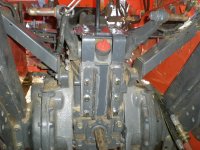
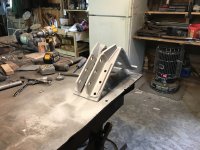
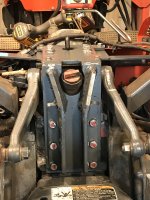
Now since my alarm didn't go off this morning and missed work, story picture time. In the process of fixing a major repair on my tractor trans case another poster (Teg) posted a picture of a Top Link Reinforcement plate for older Kabotas. So after acquiring the steel I started making it last fall. With 6> 1/2" holes on the vertical part down behind trans, and 6> 9/16" holes on the flat part under seat, two pieces , an L>shape welded together in the corner.

Now the 6 holes on top was the easiest-ish and would've been if I new about Transfer Punches. I take the seat plate off that holds the seat, lay it on the plate on the bench, very carefully traced out the 6 holes, then very carefully center punched all six holes, see where I went wrong, after drilling the 9/16" holes, I still ended up reaming out several holes so that half of top plate would bolt on top of transmission. The vertical bottom plate wasn't traceable so that required precise-ish measuring and also required reaming a couple holes.

So I go to work on Monday, chatting with the tool gribb keeper, one of them rare friendly types, I'm telling him about how hard it was to transfer those 6 top holes on that top plate, he goes that should of been easy, I go no it wasnt, you know how hard it is to transfer holes, you have to hold that center punch just right and steady, he looks at me with his head half cocked with a half cocked grin, he says no your suppose to use a TRANSFER PUNCH, I go what you talking about, he goes wait here, he goes to the tool draw section comes back over slaps a case of round punches down on the counter, he says THESE ARE TRANSFER PUNCHES, see the point on the end on all these punch sizes. I go well I thought those were just another style punch, I said anit that a site how come I never knew what these was, he about laugh his head off, and I can here you laughing to.

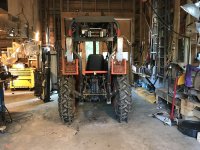
Now I'm the process of doing firewood hauling testing, it's a 3/8'' thick plate, around 6" wide, total length is around 18", with reinforcment toe brackets in and on the conner, my transmission case shouldn't crack again, I hope/pray, cause it's $850.00 for new trans case +someones labor.

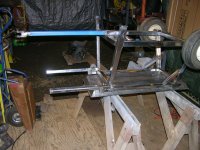
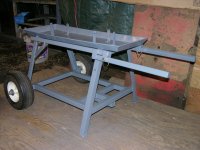
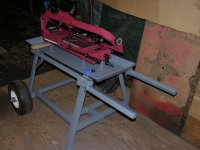
The first picture is what (Teg) sent me, I use that for a pattern/idea, the second picture I had to do twice because when I welded the small toe brackets on the inside on my welding bench, it suck in the conners about 1/4" and the plate wouldn't bolt up, so cut apart, do it again, weld it back together on the tractor, then unbolt, place it back on my bench, but this time I tacked two diagonal braces from both ends so it wont fold in, then I rewelded the inside toe bracket, checking squareness as I was welding, then welded the outside top toe brackets. The only way to keep steel from moving is tack on temp braces.
15012910870291410832690.jpg IMG_3262.JPG IMG_3266.JPG IMG_3276.JPG
 
 
Top