Ejector Bucket Design

   / Ejector Bucket Design #11  
Hi Ray,
I responded to your PM. Hope it is helpful?
Your concern for the narrowness of your bucket is a good one and there is no reason the cam should be on the inside. Obviously those ones you posted have that feature on the outside.

However, if located strategically, I thought an internal lever for a narrow bucket might be better as opposed to the external cams having to be way out there to actuate? Can you find a spot on the dipper stick where the cross tube does not interfere? Everything would (could) be more compact if you design the location well. Don't forget that this is a "helper" ejector plate and it may not need to be as large or long as you think in order to empty the bucket successfully.

Another thing to consider is to use the cross tube as part of the cam system. I guess I'd have to see your hoe curl and dipper stick and how it enters the back of your bucket to see if it could be done? Just a thought anyway?:)

I wasn't sure if you are installing this feature into an existing bucket or will you be making a custom bucket? If making one, you could design an unconventional bucket specifically in mind to accept that feature. Maybe design the cam feature around your curl and dipper stick locations on and associated movements... and then design the bucket around it?
 
   / Ejector Bucket Design
  • Thread Starter
#12  
Rob,
Good points and I'm sure the lever can find a home. I need to do another drawing. But but right now I have my rear blade attached and doing mock ups on that for some upgrades (end plates, ripper bar & gauge wheels). Ordered parts yesterday!

After that I'll build the BH bucket. Since I'm starting from scratch design applications are almost limitless.

Another thing that I like about your design concept is that the ejector flap has its own pivot pin. This means it can be easily removed if and when not needed. Also means less space needed on the main bucket pivot for the extra ears so bucket can stay as narrow as possible. I'm shooting for 7", 8" wide.

Sometimes I spend as much time on design as I do construction..... because I like it and it normally means the finish product meets expectations. I should say "most of the time". One of these days I'll post a great one cylinder lift/gravity dump loader that "didn't quite work".
 
   / Ejector Bucket Design #13  
Thanks Ray,
I have no doubt you'll get it sorted out.
I've seen what you can do and I like your way of thinking it through.
 
   / Ejector Bucket Design
  • Thread Starter
#14  
Well I spent a lot of yesterday afternoon with CAD trying to draw something similar to Rob's concept. Gave up on that and switched to tracing paper (from photos) to track the range of motion. Failed to come up with anything.

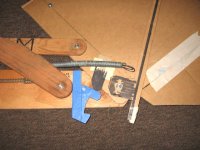
This afternoon's efforts were more promising. A full scale mock-up was a much better design tool to run the bucket through its full range of motion and find what windows of opportunities existed to fit an ejector flap actuator mechanism.

The "window" is small indeed which is why it probably eluded me in the previous processes. There is a slim area between bucket pivot pin and bucket arm pin to fit a curved push arm that pushes on the back of the ejector flap. I think this push arm could be something like 1/2" thick 1 1/4" to 1 3/4" wide. I'm thinking I can weld it on a 3/8" thick plate and bolt it to the top of the dipper stick with 3/8" dia "Thread-Serts". These will hold the arm on the dipper stick but not strong enough to resist all the exerted force so I'll probably need a small thrust block welded on the dipper stick too.

There will be a cutout in the bucket back for the arm to access the back of the ejector plate. And like bx24 mentioned, the back of the bucket will need to be at least partially open so dirt is not compacted behind the flap.

The area of the flap that is pushed by the arm will need to be plenty strong as it is so close to the pivot the forces here will be tremendous.

Next challenge will be to figure out a return spring so as the bucket is curled a bit to begin digging, the flap goes to the rear of the bucket. I need to find a source for a flat spring (like a leaf spring only lighter duty).

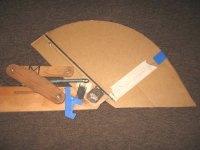
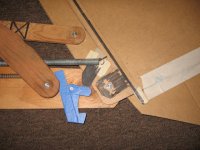
Here is how the 2-D mock-up came out. I'll likely to do a 3-D mock before I commit to building because the clearances are so small and there may also be some obstructions with pins or bucket levers that aren't apparent in 2-D. And I'm still investigating adding some cam assembly to quicken the flap rotation compared to the bucket rotation.

Detail - Push arm before engagement

Detail-B4 engage.JPG


Bucket rotation - Before push arm engagement

Full-B4 engage.JPG


Bucket Rotation - Begin engagement

Full-Begin engage.JPG


Bucket Rotation - 1/3 ejector rotation

Full-1_3 engage.JPG


Bucket Rotation - Push arm fully engaged - Ejector flap fully opened

Full-Fully engaged.JPG


Detail - Push arm Fully engaged

Detail-Fully engaged.JPG

BTW - The push arm fits between the two outermost bucket lever arm. These arms are outside the dipper stick. The inner bucket arms are tied together as an "H" assembly (the pencil block-out on the template arms). When bucket is fully curled there seems to be clearance for the ejector push arm. But that's why I'll do the 3-d mock-up..... to make sure.

I may try to spread the distance between the bucket/dipper stick pin and the bucket/arm pin to get a bit more clearance for the ejector push arm. But it's tricky because they are so closely spaced a minor adjustment can have a major rotational effect on the bucket. I mocked-up my existing bucket and I'd like to keep that if possible. I'm sure some Kubota engineer spent a lot of time getting the geometry "just right".

I'm still undecided if the ejector plate needs to be as long as the mock-up or can be cut shorter so there is not as much curve at the free end.
 
   / Ejector Bucket Design #15  
Does the pivot point of the ejector need to be an additional pin? I would think that making it pivot on the same pin as the bucket itself would make the design simpler. This would also move the push point further from the pivot (which I would expect to lessen strain).
 
   / Ejector Bucket Design
  • Thread Starter
#16  
Defective said:
Does the pivot point of the ejector need to be an additional pin? I would think that making it pivot on the same pin as the bucket itself would make the design simpler. This would also move the push point further from the pivot (which I would expect to lessen strain).

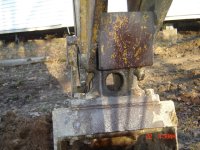
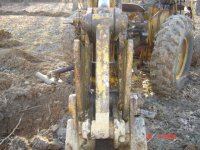
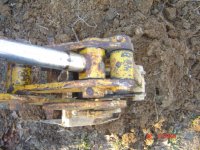
What is not evident in the mock-up is that the pivot of the ejector flap is actually a structural cross member of my original bucket. On the original this is a 1 3/4" OD pipe that runs from side to side and is welded onto the thickened side plates. I'm guessing it was found to be a necessary structural component for bucket strength.

The 1 3/4" pipe did not allow enough space to get a beefy enough push lever so I reduced it to 1 1/4" OD. After all, this trenching bucket is destined to be only 7" to 8" wide. My 1 1/4" OD pin is actually 3/4" ID shaft bushing stock so I'll make the shaft solid (#8 bolt) and the bushing will slice into three pieces. The two ends welded to the bucket, the middle piece is the pivot connection for the ejector. I'll test the ejector with the 3/4" shaft pinned so I don't have to cut it apart if trials demand modifications.

To answer your question, I'd really would like to have the pivot farther away from the lever. The stress here, as noted, will be very high and components will need to be built accordingly. The ejector could also be removed if/when not needed. The problem is that when the pivot point is moved further away, the lever arm needs to become longer, and thus the bucket needs to rotate further for the ejector to fully open. It's a geometric chain reaction. If I put the ejector pivot on the bucket main pivot I'd need to loop the ejector plate around the structural pipe and the push arm would need to be really long.

Tomorrow I am going to see if I can spread the pins some with out affecting my bucket 180 degree rotation too much. If I can gain an additional 3/4" to 1" in spread it will give more clearance for the push arm, get the push arm further from the pivot, and not substantially increase the push arm length.

I was trying to make Rob's lever/cam system work, to no avail, when this push lever showed itself as an opportunity. I ran with that to see where it would lead (mock-up #1, above).

This is a design in progress and I'm sure it will continue to evolve. I'm likely still not done investigating the lever being attached to the ejector plate like Rob's concept. My problem is that my arms and pins are much closer than Rob's and his solution, a good one, does not fit my bucket....yet.
 
   / Ejector Bucket Design #17  
OK...

I think I see some of your design trends now...

Since you're building the bucket from scratch (at least that's what I thought you were doing...) you don't need to follow the design of your existing bucket too close.

If you look at the bucket Charles built, the back of the bucket is pretty simple. Ears for 2 pins, a fairly flat back & basically not much extra structure in the way. (Look at it in this post) I'd pivot the ejector off the main pivot pin on his design & give it some reinforcement where the pin hits it.
 
   / Ejector Bucket Design
  • Thread Starter
#18  
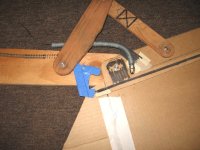
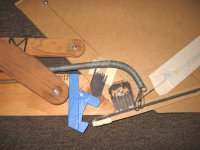
Tonight I did a couple more renditions of the ejector flap activation mechanism.

First I attached a lever to the flap that engages a roller bearing mounted on the dipper stick.

This is that lever beginning to engage

Lever on flap-begin engage.JPG


Here it is fully engaged

Lever on flap-full engage.JPG


BTW - The shape of the curved lever is dictated by the clearance needed when further curled in order to miss an "H" tie between the two bucket arms, the "X" in the photo.

Lever on flap - Clearance @ H.JPG


Due to the constraints of the curved lever I was not able to get any cam action to increase the rotational speed to the flap and I lost some bucket opening angle because the lever binds against the upper pin of the bucket.


Next I experimented spreading the bucket pins to gain more clearance for yesterday's direct push lever. I lost too much bucket opening and curl angles when I spread the pins one inch. But spreading them by 3/4 inch I only lost 5 degrees of full open and 9 degrees of full curl. I though this would be acceptable if it allowed more clearance and be able to move the lever a bit further from the pivot pin. Here's how it turned out:

Lever on dipper- begin to engage.

Lever on dipper2-Begin engage.JPG


Full engagement

Lever on dipper2-Full engage.JPG

At this point I think the later may be the best solution. Two items of merit above the flap mounted lever. 1. It takes less rotation of the bucket to fully engage the ejector. 2. If I don't want or need the ejector I can just not attach the dipper lever. In this scenario I'd bolt the flap to the back of the bucket.

I've got one more idea to try tomorrow night based on Defective's comment then I'm just going to have to pull the trigger on one of the designs and get on to the next step.
 
   / Ejector Bucket Design #19  
For most of these designs, it involves more work building it, than to scrape the clay out of the bucket every now and then.
Also, a curled ejector plate would still give sticking problems.
I have been digging trenches as summer holiday jobs, but we never really had the need for a complicated bucket like this. As a Dutchman, i dont think you guys can have much worse soil than we have, because large parts of our country were sea bottom untill about 50 years ago, which is allmost virgin clay.

IMHO, its a bit over the top to put this much work in an ejector bucket, a banana bucket works good in 99.5% of the soils.
 
   / Ejector Bucket Design
  • Thread Starter
#20  
I had a discouraging discovery after my last post. My favored design (last photos) failed when I brought the bucket through full curl. The push arm conflicts with the bucket rod at the end of the curl. I hadn't noticed it before because the rod was not part of my mock-up. I felt like I came back from shopping not buying something that was needed because it wasn't on the shopping list. Dumb.

I ran through a whole 'nuther series of design ideas and the only promising mechanical concepts were ones I couldn't fit into the tight physical package including following Defective's suggestion of designing a completely different bucket. Most of the simple mechanisms failed in the standpoint that it took too much bucket curl rotation to completely engage the ejection flap. Since I could not find a way to dis-engage the ejector (trip latch) these designs had the same flaw as my initial drawing in that the bucket needed to be somewhat curled in order to start digging. Attempts at devising non-linear scissors levers, push rods, cams, etc just took up too much space in the confined area.

I'm about to concede round one. It hasn't been a knock-out but I am staggering. I've learned a bunch the past few evenings. Thanks to all that gave suggestions.

I think I am going back to my original plan and simply build a duplicate of my bucket only narrower and like Charles, try it and see. I'll increase the draft of the sides and see if that works well enough. If I run into sticking problems I may try out a banana bucket. After all this whole ejector idea was trying to solve a problem I don't even know I have. I gave it consideration due to TBN posts expressing concern but I'm now inclined to agree with Renze that it is too complicated and time consuming to design/build (and may not be needed anyway). My notion had been if the flap was an easy add to my bucket project I'd try it out. I should have guessed that answer right off. If it was easy we'd likely see more ejector buckets on the market, or they're impractical or they're not needed, a, b, c, or, d all the above.....

If you have experienced dirt sticking to your narrow bucket I like to hear about it including the conditions at which it occurs, soil type, etc. I'm not adamant there won't be a round two somewhere along the line. And if not me then maybe someone else.
 

Tractor & Equipment Auctions

2017 Ford F250 Super Duty Ext. Cab Pickup Truck (A46684)
2017 Ford F250...
Killbros 350 Gravity Wagon (A47809)
Killbros 350...
New Holland 316 Baler (A47809)
New Holland 316...
Massey Ferguson 124 Hay Baler (A47809)
Massey Ferguson...
2021 John Deere 5100E (A46443)
2021 John Deere...
2021 Doyle 8 Ton Trailer Tender (A46884)
2021 Doyle 8 Ton...
 
Top