Electrical Trenching

   / Electrical Trenching
  • Thread Starter
#41  
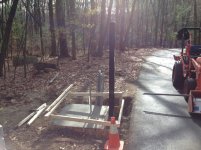
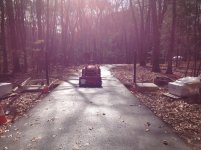
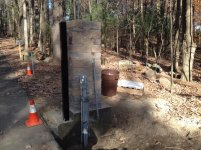
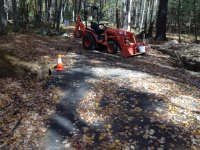
Here are some pictures of the final bore trenches and where the gate will be located.
IMG_0775.JPG
Gate location will be where the cone is. The bore will be right near the gate posts, probably just far enough so the cement doesn't encase the conduit. Everything will be tied in to a junction box and control box, which will be on the right side next to the gate post and hidden by a stone column, which i will build after the gate posts are cemented.
IMG_0778.JPG
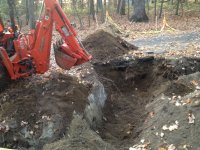
Entrance trench. This is a bit bigger than needed as it's where all the conduit runs will come together for the junction box. I'll have 6 conduit runs coming together here, which should make it interesting to wire up. Dimensions had to be 4' x 4' x 3' deep. The bore is at the very bottom of the hole, so nice and deep, which will prevent an issue if the driveway is redone.
IMG_0781.JPG
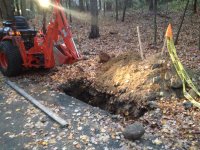
exit trench and far gate post hole. The dimensions are 4' x 16" x 4'. I made it a bit deeper to give a bigger target. A gate post will go in here and wiring for the slave opener and another stone post and light will be run through. I sleeved schedule 80 PVC inside HDPE pipe, which is what the NEC requires for 'boring' installations.

I believe that the digging part is almost done!
 
   / Electrical Trenching #42  
I sleeved schedule 80 PVC inside HDPE pipe, which is what the NEC requires for 'boring' installations.

I would say this installation has been any but boring!:laughing::laughing::laughing:
 
   / Electrical Trenching #43  
[B said:
Iowachild;[/B]3514102]I would say this installation has been any but boring!:laughing::laughing::laughing:


Right you are! One time I had to put a water line from one side of the road to the other and
that was NOTHING BUT "BORING" :D :D :D ;)

Arkaybee
 
   / Electrical Trenching #44  
The question is, would you do this all again for your lowest quote??
 
   / Electrical Trenching #45  
My question to that question is would the lowest quote have done the job to his standards.
 
   / Electrical Trenching
  • Thread Starter
#46  
The question is, would you do this all again for your lowest quote??
Good question. For me it was partially about the money (the trench may have doubled my cost), but also about doing a project and the satisfaction that comes from that. I'd definitely do it again. It was a lot of hard work, but I enjoyed most of it, learned a lot about using my BH and I now feel like I justified the purchase of the BH, which up until this point has been useful, but not strictly nessisary. If it keeps my physically active and outside then I'm happy!

My question to that question is would the lowest quote have done the job to his standards.

A very good point as well. I probably wouldn't have got as deep or as big of a trench and I'm sure they may have cheated a little bit here and there. For me part of the desire to do it myself was to minimize the disturbance to my trees. I like the natural screening they provide and there were 3 probably 20+ year old ones right in the route. Any contractor would have cut them or damaged them. I was extremely careful and worked around them and ultimately only a single tree had to be removed (a very twisted and broken pine, so no loss).
 
   / Electrical Trenching
  • Thread Starter
#47  
It's been a little while, so I thought I'd post an update. While the trenching is done, I thought folks might want to see what all the hard work was for!
Gate Posts set 4' down in concrete. I decided to go with a partial footer for the columns VS compacted base. The pads are 36" x 36" x 12+" (doesn't need to be a frost footer). Got them in just in time to avoid the cold weather.
IMG_0817.JPG
IMG_0819.JPG

Partially built column. These are mini-creta pillar kits and are a dry stack block. I used adhesive since they're just over 6' tall on the bases. After the first course is set and level it's about an hour per kit (each side requires 2 kits). Total install time for both columns was about 4 hours and that was with me taking lots of brakes and going slow on the last few rows, which were very high to lift the blocks
IMG_0824.JPG

Completed column without the cap. Caps were added after and were cast concrete. They were ~150 lbs apiece, thank god the FEL could reach high enough for me to just slide them into place, even with 2 people lifting them over 6' off the ground wasn't happening.
IMG_0834.JPG

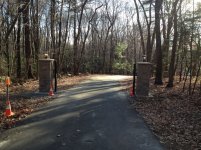
Columns completed and topped with lights. Electric was run without any issues and now we're just waiting for the gate itself and automation components to arrive. Lights are using a wireless 'z wave' switch, which I have setup on a timer.
IMG_0859.JPG
 
   / Electrical Trenching #48  
Awesome!!!

David Sent from my iPad using TractorByNet
 
   / Electrical Trenching #50  
Backhoes are fun, arn't they..... !!!!!! :)

They sure are. I'm always trying to find something to dig up with mine. lol

Chad
 

Tractor & Equipment Auctions

Case SR210 Skid Steer (A49339)
Case SR210 Skid...
2016 Chevrolet Sonic LS Hatchback (A46684)
2016 Chevrolet...
Midland WA Road Widener (A49346)
Midland WA Road...
Farmall 656 2WD Tractor (A49251)
Farmall 656 2WD...
Raccoon RC-G4.0 Golf Cart (A49251)
Raccoon RC-G4.0...
TPM 40' Container (A49251)
TPM 40' Container...
 
Top