Engine Overhaul Kama 554

   / Engine Overhaul Kama 554 #171  
You guys say I should put them in from the top to reduce the possibility of ring damage too.
I'll have to see if I can get the ring insertion tool down there or not.

It's tempting because I wouldn't need to strip down the top end at all.
No removing valve cover (and new gasket), fuel lines and injectors, intake and exhaust manifolds (and new gaskets), rocker arm assembly or valve lash adjustment, head bolts (and new gasket). So there is a lot of work I could pass over if I could get them out and back in from the bottom.

I'm not so sure pulling the pistons out from the top is a lot "faster and easier"(just to do that).
Once I have the crank removed (which I have to do anyway), and if the journal webs allow it (or if it possible at all), how much faster and easier could it be?:confused: Think about it ... Taking them out from the top requires me to push them up from/using the connecting rod side, then pull them out from the top. But it requires all that head removal work first (and re-assembly). Taking them out from the bottom requires pulling on the connecting rods and re-insertion (if possible). I understand if it's not possible because something physically prevents me from doing so, or if re-assembly becomes impossible, then yeah, I would do it from the top, of course.
So if there are any other reasons not to do it from the bottom, I'd like to hear about them. Something serious that would prevent me from doing it from the bottom regardless if it is possible or not.
Thanks,
Rob-
There is the possible impossibility, and then, if not, theres greater risk due to poorer access to get the rings into the bore. The ring land section is short, preventing guaranteed orthogonality, and is also slightly smaller diameter than the skirt so you cant compress the rings into the grooves quite fully with the compressor to further ease their safe entrance. You just have to keep a running critique of your comfort region.
larry
 
   / Engine Overhaul Kama 554 #172  
I thought you were only doing the bottom end crank shaft clearance checks and then if needed new crank and bearings. I thought the rods pistons were all pretty much all checked/replaced/repaired during the first go around. all the balancing info is probably just a fun endeavor and will not result in much real feel improvement or only help engine last a few more hours longer in long run. There is no reason to pull the top end out and even the pistons and rings rods ect. as the top end was all gone through and all had good clearance correct?

To do bottom end is flip engine over (Mark every thing for rod cap main cap side ect.), pull the connecting rod caps off and push the rods pistons UP to Top against the head/valves. use some rubber hose to protect the rod bolts and crank from being scratched when you pull the crank and put new one in (slide rubber hose over rod bolts.)


Once the rods are all loose and pushed up pull the main caps and bearings AFTER making sure they are all marked for side & position. this should free up the crank to be removed, note that the crank may stick in the bearings from oil suction some.

this should be pretty simple as it is inline 4 cyl engine. use some rags stuffed with newspaper in the block to hold the rods centered in the bores when the crank comes out that way they do not flop around.

You can leave the rods off and put in new main bearings and use the plasti-gauge to see what the clearances are and if you want/need the new crank then you will need to recheck all clearances. I imagine that the crank is probably OK and that that one rod that was slapping around may have become out of round/damaged the large end. I thought you have already checked the rods and all the clearances there though? The Main bearings can be replaced and put on the old crank IF the old crank is not damaged or scored and the polish it good on the crank. Not sure if you could check to make sure that there is not any twist to the crank or that any of the crank journals are not undersized. I think this was all due to a low warm oil pressure and that the engine was fine otherwise after the top end and piston/sleeves were done. I would look for the one main cap that was next to the knocking piston/rod to see of there was excessive wear on that bearing and that you should only need new bearings on the same crank if the journals all mic OK and are not scored or out of round.
Not sure if you had a chance or thought to try and do the oil pressure lube test to see where all the oil pressure was being lost as there could still be issues with cam bearings as well. you should try and find out for sure WHERE all the oil was/is going before pulling everything apart, I thought this was going to be something you were going to do with PAN off prior to splitting tractor though..


Mark
 
Last edited:
   / Engine Overhaul Kama 554
  • Thread Starter
#173  
I still don't have the bottom off the engine yet.
When I get it off, I will take everything said into consideration. I have also been thinking about what Mark brought up. That is, to skip balancing the rods and pistons if I have to take the head off to do it. I know I wanted to do that, but I really don't want to take the head and all that apart again just to get the pistons out. If I can get them out the bottom, and be certain to re-install them that way, then I will.

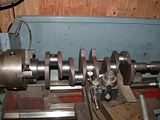
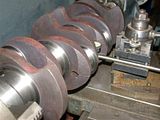
I spent most of the day checking out the new crank.
The rest of the day was taking off the front timing cover and housing and marking all the gear line up, etc. The new crank checks out real good. I set it in the lathe with a live center in the tailstock. Then indicated each main journal. I got the headstock dead on but could not get the tailstock dead nuts. I ran out about .001". As I indicated each journal, the ones closer to the tailstock also ran out in accordance with the tailstock. My impression is that the new crank is right on.

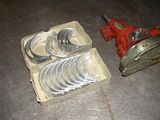
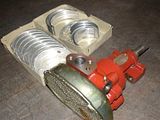
Also shown below are the new journal bearings and new oil pump.

 
   / Engine Overhaul Kama 554
  • Thread Starter
#174  
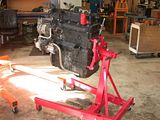
I also (finally) got the engine mounted to the stand.
I sure is nice to work on the engine with everything accessible like the. But when I started to flip the engine upside down, the wimpy handle started to bend. So the first thing I did was make a new handle out of a solid 1" bar (3rd photo below). I used a large pipe as an extension for leverage to control the engine. It was surprisingly balanced though...more than I thought. First thing to remove to get to the timing gear cover was the power steering hydraulic pump.

 
   / Engine Overhaul Kama 554 #175  
Looking good. Dead nuts....I thought only my engine machinist buddy and I talked like that. Another favorite is, "that really torques my nuts". :D
 
   / Engine Overhaul Kama 554
  • Thread Starter
#176  
This engine has a timing gear cover plate and also a timing gear housing.
They are separate, and you can only take the housing off after the cover and also after removing the gears inside. There are bolts that hold the housing on behind two of the gears. But before that, you have to take the pulley off. The pulley bolt is right handed thread. I had the engine marked on the pulley for TDC, and when the pulley came off, the key was on top.

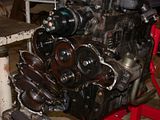
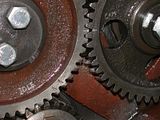
After taking the cover off, the first thing I did was mark all the gears that would be coming off.
Maybe you can see the markings in the close ups? That way, I can line up the meshing teeth exactly the same as when they came off. Chip told me if I did that, I wouldn't need to worry about timing later.

 
   / Engine Overhaul Kama 554
  • Thread Starter
#177  
After taking the bolts off behind 2 gears, I had to disconnect the fuel injector pump oiler and fuel supply hose which goes to the fuel filter. I was planning to leave the injector pump bolted to the housing ... same thing with the rear hydraulic pump. I figured the less I have to disassemble, the better.
So here is a photo of me holding the timing gear housing with injector and hydraulic pump still attached. Then I was able to flip the motor upside down so I could start splitting the bottom half of the engine to expose the crankshaft. I will get to that maybe tomorrow or when I get back from work on Wednesday.

 
   / Engine Overhaul Kama 554 #178  
Wow, i really do not want to filter through this whole post, but why are taking out the crank? As far as balancing, dont bother. In-line 4 cylinders are one of the worst engines for shaking by design. A 3 or 6 cyl in-line is much better for cancelling out the natural shaking by design
 
   / Engine Overhaul Kama 554 #179  
As far as balancing the rods go, unless the crank is balanced as sell, I wouldn't worry about the rods.
 
   / Engine Overhaul Kama 554 #180  
After taking the bolts off behind 2 gears, I had to disconnect the fuel injector pump oiler and fuel supply hose which goes to the fuel filter. I was planning to leave the injector pump bolted to the housing ... same thing with the rear hydraulic pump. I figured the less I have to disassemble, the better.
So here is a photo of me holding the timing gear housing with injector and hydraulic pump still attached. Then I was able to flip the motor upside down so I could start splitting the bottom half of the engine to expose the crankshaft. I will get to that maybe tomorrow or when I get back from work on Wednesday.


Rob-
You realize when you have your own TV series you'll have to change into brand new "clean" clothes! Those TV guys are never dirty! Quite a few friends get annoy at how clean their "work" shops are on TV. Amazing how much bigger the engine looks seperated from the tractor. Like Mark's idea about leaving the pistons in and packed with rags and newspaper to keep em centered. Thanks for sharing -Ed
 

Tractor & Equipment Auctions

TRAILER AXLE (A51244)
Agco 8200 Flex Grain Platform (A50514)
Agco 8200 Flex...
1998 Kenworth Tandem Grain Truck (A50514)
1998 Kenworth...
2019 HONDA PIONEER 5 1000 UTV (A50459)
2019 HONDA PIONEER...
UNUSED CFG Industrial MH12RX Mini Excavator (A47384)
UNUSED CFG...
2019 GENIE GTH-5519 TELESCOPIC FORKLIFT (A51242)
2019 GENIE...
 
Top