FEL Cylinder Leaking

   / FEL Cylinder Leaking #21  
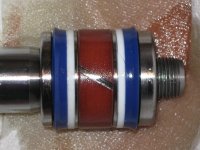
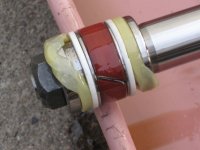
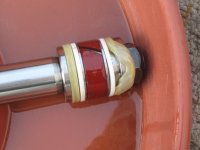
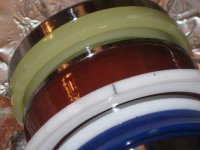
I had not heard of heating them, that would cause them to expand more, might work, never tried it. I put them on like they came using plastic guides. Good luck with your rebuild.
 
   / FEL Cylinder Leaking #22  
I heated the seals in a pan of hydraulic fluid to 160 degrees. The seals were soft and pliable and slipped into position. My question is are they seated properly? The one edge of the seal is tilted. Is this normal or do I need to jockey the seal around so the edge is more flush. See the attached pictures.....

That looks bad. It will not work. 160 degrees was not too hot at all. It looks like the inner lip isn't in far enough. Maybe take a pick or a very small screwdriver and see if you can roll the inner lip? The seals should look installed almost the exact same as they do not installed. Do you have spares? On that piston, they really don't need to be heated. You could snap them on with your palm. They are pointed the proper direction. Are you sure they are the correct size?
Andy
 
   / FEL Cylinder Leaking #23  
That looks bad. Andy

Andy,

Thanks!!!! for checking in......... I jockeyed the seals around and got the bottom of the 'U' to seat up against the white teflon washer. See the attached picture. I used a rounded edge tool so hopefully I did not nick the seals. I did not order any extra seals but I will know to play it safe next time and order a couple extra.

Don
 

Attachments

  • IMG_0897.JPG
    IMG_0897.JPG
    109.9 KB · Views: 348
   / FEL Cylinder Leaking #24  
The first pictures I posted in this thread showed both rods. Three out of four seals were splooged out of place and one seal looked OK. There's a perfectly good explanation why the one seal looked good. Unfortunately, I don't have a cut and dry reason why the other three splooged out. The first two pictures are duplicates of the ones I first posted. The third picture shows a close up of the seal that did not splooge out. It looks to me like it was mounted backwards.

Don
 

Attachments

  • IMG_0818.JPG
    IMG_0818.JPG
    81.3 KB · Views: 200
  • IMG_0831.JPG
    IMG_0831.JPG
    75.5 KB · Views: 212
  • IMG_0886.JPG
    IMG_0886.JPG
    86.4 KB · Views: 295
   / FEL Cylinder Leaking #25  
It would be a good idea to put Locktite on the threads when you put the nut on.
 
   / FEL Cylinder Leaking #26  
OK, here's all 4 seals mounted. One trick I learned is to slide the white telfon washer (it's has a slit in it) up and out of the way before mounting the seals. With the telfon washer out of the way it created enough clearance for the seals to slip right into place the proper way, then slide the teflon washer back in place. The ram that's mounted on the rod are the original seals that I had to jockey around to re-seat them properly.

Don
 

Attachments

  • IMG_0889.JPG
    IMG_0889.JPG
    96.7 KB · Views: 226
  • IMG_0892.JPG
    IMG_0892.JPG
    94.7 KB · Views: 227
  • IMG_0888.JPG
    IMG_0888.JPG
    98.8 KB · Views: 286
   / FEL Cylinder Leaking #28  
Don,

I would ask Wayne what color Locktite to use.
 
   / FEL Cylinder Leaking #29  
Yeah, that one seal is backwards. But, there are applications where that would be an advantage. I have seen plenty of cylinders that power one way and the other way has very little load so all the seals point one way.
JJ gives good advice, clean the rod threads and nut real good with brakleen then use red loctite. That's what I do anyway.
The seals look much better now. You should be okay. Some oil on the seals and a little patience during assembly and you should have a pair of good cylinders there. Take your time assembling these. Wiggle the rod around to get the seals past the threads of the cylinder housing. If you try to force it, you will tear up the new seals. Be gentle, but don't be afraid to push a little. It takes a feel for it, but you will get it.
I notice no new wear band? Not the end of the world, but next time replace it. Another thing I like to do when assembling is to stagger all the seams, like doing rings on a piston for an engine. Look at your picture and you will see what I mean. You could leave it like it is and probably never notice a difference but I get silly like that sometimes. Just a habit I guess.
Good luck, Andy
 
   / FEL Cylinder Leaking #30  
I notice no new wear band? Not the end of the world, but next time replace it. Good luck, Andy

Andy, could you steer me in the right direction on sizing the wear bands? I looked at one of the wear bands but did not fully remove it off the piston. I didn't see any size marking from what I could see.

Don
 
   / FEL Cylinder Leaking #31  
Andy, could you steer me in the right direction on sizing the wear bands? I looked at one of the wear bands but did not fully remove it off the piston. I didn't see any size marking from what I could see.

Don

There are usually no markings on the wear band. Just measure it with a decent set of dial calipers. Lay it on a table, measure the height, ID and OD. Actually, for the ID and OD you want the cylinder bore and the piston OD. It's pretty easy. It is a good idea to replace it since you have it apart, but it's not the end of the world if you don't. To remove it, just separate it and slide it down off the piston. They are fairly flexible, don't worry about breaking it.
 
   / FEL Cylinder Leaking #32  
I checked the size chart for the MH607 and they are not offered in the size I need(35x45x6.0).

I don't have the right tool to measure the bore size....but I'm working on it. :)

So the cyl ID looks like 45mm or 1.77".

Your latest pix look good.

Thx for posting, Don.
 
   / FEL Cylinder Leaking #33  
So the cyl ID looks like 45mm or 1.77".

Your latest pix look good.

Thx for posting, Don.

I found the size in the loader manual. 45mm x 589mm (1.77 x 23.18")

Now that I think about it, the 'local hydraulic shop tech' did measure the inside of the cylinder and he also said 45mm.

Thanks for checking in. It's been a real (ongoing) learning experience for me.

Don
 
   / FEL Cylinder Leaking #34  
Andy,

Need some assistance with the wear bands.

Measurements are:
Cylinder bore (ID): 45mm
Piston (OD): 42.65mm
Groove 'wear band' seats in: 39.95mm
Height: 14.87mm

1. What material is this wearband made of?
2. Can you point them out on the www.mfpseals.com website?
3. Rule of thumb 'torque spec' for nut that holds piston in place?

Thanks,
Don
 

Attachments

  • IMG_0899.JPG
    IMG_0899.JPG
    106.6 KB · Views: 229
  • IMG_0904.JPG
    IMG_0904.JPG
    103.4 KB · Views: 250
   / FEL Cylinder Leaking #35  
Andy,

Need some assistance with the wear bands.

Measurements are:
Cylinder bore (ID): 45mm
Piston (OD): 42.65mm
Groove 'wear band' seats in: 39.95mm
Height: 14.87mm

1. What material is this wearband made of?
2. Can you point them out on the www.mfpseals.com website?
3. Rule of thumb 'torque spec' for nut that holds piston in place?

Thanks,
Don

Martin Fluid Power - A worldwide distributor of seals, packing, gaskets, and seal repair kits since 1977
MWRP 45x15x2.5
45mm is the od, 15mm is the height, and 2.5mm is the thickness. Your piston is 39.95mm or 40mm for arguments sake. 45-40=5mm, divided by 2 because you are measuring both sides of the wear band gives you a thickness of 2.5mm.
As far as a torque spec goes, I figure the thread od and look at a torque chart. They can be found in any good catalog. With torque, more isn't always better.
Good luck, Andy
 
   / FEL Cylinder Leaking #37  
Cylinder reassembled without a hitch. Oiled the inside of the cylinder and the seals first, then with a little pressure and 'wiggle' the first seal slid in. A little more pressure and the second seal slid in.

Finished the reassembly, some fresh paint, then remounted the curl cylinders back on the loader frame. Initial results are promising. Raised the loader bucket waist high, leveled the (empty) bucket which extended the curl cylinder about 3.5". After 5 hours there was no leakdown, the cylinders did not extend at all. After 14 hours the cylinder moved out about 1/8" of an inch. :)

Just in time for the late season snow storm :eek: we're getting.

Don
 

Attachments

  • IMG_0908_1.JPG
    IMG_0908_1.JPG
    89.7 KB · Views: 241
  • IMG_0912_1.JPG
    IMG_0912_1.JPG
    91.5 KB · Views: 231
  • IMG_0910_1.JPG
    IMG_0910_1.JPG
    67.2 KB · Views: 223
Last edited:
   / FEL Cylinder Leaking
  • Thread Starter
#38  
I thought I'd update you guys on this project that I finally finished up about a month ago. I got the cylinder off easily and only dropped about a pint of fluid on the garage floor.

I ended up taking the cylinder to the local Kubota dealer. It took them about a week to get the parts ordered and installed and about another week for me to pick it up. In the meantime I got my truck stuck down by the pond, so it stayed stuck until I got the cylinder back and the tractor put back together.

The final cost was $20 for parts and $85 for labor. I feel like I paid more than I should have for the labor, but it's not something I felt comfortable doing. Next time I'll spend more time looking around for a local independent hydraulic guy.

Thanks for the guidance and help you guys provided!
 
   / FEL Cylinder Leaking #40  
Does seem a bit much to just replace the o-rings. Did you get an estimate up front. Did they indicate that they did anything other then replace the seals? They may have a minimum charg, but it still seems execssive.

Andy, don't want to hear anything on my reply. I know, freedom of speech.
 

Marketplace Items

1996 FORD F-SERIES FLATBED TRUCK (A52706)
1996 FORD F-SERIES...
Cummins 6-Cylinder Diesel Engine with Transmission (A59230)
Cummins 6-Cylinder...
UNUSED JCT 72" HYD 4N1 BUCKET (A52706)
UNUSED JCT 72" HYD...
Schulte SBW800 Rock Windrower (A61307)
Schulte SBW800...
2022 Brush Wolf 4800X Severe - Duty Excavator / Backhoe Brush Cutter (A57024)
2022 Brush Wolf...
2014 Freightliner M2 106 Palfinger PK22002EH 6 Ton Knuckleboom Flatbed Truck (A55973)
2014 Freightliner...
 
Top