First repair that needs to be completed on my new LS3025H

   / First repair that needs to be completed on my new LS3025H
  • Thread Starter
#11  
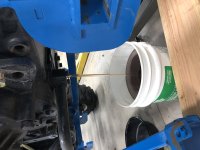
Now before I take any bolts out, I than drained the transmission in both drain bolt locations. I put all the new hydraulic fluid back in there containers sealed up.
IMG_6322.JPGIMG_6320.JPG
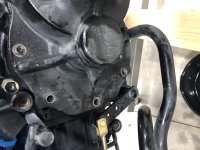
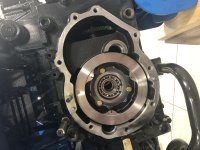
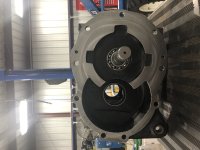
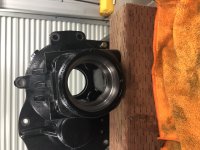
After that was complete, I was than able to take all of the bolts out of the final drive assembly so I can finally get to the main problem that needed to be fixed. This is as far as I was able to go today. Tomorrow, hopefully, I will get the actual repair completed.
IMG_6330.JPG
 
Last edited:
   / First repair that needs to be completed on my new LS3025H #12  
So far so good! I'm following along closely. Hope everything continues smoothly!
 
   / First repair that needs to be completed on my new LS3025H
  • Thread Starter
#13  
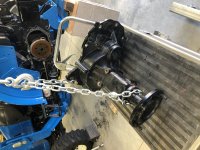
Another update and it has been a VERY long day. Lets start from this morning around 8 am. I read the repair manual again for the brake section as well as the final drive section. It states the final drive unit was heavy and to use a cherry picker or forklift. So I had to block up the tractor so I could use the engine hoist. Once I had the tractor stable and sound I than hooked the engine hoist to the final drive unit.
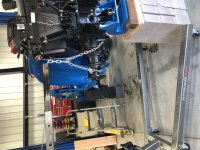
IMG_6331.JPG
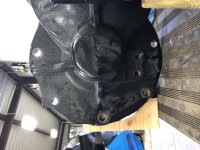
That's when the problem I thought was resolved showed its ugly head once again. The brake actuator is in the way. Even though I have the brake all the way down, the actuator is still a 1/4" in the way and would not allow the final drive to come out. So I called my Dealer at 9 am and we went over everything as well as discussed pics. He than called LS to see what steps we needed to make. After he called me back, the answer from LS was "it should come out"! That's it, it should come out. Well I had him on speaker phone and as I did a little bit of prying, I was able to get her out. HOWEVER, that will not work getting her back into place. So we came up with two viable options. 1. As you can see from the picture, you can see the paint mark on the final drive that for whatever reason they decided to cause the casing to have a hump right in the location of the brake actuator. We can grind off what is painted and the issue would be resolved.
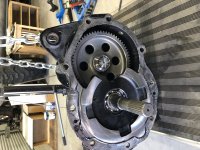
IMG_6333.JPGIMG_6335.JPGIMG_6338.JPG
2. We came up with another plan that may or may not work but is worth a real try. The final drive assembly has a stud at top and at bottom which helps aid in a clean install as well as keeping the critical components in place. We wanted to see if we could take out the bottom stud. IF so, I think this would be the correct step in getting the final drive off as well as back on. I was able to get the stud out very easily by putting on the two nuts and using the inner one to back out over the outer one. Now that the stud is off, I am going to try and reinstall the final drive as a test trial before adding silicon gasket maker to the transmission casing. If it works as planned. The right way of taking the final drive off and on would be to take out the lower stud "first", than proceed to full removal.
IMG_6336.JPGIMG_6337.JPG
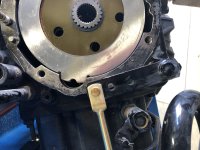
Now I am finally at the point of where I got another snag. I looked throughout my "entire shop of 2800 sq feet, and I could not find my 3-16" or 1/4" cold chisel. This is needed to take the bent tab back off the shaft so you I can take off the nut. Of course when you need a tool so bad, of course you get just a tad upset and that just makes matters worse. Bottom line, they grew legs and left the building. So now I was on a hunt for a cold chisel so I can take off the 50mm nut on the back of the drive shaft so I can take the drive shaft off and take the bad oil seal out. Well once again, I drove all over town and of course it was the last and final stop that had at least a 1/4" cold chisel, not curved and a 3/16" would be optimal, but I will make it work. I will get started on that part of the repair in the morning. I will also go into more detail about the brake clutch packs as well. You will want to make sure you have brake cleaner and rags to clean up everything.
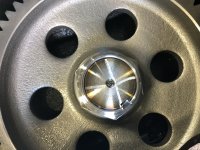
IMG_6334.JPGIMG_6339.JPG
UPDATE on my new rear remotes. I was told by my Dealer, that the rear remotes will now take the place for connecting my back hoe up as well. That is great news, if you could see in some of the earlier pictures. You will see how the two hoses are literally hanging and wearing the paint off the safety shield to the PTO shaft. They also look terrible and unfinished. The kit is on it's way now and should be here by the weekend. I will do a complete write up of that install as well. I will be taking the BH hoses off and will also need to take off the right rear tire as well as the fender to gain good access for a clean install. So I will not technically be finished with the rear end till after the rear remotes are finished. This means I will take the ROPS completely off since I have to take off the right fender.
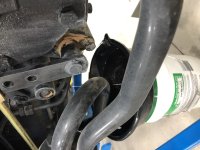
 
   / First repair that needs to be completed on my new LS3025H
  • Thread Starter
#14  
Well my worst fears came to bare its ugly head. As a mechanic, you always have to wonder why a part failed and what may or may not had caused it to do so. In this case, I new I was losing a fare amount of hydraulic fluid of a couple of quarts when I changed the fluid. That is enough to know you have a pretty big leak.

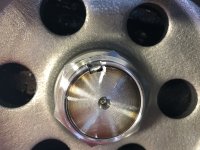
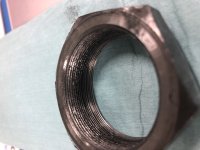
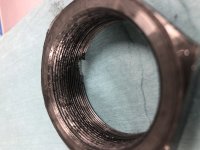
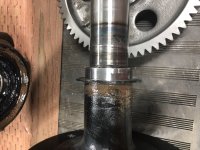
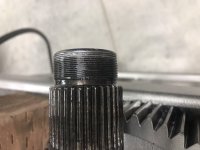
So first thing this morning I was really excited to get started on "Big Papa Smurf", that is the name of my tractor. My amazing college girls and son thought of it. Anyway, I was able to pull the tab back on the nut and was not able to budge the nut with the ratchet. The book says 8lbs of torque when installing the nut so it should be real easy right? Well I had to pull out my heavy hitter impact gun to take it off. Low and behold, the threads were stripped the second half down of threads, not the beginning side where most stripped threads typically are. So when I pulled the shaft out with the dead blow hammer, you can clearly see the seal had been compromised by another means. The shaft got to hot at both bearing locations and melted the seal which caused it to fail. No metal in the case and the outside bearing definitely got too hot, the inside bearing doesn't look bad. Any thoughts on what would of caused this?

My thought was they installed the nut to tight which caused to much pressure on the bearings and also stripped the shaft nut in the process?

I called my dealer and the owner Scott is not in today as he is at a training. I sent him the email with pictures. Now I will need a new shaft, new nut and possibly new bearings! NOT HAPPY

The right side is dry as a bone, no failure there.
IMG_6344.JPGIMG_6345.JPGIMG_6346.JPGIMG_6347.JPGIMG_6349.JPGIMG_6350.JPG
 
   / First repair that needs to be completed on my new LS3025H
  • Thread Starter
#15  
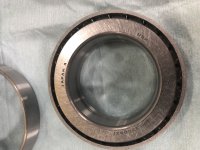
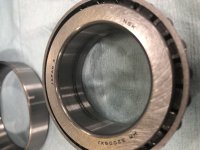
Since I am dead in the water, I thought I would be proactive and get everything cleaned up and ready for when the parts come in. I attached the outer wheel bearing that you can see was spinning on the shaft.
IMG_6351.JPGIMG_6352.JPGIMG_6353.JPGIMG_6354.JPGIMG_6355.JPG
 
   / First repair that needs to be completed on my new LS3025H #16  
Excellent write up. It sure looks like someone went nuts with an impact gun putting that nut on and over torqued it and put too much preload on the bearings.
 
   / First repair that needs to be completed on my new LS3025H #17  
If that is warranty work , why are you doing it ? I would hate to see what else is wrong with that tractor . With you doing the work that dealer has got an out for anything else that happens . That is one piss poor dealer . Is he paying for parts and your time ? Good luck .
 
   / First repair that needs to be completed on my new LS3025H #18  
With my repairs that are under warranty, the dealer got the parts to give to me. I make the repairs. He knows that I am a decent mechanic and can make those repairs faster than his service technician who is weeks out on calls can. The work is still warrantied, just gets done faster than he get it done. Also, no one cares more about my tractor getting done right the first time than I do. Where a dealership mechanic comes out in the cold, makes the repairs quickly due to time constraints and temp, he/she might miss something. Where when I do it, I pay attention to the small details, make sure things get torqued correctly, seals are seated, etc. Not saying all dealer mechanics are like that, only that I care more about the tractor than any mechanic does.
 
   / First repair that needs to be completed on my new LS3025H
  • Thread Starter
#19  
Thanks for your reply Kevin37B.

I mentioned in the beginning of this write up on why, but I will answer to you sense you took the time to ask. My dealer is Hobby Tractors. They are located in a small town on the top of Utah. They sell Branson tractors as well as zero turn mowers. The only other dealer closest to me was actually in Arizona where I live, but outside of Sierra Vista which is 4 hours away from me. I toured my closest Dealer and they brushed me off completely even though I was paying cash.

When I was introduced to Lance and Scott who are Co-Owners of Hobby Tractors, they went out of there way to answer ALL of my questions and concerns. In fact, they spent WEEKS helping me determine which tractor would be best for me. We also discussed my concerns with "Warranty" work. Scott being in charge of all maintenance service and warranty claims. We discussed how he would be more than happy to offer me three different options depending upon the warranty work that needed to be completed.

1.) We can arrange for Hobby Tractors to pick up my tractor and take it to the closest LS service dealer for repairs.

2.) I can bring the tractor to Hobby Tractors or any LS service dealer myself due to time frame.

3.) I can perform my own warranty work since I am a mechanic and have my own shop and tools to perform such tasks. But at any point if I chose "not to" perform any repair work, this would be my choice and Scott would follow through with picking her up and getting the warranty work completed.

Scott is only full filling my wishes of being able to save "me" time and down time due to distance from my closest Dealer for warranty work. At anytime, Scott can tell me he would no longer allow me to service my tractor and than my only choice is to bring her in for warranty repair.

In fact, Scott is losing money by not doing the work himself or his employees to do the work and get paid for the labor portion of the repair by LS. I openly thank Scott for being so gracious in my request and value his work ethic and being so flexible to my needs. At no point has Scott or Lance pushed me in anyway to make any call or judgment to do my own warranty work.

Scott has ordered the rest of the parts I need to repair the tractor correctly and according to LS Service and the Service manual. I have documented everything to include pictures and provided everything Scott asks of me. I have also included him in this write up in which he has full access to for full disclosure of my steps and the findings.

Now here is what we think "MAY" of happened that I suggested. I believe the nut and or the shafts higbee cut was cut wrong. The higbee cut has to be placed in the exact location so when you thread on the nut, the indention tab should land at the shaft indention area when the nut gets torqued down at the specified rating. In our case it was 8lbs in our unit of measurements. If the indention tab on the nut is no where near the indention on the shaft. You would have to continue to torque the nut down till the tab reaches the indention on the shaft. This is what I believe happened. As of now the parts are on order and I will continue this write up on the repair being completed "Correctly" as my arrangement with Hobby Tractors have allowed me to do so. I greatly appreciate you for your concerns.
 

Tractor & Equipment Auctions

2015 CATERPILLAR 299D XHP SKID STEER (A51242)
2015 CATERPILLAR...
2013 KENWORTH T370 DUMP TRUCK (A51406)
2013 KENWORTH T370...
24' Free Standing Panel with Swing Gate (A50515)
24' Free Standing...
2007 Hyundai Sonata GLS Sedan (A51694)
2007 Hyundai...
2014 Dodge Grand Caravan Van (A50324)
2014 Dodge Grand...
2025 Swict 60in Bucket Skid Steer Attachment (A50322)
2025 Swict 60in...
 
Top