Ford 1920 clutch Help needed

   / Ford 1920 clutch Help needed #21  
MIkeWard said:
I went to the local auto parts- Pep Boys and looked at a clutch universal alignment tool. $19.99 not bad
Does anyone know If I need metric or US.

I would assume metric and if no one knows I'll bring in the new pilot bearing when I get it and try it out to see for sure.

The NH dealer told me he has one on order for a year and still hasn't come in.

By the way there was also a $111.00 core charge on the clutch. They c alled back after I ordered it to add this. I just need to mail(UPS) it back to them for a refund. While he was on the phone He told me the list on the clutch was now $6)). and change but the honored the internet price for me since they were slow to update the price online, So far Messicks seems like a good company to deal with.

Mike


Sounds good Mike, a guy with a short piece wood dowel can make an alignment tool as well. The dowel dia should match splined hole dia on the clutch plate. No.. you do not need to cut splines in the dowel wood but need to make the tip of the dowel in a cone shape (same as sharpened pencil) to have the tip of the dowel and center of dowel dia in line. A lot of clutch disk reman outfits throw in a the plastic tools for nothing. I don't think there is even a dollar worth of material in it.

JC,
 
   / Ford 1920 clutch Help needed
  • Thread Starter
#22  
I found this post by john_bud under the title clutch job. I'll post it again hope John doesn't mind.

Things you will need.

Manual
sockets for all the bolt/nut sizes. (many may be larger than 1")
Air tools (nice, but honestly not needed)
2 sturdy adjustable jack stands (I like the 6 ton versions as a minimum)
2 more sturdy jack stands if you keep the loader on.
Bottle jack that can reach the bottom of the oil pan and lift it 2"
Roll around floor jack
Concrete or other hard floor (not asphalt unless you put plywood on top)
Clutch alignment tool (cheap plastic ones work. I made mine from wood on a lathe)
Digital camera, 2 dozen large boxes, a box of gallon zip lock bags, notebook, and a sharpie

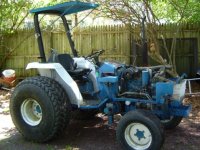
If you have a loader, it may or may not need to be removed. Depends how it is mounted.

Pressure wash the tractor several times so it is clean enough to eat off. I will take several washings as there seems to always be spots that are behind brackets and under things that don't get clean.

Read the manual all the way first, then do it again.

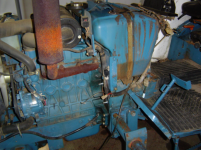
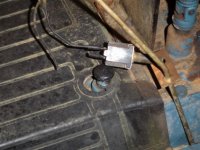
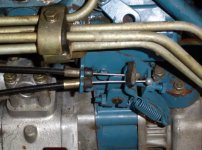
As you take each sub-assembly apart photograph it in the original condition and several times as you take it apart. Good closeups of the bolts nuts and orientation. Put the parts in labeled boxes and the nuts/bolts in bags in the box. Mark down the picture numbers and what they are for in your notebook and reference that on the box.

Extreme? Yes, by far. But, if you have questions on what a part is or where it goes the pictures will answer them. I have never seen a person get "over their heads" when doing it this way. I have seen many people all but junk equipment when taken apart in a rush like a 3 year old at Christmas.

Align the clutch disc with the tool to the flywheel. Bolt on the pressure plate. The better the alignment, the easier it is to slide the transmission back. If it is off a touch, you can manipulate the clutch peddle to release the disc. I always keep the trans in neutral so the input shaft can rotate to align the splines. If it has issues, putting it in gear and rolling back 1/2" then back to N and forward again often fixes it.

HOT TIP ALERT! HOT TIP ALERT! HOT TIP ALERT!

Get some bolts that are of the same diameter as the ones that bolt the trans to engine. They should be about 3" too long, but not so long as you couldn't remove them with the tractor together. Cut the heads off the bolts and grind them to a round point. One per side at about the mid point of the trans case. These are guides to help hold alignment between th trans and engine. You still will have to wiggle and woggle to get it to slip together, but this tip will make it super easy.


DIRE WARNING! DIRE WARNING! DIRE WARNING! DIRE WARNING!

Never force the transmission and engine together. It will damage the clutch possibly the input shaft. The parts will slide together when you have them aligned. Little force required.

Ok, you can do it alone. It will take you one full 8-12 hour day to take the tractor apart and get it split if you go slow and take lots of pictures (check them on the computer while you are doing it), write down all your documentation etc. It takes a "pro" 1-4 hours to get it all apart depending on models. Don't get in a hurry.

It may take you a couple days to clean all the parts, degrease them and repaint. Depends how crazy you get and how spiffy you want it to look.

Putting it back together should be in the 6-8 hour range. Figure on 1-2 hours to get it aligned. Take you time, look at it from both sides. If you aligned it correctly, it may slide together the first try and that would be 15-30 min. Then all the little parts back on will be 4-6 more hours.

Those are times that it took me doing it alone the first time on a tractor with a loader and hoe frame that blocked the rear end from moving freely.

Clutch disc, Pressure Plate, and bearings -> under $200.
Fluids -> 50$
Savings -> $1000.
john_bud
 
   / Ford 1920 clutch Help needed
  • Thread Starter
#23  
The above post seems to have great advice!

TCBoomer wrote to use an engine hoist- I was really thinking of using a 3ton hyd jack with rollers underneath.
The top of the 1920 engine is 4 ft high and as I look and measure it seems evenly spaced over the wheels.
don't know if the engine hoist will be high enough.

At this point I'm waiting for the parts and going over all that needs to get done! Re reading repair manual.
I feel like a combination of cramming for an exam and getting all the details done for a wedding

Thanks for all your help TBN
Mike
 
Last edited:
   / Ford 1920 clutch Help needed #24  
Most cranes like mine will work at that height no problem. Think of the height needed when an engine is removed from a car/truck. It has to clear the fender or radiator support.

3ton hyd jack with rollers underneath

Would that be a floor jack? If so, that would probably work too. Just remember it's all about balance. When you separate the half's, be prepared for anything. By that I mean just have sufficient support in place to prevent something from flipping.

When I did mine, I determined that the rear half was heavier. So that became the stationary piece that was blocked and supported in place. The front half was lighter and easier to roll away. If you use a floor jack...if I understood you correctly?...put a block of wood under the oil pan and position the jack in place from the front of the tractor. This was you can just pull the floor jack straight back a few feet, and then put a couple jack stands in place to hold it steady. I wouldn't hesitate to do it this way if I didn't have a crane.
 
   / Ford 1920 clutch Help needed
  • Thread Starter
#25  
TC yeah it's a floor jack.
The repair manual states to chock and support the FRONT and to roll the rear half away. Every time I think about this it seems like the front is the smaller half and that it would move easier. I guess I'll just follow the manual.

Mike
 
   / Ford 1920 clutch Help needed #26  
MIkeWard said:
TC yeah it's a floor jack.
The repair manual states to chock and support the FRONT and to roll the rear half away. Every time I think about this it seems like the front is the smaller half and that it would move easier. I guess I'll just follow the manual.

Mike

Mike,
That was a great post from John Bud. That's the way I approach it. I am such a visual person and I dig it when he says take lots of pics as pics never lie and with short memory pics are best archive. I also use several apple boxes, cut out the sides, take a sharpie pen , draw up a section,use scratch awl or screw driver and poke holes and put the bolts in the same sequence they are installed (i,e head bolts or camshaft hold down bolt or what have you. In case of 1700 if I split it most of the weight stay in the back but I still use a carry all to totally stabilize the back. For the front it is not bad to have a boom, chain hoist to make sure the front does not flip, but I prefer either a transmission jack if you have, or a floor jack on wheels. I set the floor jack in an orientation that helps me to roll the front back . A few jack stand to stabilize things and everything else John said. I wished manufacturers would include 2 to 4 tabs/ ears around the transmission with threaded holes facing engine block, by staring 4 bolts and tightening them slowly one could separate engine and transmission almost effortlessly and wit much control.

JC,
 
Last edited:
   / Ford 1920 clutch Help needed
  • Thread Starter
#27  
Removed Bh and loader.

The clutch finally was delivered. Boy is it heavy- about 75 lbs.
I power washed the tractor after removing tins.
Removed canopy - I think I will make a better one.
 

Attachments

  • no tins.jpg
    no tins.jpg
    108.5 KB · Views: 499
   / Ford 1920 clutch Help needed
  • Thread Starter
#28  
The weather has been rainy cool and lots of things falling from the trees so we bought a temp carport and put it over where I am fixing the tractor. Garage is full so it is outside on the basketball court for repair.
 

Attachments

  • shelter.jpg
    shelter.jpg
    104 KB · Views: 309
   / Ford 1920 clutch Help needed
  • Thread Starter
#29  
Got the whole dash disassembled.
The whole space underneath the dash had a HUGE mouse nest.
I am lucky none of the wires were chewed.
 

Attachments

  • leftside.png
    leftside.png
    487.7 KB · Views: 436
  • rightside.jpg
    rightside.jpg
    122.2 KB · Views: 482
   / Ford 1920 clutch Help needed
  • Thread Starter
#30  
Found a couple of problems.
The outer throttle cable is very loose and not really attached underneath the floor. It is connected to gas petal and the pump.
You can see how loose it is at the pump. Do i just need to stretch it out and clamp it in several places?

The other thing I found was a broken wire on parking brake sensor. Should I try to repair it by soldering connection?
A;so looks like it is missing a nut to attach it to the parking brake bracket.

So far so good
Mike
 

Attachments

  • brake light.jpg
    brake light.jpg
    112.2 KB · Views: 388
  • throttle.jpg
    throttle.jpg
    114.4 KB · Views: 397

Tractor & Equipment Auctions

Gladiator 12-16.5 Tires (A50322)
Gladiator 12-16.5...
(2) Tires (A50121)
(2) Tires (A50121)
2020 Ford F-150 Crew Cab Pickup Truck (A50323)
2020 Ford F-150...
2018 Bobcat T590 (A50120)
2018 Bobcat T590...
2016 Bobcat E85 Midi Excavator (A50322)
2016 Bobcat E85...
2016 Ford Fusion SE AWD Sedan (A50324)
2016 Ford Fusion...
 
Top