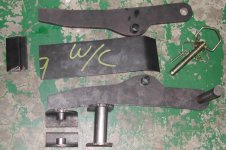
Homemade Articulated Mechanical Thumb

   / Homemade Articulated Mechanical Thumb #21  
3RRL said:
I can paint them too.

????? Seems like the last "special project" had a dedicated painter. What did you do wrong to make her unavailable for future jobs? :)

This project is turning out great so far. Kind of a hard way to "cut teeth" though. I really like your v-block setup.
 
   / Homemade Articulated Mechanical Thumb
  • Thread Starter
#22  
Thanks again guys,
K7147,
Of course proof is in the pudding so I need to get it done and welded to the backhoe to try it out. I'll probably post a video and some photos. (If it works:D )
You know Eddie,
There is nothing like a bigger hammer if all else fails. LOL ... I've got a couple big ones in my tool boxes too....I'm not exempt from Murphy's Law either.
tlbuser,
Well, I'm hoping I've been good and she will do it again for me. I've got to get the parts welded and cleaned and then she will do her magic.

I do have some concerns as to what 63DH8 said:
I used to work for an outfit that designed and built bucket thumbs. Unless you use a common pivot point, whatever you are carrying will "roll" in the thumb/bucket. Use your CAD to roll the bucket and thumb. You'll see how the thumb will be closer and further away as you roll the bucket. Our boss tried to get us designers to make a thumb that was prebuilt that would be welded onto the stick (excavator arm), but it wouldn't work due to the rolling effect. That made grabbing then rolling out the bucket impossible to do without dropping what was carried.
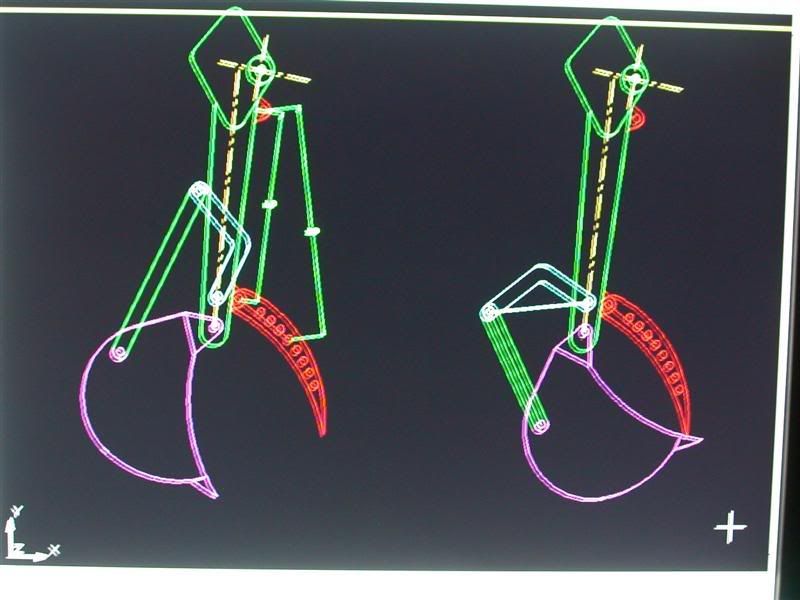
I used the CAD to move the linkage and bucket from the pivot points in the picture in one of the first posts where there are multiple drawings of it.
You can clearly see how the bucket and jaws are approaching each other.


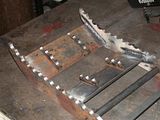
It seemed to me the bucket and jaws approach each other to "grab" stuff. Does anyone see a problem where if I "curl" the bucket to grab something it will drop out? I've welded 2 plates across the jaws to help with stability and to catch stuff.
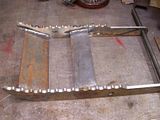


Maybe I should add some extra teeth on the plates ... kind of like a sharks mouth? I do have those drilled out remnants I could cut up and weld to them.
Sort of like this, except I would make the rear ones lower profile. Or do you think adding them makes no sense and could just collect dirt? It does look pretty cool though?


I'm worried I missed something here? I do realize the thumb pivot is about 4" away from the bucket pivot. I guess what he is saying if the object I pick up is smaller than 4" it could "roll" up the thumb towards the gap between them. But then again, I wasn't planning on using the backhoe for stuff THAT small. More like basketball or beach ball sized stuff.

If anyone has any input on this I would appreciate it.
Thanks,
 
   / Homemade Articulated Mechanical Thumb #23  
3RRL said:
You can clearly see how the bucket and jaws are approaching each other.


It seemed to me the bucket and jaws approach each other to "grab" stuff. Does anyone see a problem where if I "curl" the bucket to grab something it will drop out?

I've never done this, so it could just be that I don't understand it, but wouldn't it be better for the bucket and the grapple to come together at the very bottom position?

I understand that with a fixed thumb, you have to bring the material to the thumb, then trap it together, but if you didn't have to do it that way, why would you?

I don't see how it would matter too much with big objects to pick up, but smaller stuff, like a hundred or two hundred pound rock that is maybe more flat than tall.

Of course, maybe it doesn't matter. Maybe you just push the object to the thumb.

Thanks, this is very interesting.

Eddie
 
   / Homemade Articulated Mechanical Thumb #24  
EddieWalker said:
I've never done this, so it could just be that I don't understand it, but wouldn't it be better for the bucket and the grapple to come together at the very bottom position?

I understand that with a fixed thumb, you have to bring the material to the thumb, then trap it together, but if you didn't have to do it that way, why would you?

I don't see how it would matter too much with big objects to pick up, but smaller stuff, like a hundred or two hundred pound rock that is maybe more flat than tall.

Of course, maybe it doesn't matter. Maybe you just push the object to the thumb.

Thanks, this is very interesting.

Eddie

Eddie, I find myself using the fixed thumb in exactly the opposite way -- I position the thumb first, then curl the bucket to clamp the material against the thumb.

This picture of the excavator pulling stumps on my lot shows what I'm talking about. He positioned the fixed thumb against the stump, then pinched, then lifted...

http://www.loonlanding.info/Img_0895.jpg

http://www.loonlanding.info/Img_0898.jpg

He pulled the stumps, not pushed them out, nor dug them out... He'd first push hard with the thumb, then pinched the stump, then curled back as he lifted... the pine stumps would just "pop out"...

Watching how well this worked, I bought a thumb and installed it on my mini-hoe... totally different scale, but I can pull out 2-2.5" saplings if the soil is moist...
 
   / Homemade Articulated Mechanical Thumb #25  
3RRL said:
Thanks again guys,
K7147,
Of course proof is in the pudding so I need to get it done and welded to the backhoe to try it out. I'll probably post a video and some photos. (If it works:D )
You know Eddie,
There is nothing like a bigger hammer if all else fails. LOL ... I've got a couple big ones in my tool boxes too....I'm not exempt from Murphy's Law either.
tlbuser,
Well, I'm hoping I've been good and she will do it again for me. I've got to get the parts welded and cleaned and then she will do her magic.

I do have some concerns as to what 63DH8 said:
I used to work for an outfit that designed and built bucket thumbs. Unless you use a common pivot point, whatever you are carrying will "roll" in the thumb/bucket. Use your CAD to roll the bucket and thumb. You'll see how the thumb will be closer and further away as you roll the bucket. Our boss tried to get us designers to make a thumb that was prebuilt that would be welded onto the stick (excavator arm), but it wouldn't work due to the rolling effect. That made grabbing then rolling out the bucket impossible to do without dropping what was carried.
I used the CAD to move the linkage and bucket from the pivot points in the picture in one of the first posts where there are multiple drawings of it.
You can clearly see how the bucket and jaws are approaching each other.


It seemed to me the bucket and jaws approach each other to "grab" stuff. Does anyone see a problem where if I "curl" the bucket to grab something it will drop out? I've welded 2 plates across the jaws to help with stability and to catch stuff.


Maybe I should add some extra teeth on the plates ... kind of like a sharks mouth? I do have those drilled out remnants I could cut up and weld to them.
Sort of like this, except I would make the rear ones lower profile. Or do you think adding them makes no sense and could just collect dirt? It does look pretty cool though?


I'm worried I missed something here? I do realize the thumb pivot is about 4" away from the bucket pivot. I guess what he is saying if the object I pick up is smaller than 4" it could "roll" up the thumb towards the gap between them. But then again, I wasn't planning on using the backhoe for stuff THAT small. More like basketball or beach ball sized stuff.

If anyone has any input on this I would appreciate it.
Thanks,

Rob:

Great CAD drawings and milling machine work, as usual. I recently
completed my 2nd generation thumb, and I built articulating linkages
as well. One link in my design uses the same pin as my curl cylinder,
and that has kept me from connecting it all up. (I do not have a 25mm
drill bit yet.) I also have to turn down some 1-in stock to make an
extra-long 25mm pin.

I took the old-fashioned approach and built a full scale wood mockup
first. I do not see a problem with NOT using the bkt pivot for the
thumb pivot as I never had any "rolling" action with grasped rocks or
logs. I am sure you will post a movie when yours is working.

The 2nd time around for me I had a shop in El Monte take my DXF file
and cut a bunch of the curved parts for me on their CNC plasma cutter.
It was quite reasonable. Cutting 1/2" plate is slow and tedious for me.
You guys in Socal have all the good deals on steel and machine shops!

I am sticking with the use of hard steel for the tip of the thumb as
my prototype used std small bkt teeth and got quite worn in normal
use, esp with rocks. I used plow steel this time.
 

Attachments

  • thumb_kit_a.jpg
    thumb_kit_a.jpg
    124.1 KB · Views: 1,348
   / Homemade Articulated Mechanical Thumb
  • Thread Starter
#26  
KentT,
That is one big excavator with a lot of power. My backhoe is a dink compared to that.
Thanks for sharing those pictures.

Eddie, your first question about coming together at the bottom is that I can only open the bucket back so far. In the position I have the dipper stick drawn, it is pointing down. This position is very much like the excavator in Kent's 2nd picture.

I hope I can explain this so it is not confusing, so bear with me...
Now when you extend the dipper stick out, more parallel to the ground, then the thumb would be more vertical to the ground and perpendicular to the dipper stick. That's also why I have several linkage connections. This is so I can vary the starting position of the thumb. In other words, if I set the thumb closer to the bucket, they will come together sooner, so the bucket has less curl before the two meet. If I set the thumb all the way back like in the drawing, that allows the bucket to curl quite a ways before they meet.

The reason for the different linkage positions is so I can (to a degree) set up the thumb for the type of grabbing I want to do. If I'm going to pick up rocks down a slope, I'll most likely have the boom and dipper stick extended straight out down that slope. So I would want to have the thumb set back like in the drawing so when the dipper stick is parallel to the slope, the bucket and jaws are in the correct position to grab a rock on the slope.

If I was grabbing rocks say from a level position, like from a road and the pile is a little closer to the tractor, then the boom and dipper stick would be more folded. In that case, I'd set the jaws closer to the bucket and the bucket fully extended out.
More like this drawing that shows the thumb starting much closer to the bucket.


The gap is a lot smaller to start with and they would clamp a rock a lot sooner. But that way I could pick up rocks with the boom and dipper stick more folded, which is the position you were referring to. Again, the dipper stick is drawn almost straight up and down here and I would probably not have the rocks that close to the tractor.
Does that make sense, I hope?

That drawing is just an example of moving the jaw closer to the bucket but in my linkage, I will not have quite that much adjustment. With a fixed thumb you can do that easily by having different locations to fix the jaws or some guys use a turnbuckle top link for that. My friend Dave Krug uses the turnbuckle style support.
 
   / Homemade Articulated Mechanical Thumb
  • Thread Starter
#27  
Hi Dave,
We must have cross posted as you see I referred to you in my last post.
Thanks for the compliments too.
One link in my design uses the same pin as my curl cylinder,
and that has kept me from connecting it all up. (I do not have a 25mm
drill bit yet.) I also have to turn down some 1-in stock to make an
extra-long 25mm pin.

I know what you mean and I thought about using the same pivot as the bucket but I did not want to make a metric hardened extra long shoulder bolt with 22mm threads on it.
That's also good information about using hard steel ... I thought about case and carburize the HRS for the jaws but would like to try them out first. I might flame harden them at the property?
Get more pictures of your 2nd generation thumb for all of us to see. It looks pretty cool! You know El Monte is right next door to me. If you need some knick knacks turned or milled, give me a holler.
 
   / Homemade Articulated Mechanical Thumb
  • Thread Starter
#28  
Any comments about adding the extra rows of sharks teeth to the center plates?
Yea or nay?
 
   / Homemade Articulated Mechanical Thumb #29  
Thanks Rob, that makes sense.

It's a great project and I'm looking forward to seeing it in action!!!

Eddie
 
   / Homemade Articulated Mechanical Thumb #30  
3RRL said:
Any comments about adding the extra rows of sharks teeth to the center plates?
Yea or nay?

Personally, I think teeth in general are over-rated, but it sure looks meaner!

I had my Gen 2 Thumb cut with some teeth, since the CNC plasma cutter
cost was the same. I had very little slippage with my Gen 1 thumb, and it
had no teeth, except for the two bkt teeth at the end.

I have a question on your linkage: why do you want one link to have
a pivot in the middle? It is not necessary, and that link will be weaker.
Why not have all 3 links pivot on the same pin?
 

Tractor & Equipment Auctions

2017 Ford F-150 4x4 Ext. Cab Pickup Truck (A46684)
2017 Ford F-150...
2003 International 4300 Flatbed Truck w/ Liftgate - Inoperable - 7.6L DT466 Diesel Engine (A48561)
2003 International...
2017 Club Car Precedent Golf Cart (A48561)
2017 Club Car...
Multiquip 36in Concrete Power Trowel (A45336)
Multiquip 36in...
2008 Lincoln Navigator (A46684)
2008 Lincoln...
2002 Stewart & Stevenson LMTV Off-Road Supply Truck (A47307)
2002 Stewart &...
 
Top