I will list the equipment (with pics) of the setup I have used - bear with as I gather my already taken shots - I will be back
Alrighty - see if I get this right - as long as the pic remains, then I did ok I guess.
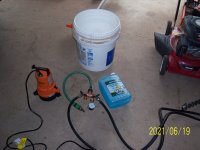
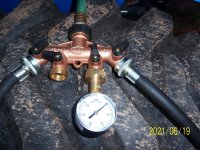
Pic 1: the pump is just a pump I bought from HD (was it ever fast) did one tire in under 18 mins I think it was. The manifold is just a garden hose bib manifold, the pressure gauge is garden hose connection (off the shelf), the pail is to simply to be the reservoir and of course the WSWasher fluid (-40), the green hose has a quick connect for water hose, this attached to the air/water valve that screws onto the valve stem, the two black hoses are washing machine hose (due to the need of two female connectors)
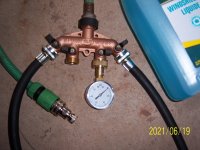
Pic 2: just gives a blow up of the connections
The connection is a tad slow tonight (this morning actually) - I'll come back again
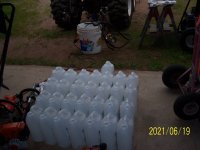
Pic 3: the empties (just one tire)
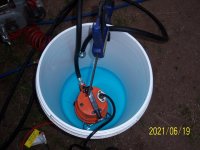
Pic 4: From Reservoir to tire and from tire to reservoir - this saves a big mess when needing to release the pressure buildup (as it slowly occurs)
Pic 5: Hose on the left is from the reservoir - open when pumping - hose on right returns to reservoir, closed while pumping - the opposite for both when releasing the pressure buildup - centre hose (if using for water hose, would be the inlet) goes to/from the tire valve
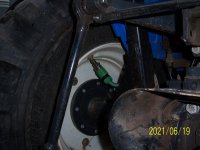
Pic 6: Valve connection - this line goes to the distribution block
If your pump has the capacity of this little one, then make sure your reservoir is big enough to hold two or three jugs at least - the size is also beneficial to reduce the splash experienced when releasing the pressure build up - I found it best to keep the return/bleed line out of the fluid in the reservoir. Pump for a while - watch your gauge for pressure build up, when you see it, simply stop the pump, close the feed valve (distr block), open the return valve (distr block) and simply let the pressure off. Oh yes - open ALL of your jugs before even starting to run the pump, that way, while it is running, all you have to do is pour - I did not do that with the first tire and first few jugs, but I could not keep adding fluid fast enough because of opening them during the process so stopped and opened all jugs.
It is important that the tire valve stem is at the top-most point for filling, bottom-most point for emptying (connect at top-most) - have the tractor on jack stands, this does two things, eliminates weight pressure on the tire when there is no air pressure in it and thus aids in not losing bead/rim connection - secondly, you can rotate the tire as needed anytime throughout the process. While filling, it was a nice aid in determining that the tire was indeed filled with liquid
The emptying aspect, is all in reverse however, gravity will take care of a large part of the emptying until it reaches a point of balance due to height differences of the tire valve and the reservoir - the pump, will NOT remove all fluid as there is nothing to reach thru the tire valve and down into the tire so you will always have some left in the bottom - but one heck of a lot lighter then filled
Hope this helps - if you go to F/B and see Dave Knows Best - he has a vid there of him doing his tires, it is where I got plan from
Don't think I am missing anything - you will get some mess, but it is far less then not having this for the empty process as well as the bleeding of pressure (lots will do it right at the air/water valve at the tire - messy, messy, messy) - if you look closely at pic two, see the little circle (on the air/water valve inserted in the quick connect), that is a bleeder valve for releasing pressure - just don't press it and you won't get fluid pissin out.
Cheers for now
")