Landscape Rake Build

   / Landscape Rake Build #1  

GuglioLS

Veteran Member
Joined
Feb 13, 2005
Messages
1,155
Location
Edgewood, NM USA
Tractor
Jinma 354, 1953 Ford NAA Golden Jubilee, Komatsu Bulldozer
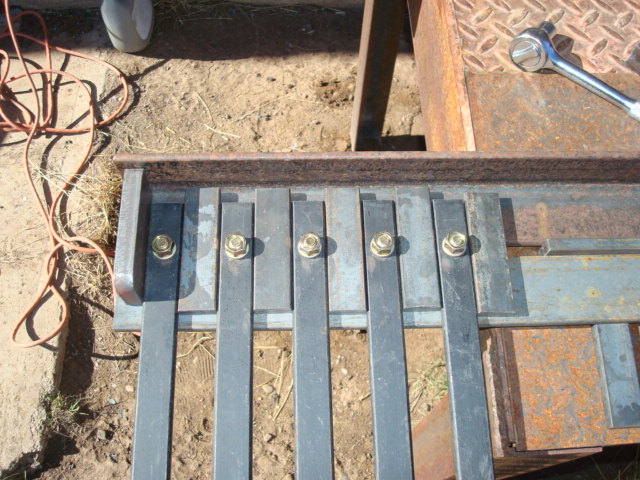
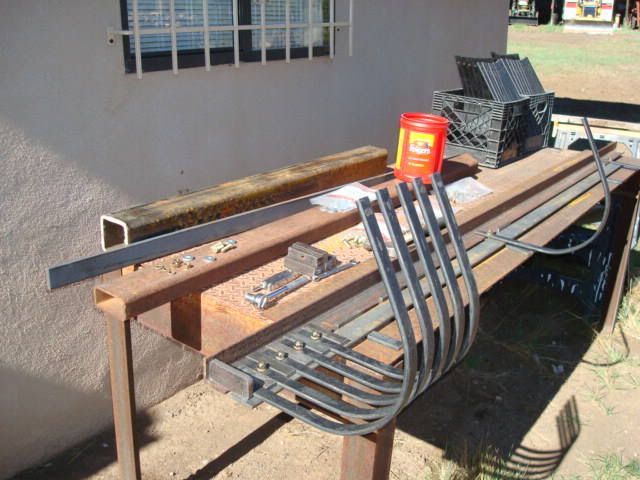
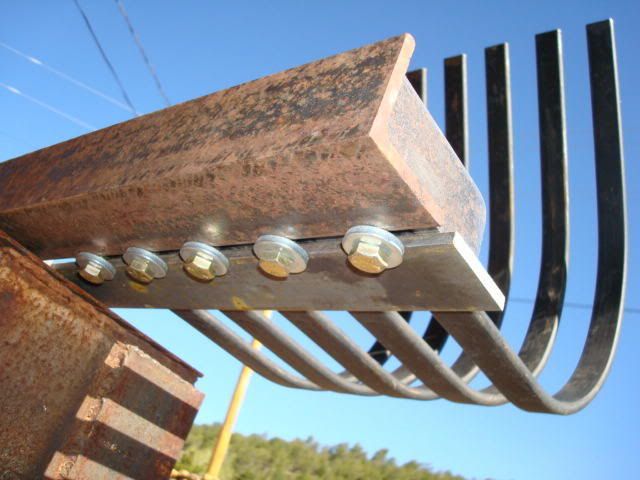
I've been wanting a landscape rake. I checked a few out in person, but none were configured exactly to my liking. So I have decided to build one from scratch.
Rob (3RRL) has been very generous and helpful in the design and build of my 360* rotating back-blade project and in designing the jaws and brackets for my grapple project For anyone who is following Rob's (3RRL) home build project right now Rob's plate is pretty full, so maybe I should give him a break and do this on my own? For the most part, many of my projects have been "built then designed" instead of being "Designed then built". For this Rake project, I have decided to Design then build. Last week I picked up AutoCad :D and are teaching myself how to use it with this project.
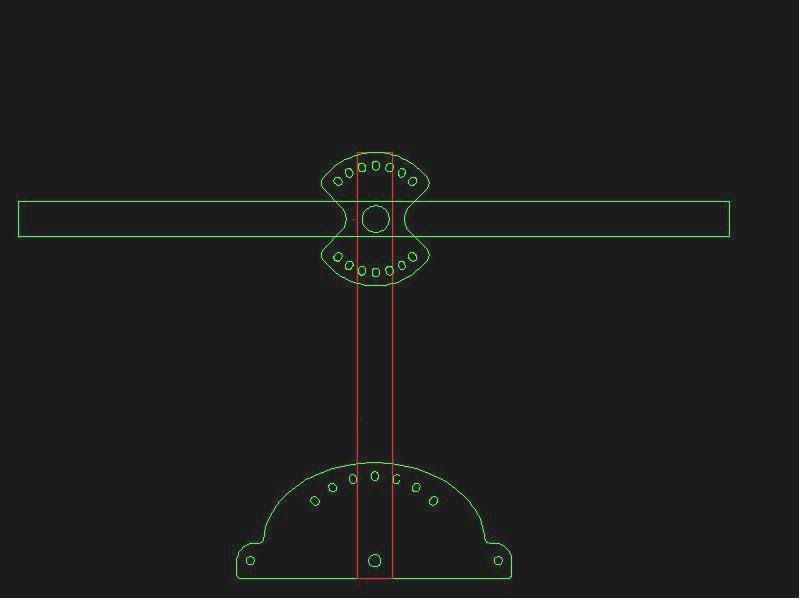
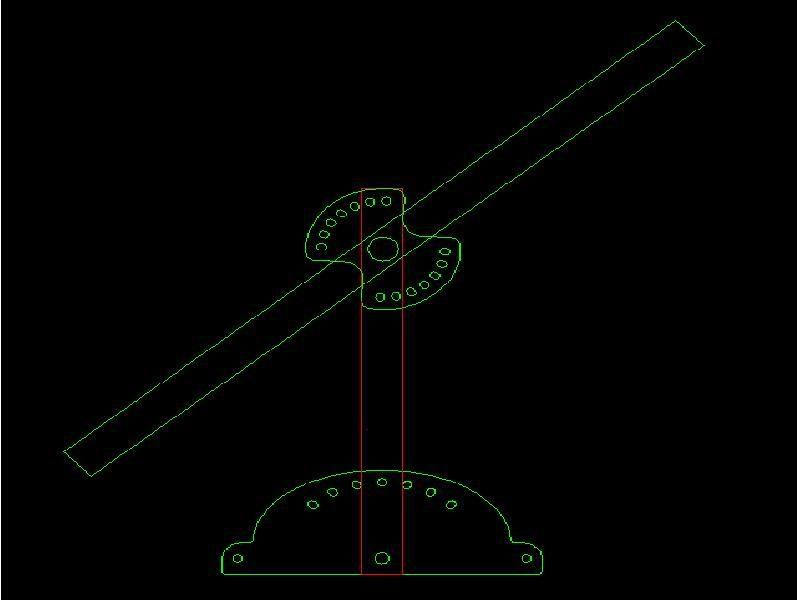
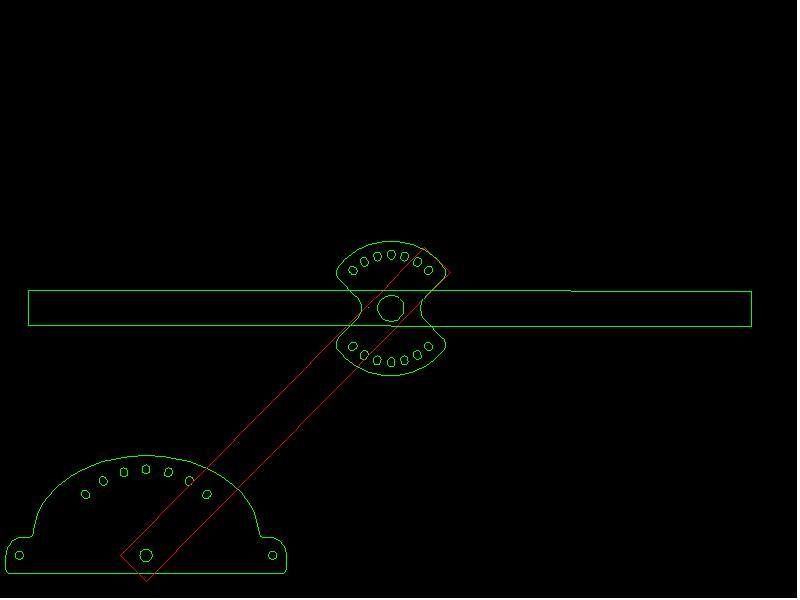
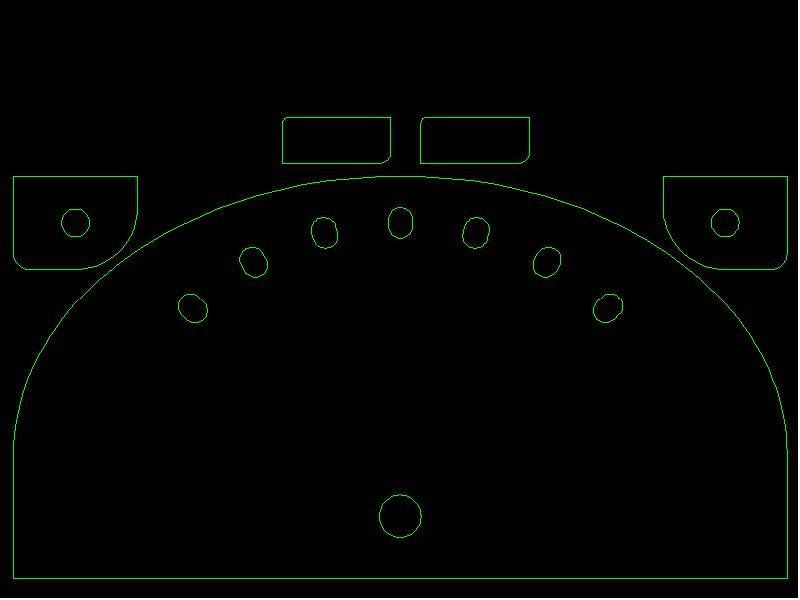
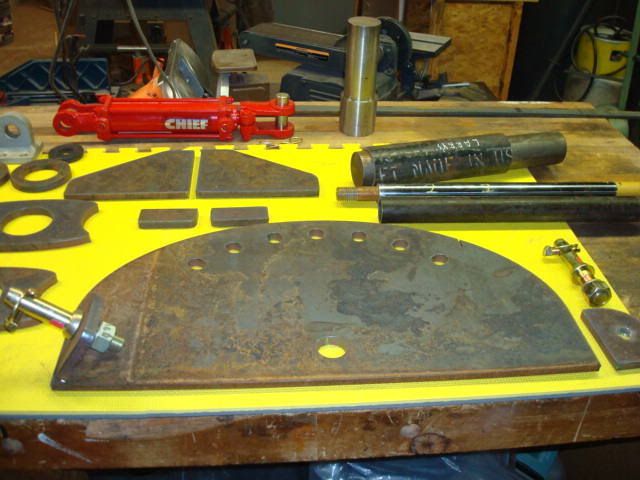
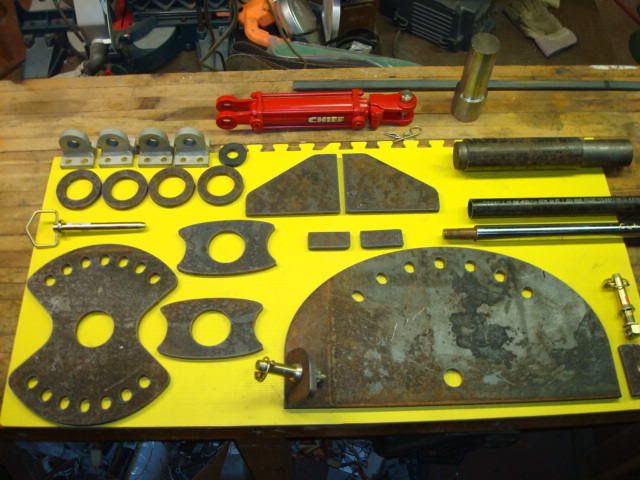
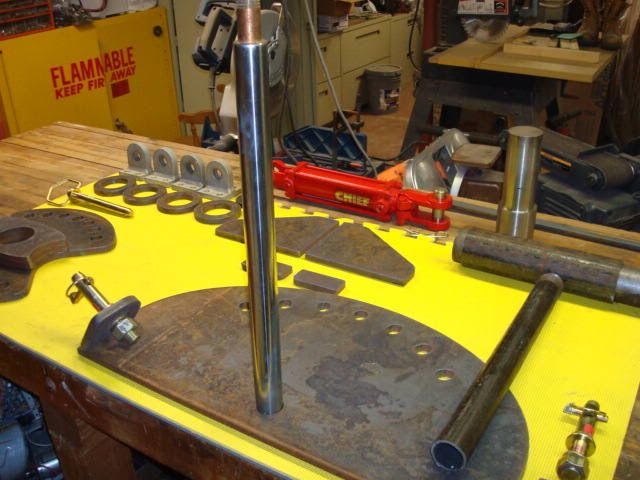
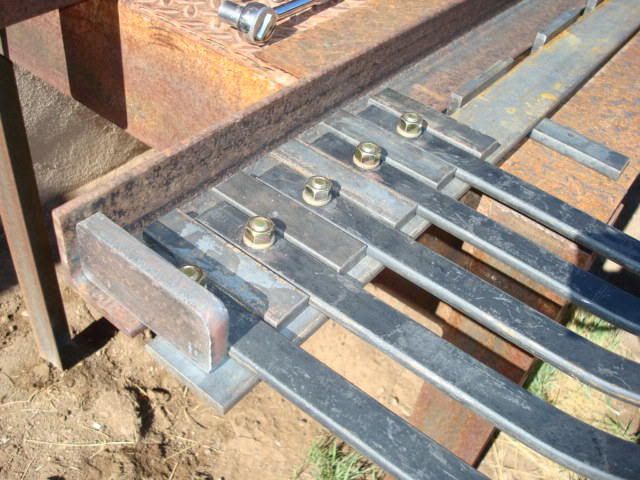
Here are the basic concepts of the rake I am going to build:


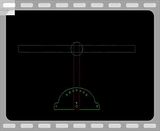
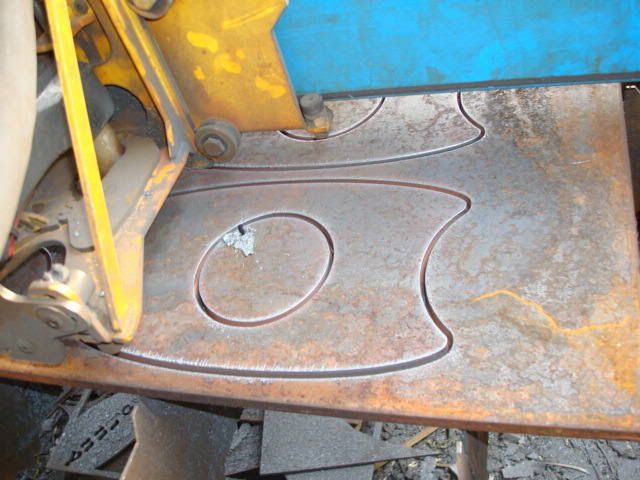
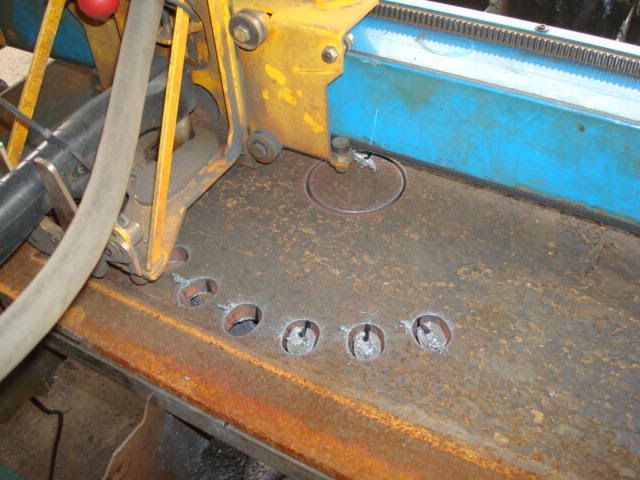
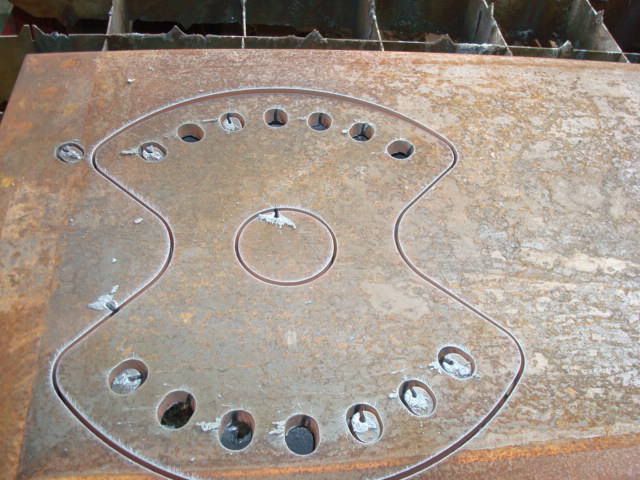
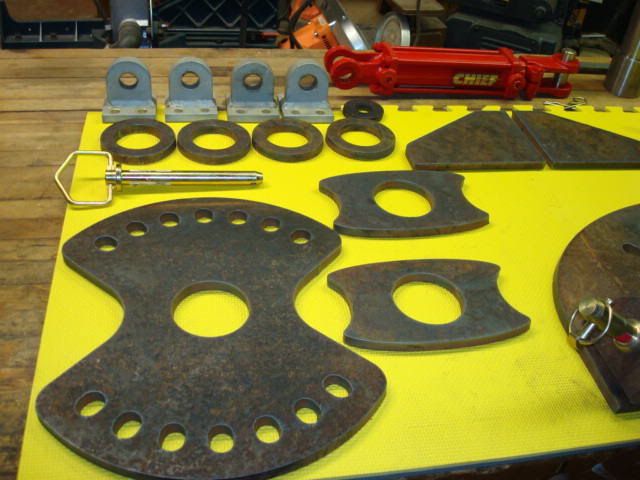
As you can see it will have a swivel offset and rotation angle feature. I will add index holes to pin the positions, but do plan on having it controlled by hydraulics. The design will be such that it could be manual or hydraulically operated.

Larry
 
   / Landscape Rake Build
  • Thread Starter
#2  
After a few hours on Autocad, I worked out details for the rotation index plate and index plate for swivel. The following pics are to verify the concept will work in real life.To keep machining to a minimum, I plan on having as many parts cut out by a computer controlled plasma cutter:


Larry
 
   / Landscape Rake Build
  • Thread Starter
#3  
A close up of the finalized index plates, miscellaneous brackets and spacers ready for plasma cutting:

Larry
 
   / Landscape Rake Build #4  
I can't wait!!!! But, alas, I will.

Looking forward to this build. ;)
 
   / Landscape Rake Build
  • Thread Starter
#5  
John (SknukWerX),
Thanks for your interest -

I got parts plasma cut on Friday (5/23/08) just now had time to upload all the video and pics. It takes me longer to take picks, resize, upload and post than it does to actually build stuff :confused: I hope all this is worth it, because I could be done my now ;) Maybe I am? who knows? Tell you what, at the end of the day, I can get a pic with the progress that includes the front page of today's Sunday paper showing the date. :rolleyes:


Larry
 
   / Landscape Rake Build
  • Thread Starter
#6  
Here are a few still shots showing the plasma cut parts which are still very warm:


Yesterday Saturday as in 5/24/08 - Here the parts are now in my home basement shop all laid out pretty like for their photo op :D


Larry
 
   / Landscape Rake Build
  • Thread Starter
#7  
So now it's time for me to do some actual work. I need 34 spacers 3/8" thick by 3-5/8" long, by 1" wide and 6 each 1" x 1" x 3-5/8" long to put between all the tines so as to keep them evenly spaced. This was done on the band-saw using a stop to get all the parts the exact same length:


That didn't take very long at all ;) considering I had to take the saw apart to clean it first :rolleyes:

Larry
 
   / Landscape Rake Build
  • Thread Starter
#8  
After getting all those spacers cut and the burs removed, it was time to start bolting on the rake tines in prep for welding the spacers. I picked up some extra thick 3/8" washers, grade 8 bolts, nuts and lock washers online. The washers are just shy of 1/4" thick.


So that is where I am as of right now. Time to go out and see what I can get done. My hope is to at least be able to weld all the rake time spacers into position without welding the tines :eek:


Larry
 
   / Landscape Rake Build #9  
Larry,
I always look forward to your build it projects. I want to make a rake that will fit the frame of the RB that I made, but I cannot find the tines here. I have asked even at places that make springs, but they say that they cannot make what I want. :(

What I am saying is that I am going to enjoy your project as if it were mine.:rolleyes: The only problem is that in the end I still will not have a rake! :mad: :rolleyes:

Why did you choose the one bolt tines instead of the 2 bolt where a spacer would not be needed?

Mike
 
   / Landscape Rake Build
  • Thread Starter
#10  
MJPetersen said:
.......Why did you choose the one bolt tines instead of the 2 bolt where a spacer would not be needed?
Mike

Hi Mike,
Good question - I did not want to drill 82 holes! I weighed both options: using spacers or drilling a bazillion precision holes and doubling the hardware to mount them. One hole and two hole tines are the same price, available online form Agri supply LANDSCAPE RAKE TINES - Agri Supply I got the ones made in Italy :cool: The tine mounting "system" I have uses 2" x 2" x 1/4" wall angle and a piece of 2" wide x 1/4" thick flat bar which I have plenty of in my "scrap" pile. If I went with the two hole tines, I would have had to purchase a a very large piece of angle or flat bar stock. So I went with what I have on hand. Would those tines I posted a link to work for what you are needing? I seem to have missed you RB project. I will look it up to check it out.


Larry
 
   / Landscape Rake Build #11  
I can understand about not wanting to drill a gazillion holes. I see that the way that you did it you did not have to drill any for the tines. Yes, those tines would work very well--if I could find them.--I am a whole lot closer to Italy than you are but they are not to be found yet!! You preferred the Italian ones to the ones made in China?:rolleyes:

I see this spring there are a lot more implements being imported from Italy like mowers and tillers. So maybe other things too.:rolleyes: I hope so. There are a lot more dealers advertising small kubotas and other brands than a year ago, so hope springs eternal. :D

About my RB build, just remember I work on a whole different plane than you and your buddy Rob, both in dimensions and precision. ;)

Mike
 
   / Landscape Rake Build #12  
Larry,

It suddenly dawned on me that your new rake is designed to be completely manual adjustment, no hydraulics or mechanical devises to change blade angle or swing on the fly. it really seems out of character for you.:D After all you have the only hydraulic motor powered rotating RB in captivity. You did not seem to make a way for that box to fit on your rake either.:confused: It is curious. I thought aha, maybe an impostor--but the cool videos and shots of the plasma cuts are definitely in Larry's style though. :cool:

Any way I look forward to seeing you bring it together.

Mike

Oh, for your information my RB build is already on page 7. http://www.tractorbynet.com/forums/build-yourself/118176-rear-blade-build.html
 
   / Landscape Rake Build #13  
What are you using for a video camera? It's refreshing to see a video on the Internet that is clear and generally artifact free.

Also, do you own the PlasmaCam type cutter, or did you go to a shop to have it done?

Nice work!
 
   / Landscape Rake Build
  • Thread Starter
#14  
MJPetersen said:
Larry,

It suddenly dawned on me that your new rake is designed to be completely manual adjustment, no hydraulics or mechanical devises to change blade angle or swing on the fly. it really seems out of character for you.:D After all you have the only hydraulic motor powered rotating RB in captivity. You did not seem to make a way for that box to fit on your rake either.:confused: It is curious. I thought aha, maybe an impostor--but the cool videos and shots of the plasma cuts are definitely in Larry's style though. :cool:

Any way I look forward to seeing you bring it together.

Mike

Oh, for your information my RB build is already on page 7. http://www.tractorbynet.com/forums/build-yourself/118176-rear-blade-build.html

Mike,
Thanks for your RB build link, I'll check it out. There will be provisions for hydraulics. Just hold on for it.

OK a little progress was made today -
All the Tines were bolted on with spacers in-between each one. It seems like it took forever. Had to keep everything square, several times I had to loosen a few, straighten things out, then re-tighten. I think it was worth the extra effort as it seems to be evenly spaced. Does it look straight?


I got all the spacers tack welded with my trusty Harbor freight Russian MIG, Yes you read that right a harbor freight tool made in Russia, not China, go figure. Somehow I managed not to weld any of the tines, lucky me.
Here's a few pics of the inside guts of my Russian MIG:


Larry
 
   / Landscape Rake Build
  • Thread Starter
#15  
mjncad said:
What are you using for a video camera? It's refreshing to see a video on the Internet that is clear and generally artifact free.

Also, do you own the PlasmaCam type cutter, or did you go to a shop to have it done?

Nice work!

MJ thanks for the kind words. The camera is a Sony Cyber-shot DSC-W80 7.2 mega pixels. Still pics and Video with sound plus some other cool stuff.

The plasma cam is run by a buddy of mine at a mom and pop metal shop in Albuquerque. I barter with them, I fix their broken stuff, and they plasma cut parts for me every now and then. The day I had these parts cut, I worked on an antique 250 amp three phase MIG ,got it working. In the past I have repaired the Plasma cam machine itself in trade for Rob's (3RRL) Gauge wheel parts.

OK I went ahead and took a pic of my project with the Sunday paper, just because I said I would. After the spacers were tack welded in place, ALL the frigging tines were removed so I would not weld them in place laying a solid bead of weld on each spacer. After that, I cut off the un-finished end, you see I had no idea how long this thing was going to turn out, what with all those tines and spacers, there was just no telling how long it was really going to be. Pay no attention to the cramped shop.


Larry
 
   / Landscape Rake Build
  • Thread Starter
#16  
The deep welds caused a little warp-age, so I used the H/F press to whip it back into shape. OK now I have a problem, A press is not intended for what I am about to do. Here is my Redneck solution. Wheel the press under the main support beam for the house, hold the press in place at the top with a 20 ton bottle jack up against the under side of the beam, support the tine bar at both ends then go for it.


After a few tries, It came out straight. Thats it for now, I'm off to San Diego for a week long Business trip. Don't get any ideas while I'm gone - My retired Police officer neighbor is keeping an eye on it :cool:

Larry
 
   / Landscape Rake Build #17  
GuglioLS said:
A press is not intended for what I am about to do. Here is my Redneck solution. Larry

I prefer to call your Redneck Solution "Yankee Ingenuity."

Thanks for the camera and PlasmaCam information
 
   / Landscape Rake Build #19  
Larry
you have some room in there for a small iron worker then you can punch the holes in stead of drilling them or at least a whitney punch and a little elbow grease

tommu
 
   / Landscape Rake Build
  • Thread Starter
#20  
Jim,
I checked out your rake build, man that came out nice. What impresses me the most is that the rotation is synchronized with the swing function, When you swing your blade, the rotation compensates to stay at the same angle, that feature is just too cool. OK a question for you - how did you drill out the huge holes in the rectangular tube to fit the large pipe? Hole saw?, combination of hole saw and boring bar? other?

Larry
 

Tractor & Equipment Auctions

2014 MAGNUM PRODUCTS LIGHT TOWER COMBO (A55745)
2014 MAGNUM...
1999 WEST WIND 30FT PINDLE FLATBED DOVETAIL TRAILER (A58216)
1999 WEST WIND...
JOHN DEERE 644K WHEEL LOADER (A58214)
JOHN DEERE 644K...
2339 (A60432)
2339 (A60432)
2019 CATERPILLAR D6 HIGH TRACK CRAWLER DOZER (A60429)
2019 CATERPILLAR...
2014 Magnum 7696BLA Light Tower (A59213)
2014 Magnum...
 
Top