Landscape Rake Build

   / Landscape Rake Build
  • Thread Starter
#41  
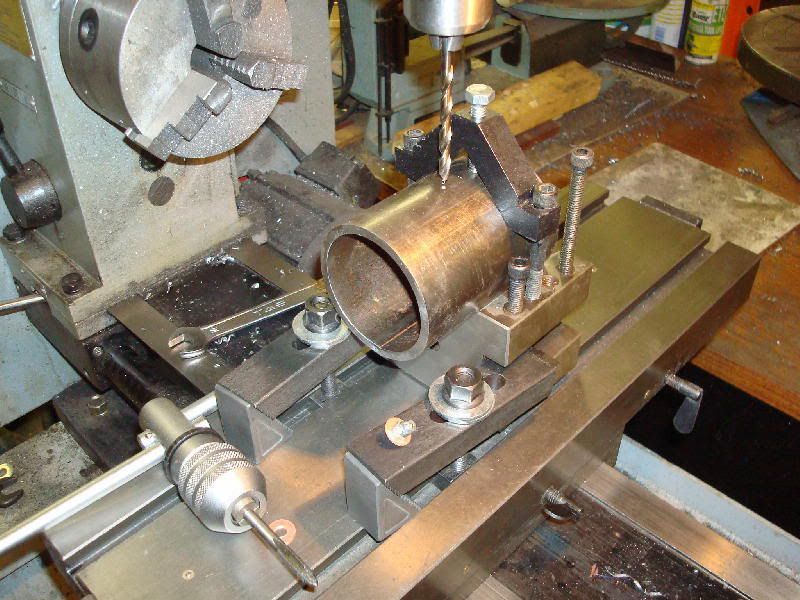
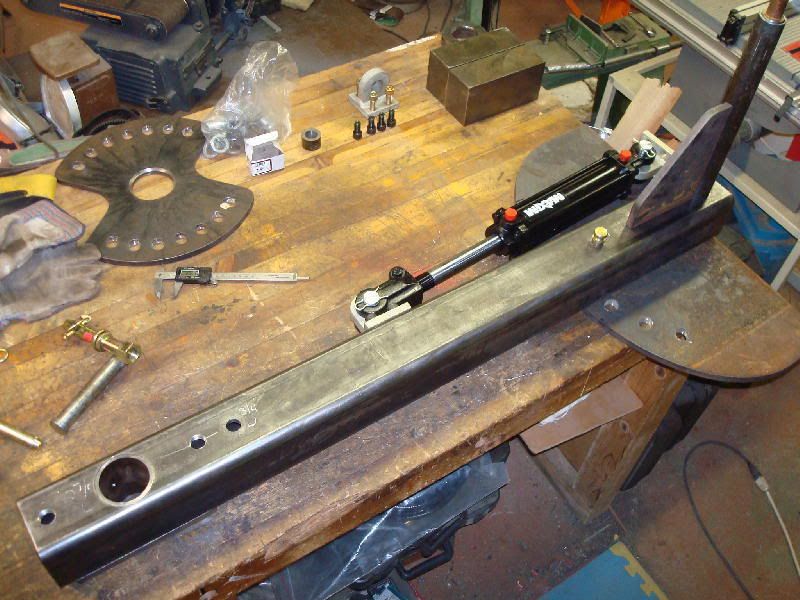
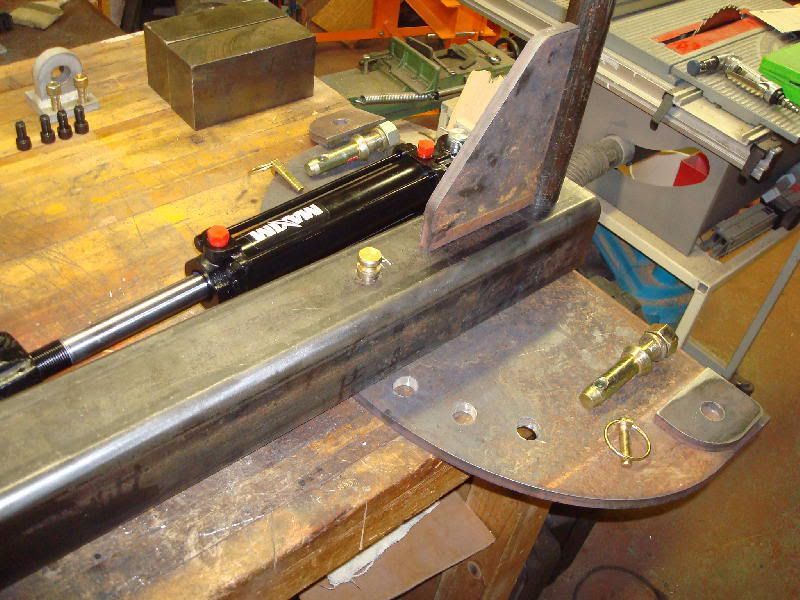
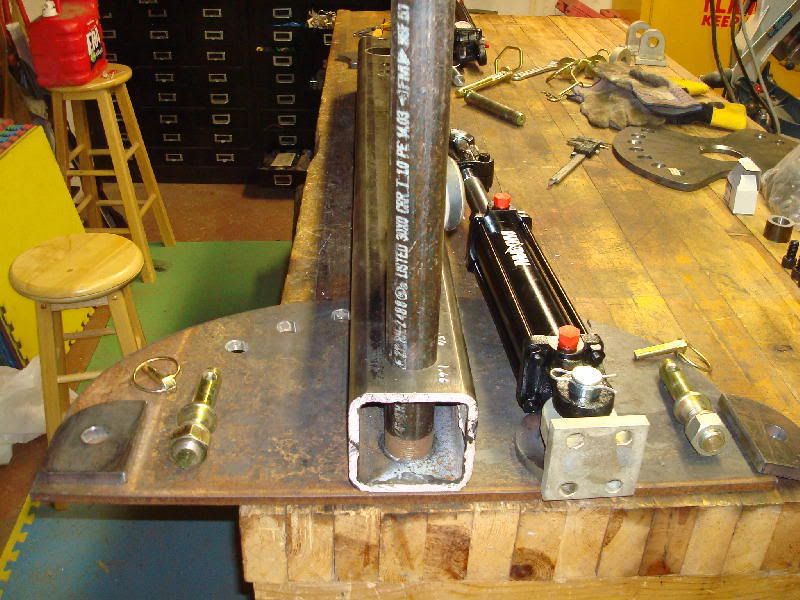
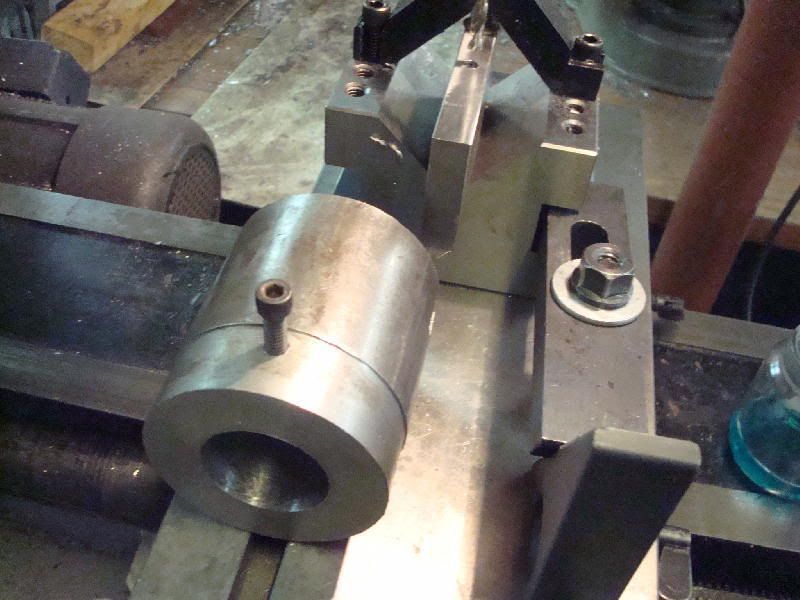
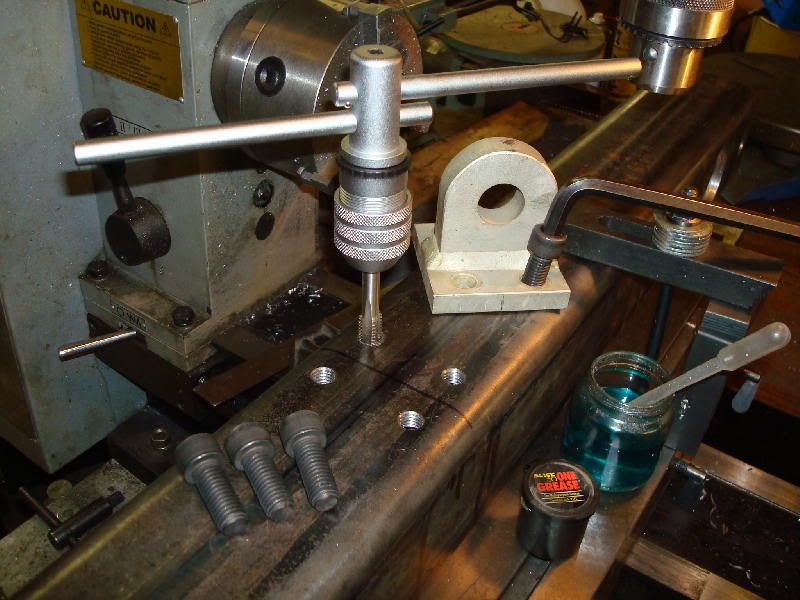
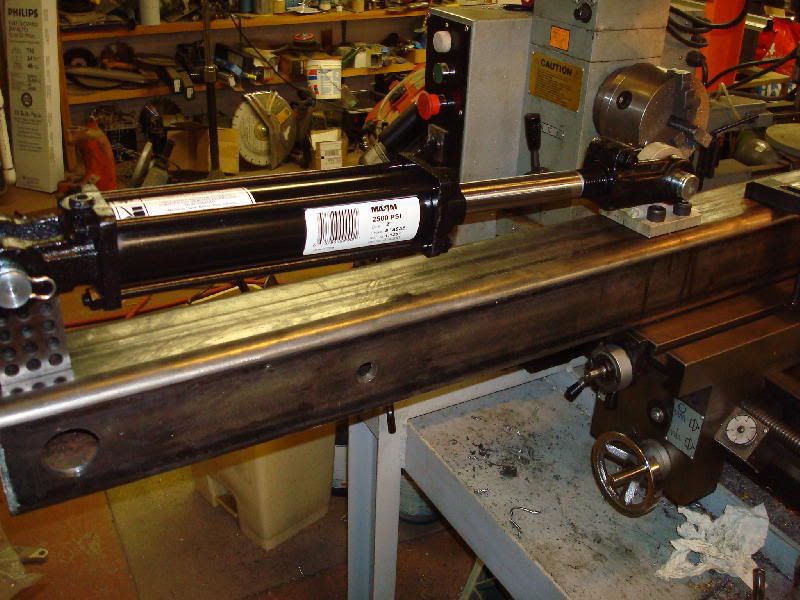
After test fitting the bearings, they were taken off so I could add the swing offset cylinder mount to the boom......


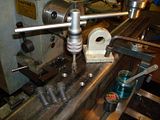
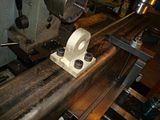
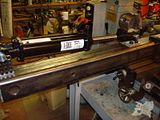
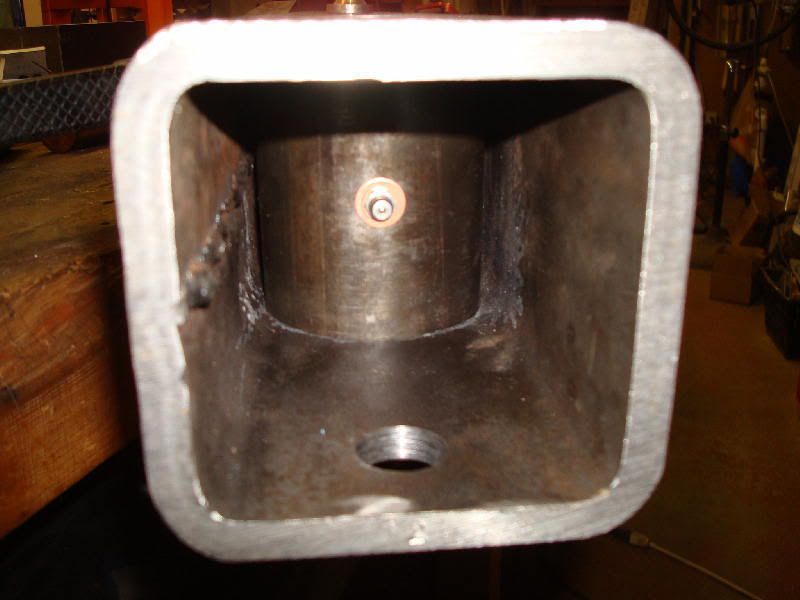
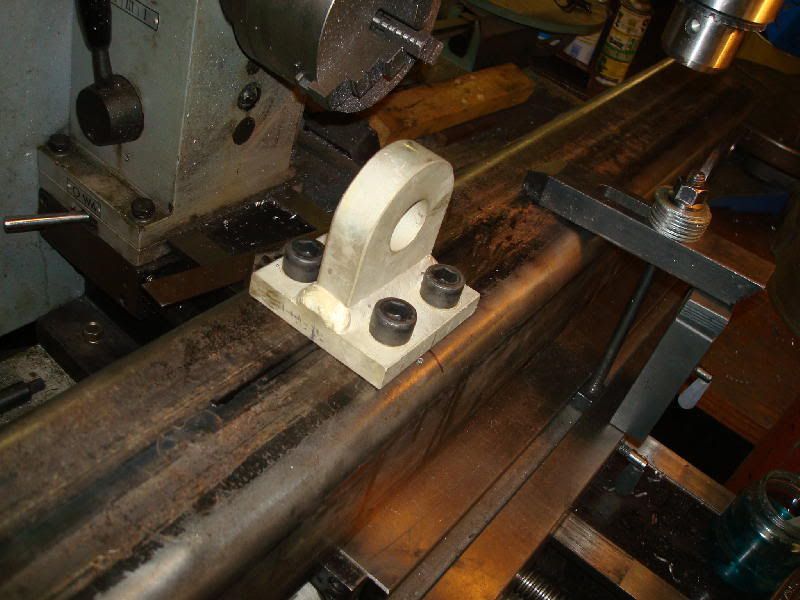
1/2" SHCS were used, the boom is 3/8" thick so they should hold okay. They were bolted on as opposed to welding so in the future as any part wears out, it can easily be replaced.


Larry
 
   / Landscape Rake Build
  • Thread Starter
#42  
A grease fitting was added to the king pin sleeve. Since the flange bearings were added, that grease fitting was not really necessary as the king pin does not touch the sides of the sleeve. But what the heck, I've gone this far so why not? The boom and the start of the makings for the TPH mount were placed into position to get an overall look and feel for what's next. What is next? Hum I think I better start making the TPH Triangle. That will involve bending some 1/2" thick x 3" wide flat bar. Do you think I can do that with my log splitter? Will I have to heat the metal? or can it be bent cold? (45* angle).


Larry
 
   / Landscape Rake Build #43  
Larry, to bend 75x12mm flatbar (3" x 1/2") i would use my pipe bender, put a strong tube against the pipe dies to create a flat anvil, then put a piece of C-channel against that, to act as a bending die, and hold a 1 inch round shaft against the pipebender cylinder to push this into the C-channel, while the workpiece to be bent, sits inbetween.

But since you got this nice shop press, i'd put the C channel on the workshop press table, put the round stock on top and just push that way.

As a rule of thumb, when bending flatbar, the width of the lower die (substituted by a piece of heavy hot rolled C-channel in most hobby workshops) should be 7 or 8 times the plate thickness.

so bending half inch flatbar would require a 3.5 to 4" die opening to get nice and straight bends. When using the round stock, instead of an official pointed bending die with a nose radius of about 5mm, the die opening better be a little wider, to reduce the force required.


By the way, what did those flanged bearings cost you ?? I was thinking of using an old truck wheel hub as pivots for my road scraper, but i'm afraid it will bend the truck rim completely, so when i need to reinforce the truck rim completely, it'll be even more work that to make a decent purpose built pivot.
 
   / Landscape Rake Build
  • Thread Starter
#44  
Renze,

Thanks for the idea to use C channel as a die, your idea came just in the nick of time too. I will try it just like you suggest. If the press does not have enough power, I can try it on the log splitter, if all else fails use a torch to heat it. On second thought I might just try it on the log splitter first because it has a sharp wedge to use as the anvil, all I need to do is find some heavy C channel, I think I have a heavy duty I beam that may work - I better go scrounge that stuff up. Thank you again for the idea.


Oh and I paid 24.95 USD for the flange bearings from Surplus Center ...
Surplus Center Item Detail

Larry
 
   / Landscape Rake Build #45  
Oh man Larry, that is going to be one heck of a rake. You must have a gazzilion bucks in it by now with all that steel, those bearings, cylinders and heavy duty hardware. It will be the best one on the planet, I'm sure.
Why do you need to bend steel for the 3pt "A" frame? Can't you fabricate one from square tubing and weld it together? If you already have the steel stock, consider sawing an welding instead?
 
   / Landscape Rake Build
  • Thread Starter
#46  
Rob,
Thanks for the generous compliments. As far as cost go, it's not that bad, I only had to buy about 75 in new steel, the plasma cut steel was bartered for my time to repair an antique 3 phase 250 amp MIG. Rake tines were 125, cylinders and flange bearings came to 200. Nuts, bolts and miscellaneous hardware I get from that Surplus City place in Albuquerque for 2 bucks a pound. Remember that place?
As far as bending flat bar, Isn't bent flat bar stronger than cut and welded? Plus I think bent steel (as long as it's bent in the right direction) looks better, to me anyway. And I have that 20 ton press I want to put it to good use.

I did not make any progress on the rake today, BUT I did make an Anvil and Die as suggested by Renze for my hydraulic press. I spent all day on that. I've been wanting to make an anvil for the press so this rake project was just as good an excuse as any.
Here goes the anvil and die project to bend steel for the TPH triangle mount....
Took a chunk of 3" dia round bar x 3" long, trued the ends, drilled a 1/4" hole clean through, then drilled a 1.5" dia hole 1.25" deep.


Larry
 
   / Landscape Rake Build
  • Thread Starter
#47  
Here is what happens when you forget to clear the drill shavings. What a tangled mess. After removing all that, the 1.5" drill bit was pushed into the anvil holder....


Larry
 
   / Landscape Rake Build
  • Thread Starter
#48  
After finishing that 1.5" hole, it was time to start milling out a channel for the anvil insert, the milled slot is 1/2" wide and 7/8" deep. The last pic shows the start of the anvil that will be inserted into the milled slot whick is CRS 1/2" thick X 2" wide X 4" long.


Larry
 
   / Landscape Rake Build #49  
GuglioLS said:
MJ,

Yes, I am 25 miles from Albuquerque. No way would I do the tines, but if it's not really all that much, it might be worth coating the main assembly. Does it have to be baked on? as in it goes inside an oven? There will be three main assemblies that can be separated - the rake tine holder, the Boom and the TPH mount. Sounds interesting, I will have to investigate, see who can do it and what's involved to get an estimate. What colors are available? How long does it need to cure?

Larry

Powder coating is a dry process in which a the powder is positively charged and the item to be coated is negatively charged, or the other way around; but static electricity is the how the dry coating is initially adhered to the item to be coated by a spray gun device. Yes, it is baked on in an oven for about 20 - 40 minutes at about 400 - 450 degrees F from what I'm told. Once it's out of the oven and cool, it's cured. There are numerous colors available and a variety of glosses for those colors. This link at Eastwood Company: Auto Tools, Body Repair, Classic Car Restoration, House of Kolor Paint, Powder Coating will give an idea of the variety of standard and specialty powders that are available HotCoat Powder Coating Powders: Standard Colors. Of course your local powder coater's standard inventory will differ. You will save money by not requesting a specialty powder, and I still haven't found one for JD green...not that I've looked real hard.

JB weld, and Lab Metal can be powder coated. I haven't tried Lab Metal at all, so I'm going by their web site's information. Metal repair and patching compound - Alvin Products - Metal Restoration and Repair

Bondo does NOT work in powder coating processes, nor does Loc-Tite and its clones. Nor is soldered copper pipe recommended due to the solder's relatively low melting point. Ask the coater what can be coated and what can't. if you have threaded holes or studs, they can be masked by the coater. Just make sure they are aware of them, otherwise prepare to chase the threads with a tap or die.

Separating the assemblies would make it easier for the coater to hang the parts from the racks; but I've seen the guy I use powder coat complete race car frames. Again, it's all up to each shop...so inquire around.

This link will give you an idea of just how tough powder coating is. Picasa Web Albums - Matt - "Resistance i...

It's not invincible; but it is tough stuff.
 
   / Landscape Rake Build
  • Thread Starter
#50  
Two 45* angles were desired on the anvil business end. Two "V" blocks were stacked and clamped into the band saw, place the work piece bar on it's edge, clamp with a C clamp and proceed to cut down the length. As the blade neared the clamp, it was removed then placed above the blade so as to finish the cut......


The blade tracked perfectly square the entire 4" length of cut. The piece was then flipped over to cut the remaining 45* edge. A 1/4-20 hole was drilled and tapped into the center so as to retain the anvil in the anvil holder, which slips over the press stock anvil.


Now it's time to harden the anvil using an Oxy Acetylene torch.
Larry
 
   / Landscape Rake Build
  • Thread Starter
#51  
MJ-

Oh man that is nice stuff, super tough too. Thanks for all that detailed info and the links. I'll check to see what's available in Albuquerque. I'm a couple weeks off for sure.


When the anvil was a bit more than cherry red, it was immersed in cold water. After that I started to fabricate the Die per Renze's recommendation of 4" wide.


WOW what allot of work to make an Anvil and Die for my hydraulic press. This thing better work or I gonna Kill Renze. In the last pic, the anvil and die are complete and installed onto the press for a trial run with a 1/2" thick x 2.5" wide flat bar............

Larry
 
   / Landscape Rake Build
  • Thread Starter
#52  
Oh boy here we go.............


Well it works better than expected. At least I'm impressed. I got a little over 45* so some sort of a stop at the bottom of the die should allow for more precise bends. Thank you Renze for the idea of using C channel to make a die. The anvil is not too shabby either. Check out these close up's of the bend.....


With this setup I should be able to accurately bend up to 1/2 thick by 3" wide flat bar for the TPH mount on the Rake project. Maybe I'll get to that by mid week?


Larry
 
   / Landscape Rake Build #53  
GuglioLS said:
MJ-

Oh man that is nice stuff, super tough too. Thanks for all that detailed info and the links. I'll check to see what's available in Albuquerque. I'm a couple weeks off for sure.
Larry

You're welcome Larry. The press break did a nice job on the bend, and I'd bet you could get tighter bends with the metal heated up; but that would require building alignment tabs onto the die to be able to accurately position the hot metal.. Now if I only had your tool collection, I could expand my capabilities, or at least try.
 
   / Landscape Rake Build
  • Thread Starter
#54  
MJ- thanks or the kind words, at first I thought no way was the press going to bend that metal bar like butter.

Here is a pic of the TPH mounting arms, not sure what the correct technical term for those two pieces are. In any-event those are what need to be bent on the press. Please someone let me know if the geometry look correct for a TPH? Any suggestions before I start cutting, drilling, milling a radii at the top link, then bending?


Larry
 
   / Landscape Rake Build #55  
Wow, very cool Larry.
A lot of work for the anvil and die, but they sure work great. That crazy Dutchman must know his stuff! hahaha.
The geometry looks good to me, but you can check it with the Standards of 3pt hitch categories, but I'm sure you've already done that.
Great stuff Larry!
Rob-
 
   / Landscape Rake Build
  • Thread Starter
#56  
3RRL said:
Wow, very cool Larry.
A lot of work for the anvil and die, but they sure work great. That crazy Dutchman must know his stuff! hahaha.
The geometry looks good to me, but you can check it with the Standards of 3pt hitch categories, but I'm sure you've already done that.
Great stuff Larry!
Rob-

Hey thanks Rob, I appreciate your Dutch Indonesian input, yea, gotta love those crazy Dutchmen. Thanks for the TPH standards link, I double checked the dimensions, plus measured a few of my store bought TPH stuff as a comparison. I think it's OK to go ahead and cut those pieces and make them per the drawing. When drilling out two identical pieces, do you stack them and drill through both at the same time? or drill each separately?

Larry
 
   / Landscape Rake Build #57  
GuglioLS said:
Hey thanks Rob, I appreciate your Dutch Indonesian input, yea, gotta love those crazy Dutchmen. Thanks for the TPH standards link, I double checked the dimensions, plus measured a few of my store bought TPH stuff as a comparison. I think it's OK to go ahead and cut those pieces and make them per the drawing. When drilling out two identical pieces, do you stack them and drill through both at the same time? or drill each separately?

Larry

Do you use a Quick-Hitch? Regardless of whether you do or not, allow a little slop spacing in case the manufacturers of your implements didn't adhere to the standards as well as you intend to.

I stack and drill to save setup time, and I find it more accurate that way. I've started to drill a small (3/8" to 1/2" dia.) hole depending on thickness on the back side of one piece and plug weld the parts together before cutting and drilling begins. Then I drill out the plug welds as the last major machining step. I did something similar here minus the plug welds. Picasa Web Albums - Matt - King Kutter K...

Matt
 
   / Landscape Rake Build #58  
When drilling out two identical pieces, do you stack them and drill through both at the same time? or drill each separately?
Hi Larry,
For tractor projects, I too stack them to save set-up time. After all, how close does it have to be?
For exact locations, I pre-drill them separately in a precision vise set up with stops. The pieces are ground square and parallel first and then indicated in to insure exact positioning, then bore to size. This insures location and counters drill walk off and over cut.
If your pieces are not exactly square and parallel, and/or the head is not dead square to the table, going through stacked pieces can result in the top piece being off location from the bottom one. The more pieces you drill though, the bigger the difference can be from top to bottom.
For what you're doing, I wouldn't sweat it though.

Hey Matt, I saw your machined parts ... they look great. Excellent work there.
 
   / Landscape Rake Build #59  
Larry,

thanks for the compliment... I used this method only the redneck way, on a pipe bender with all sorts of scrap metal
I didnt have time to put the 32 ton bottle jack i bought a year ago, into a frame to use it as a workshop press like you have... and then i'd have to collect several sizes of standardised UNP profiles to use as dies... 7 or 8 times the sheet thickness... means i need dies from UNP 40, UNP 50, UNP 60, UNP 80, UNP 100 to bend most flatbar of common farm sizes.

For thin sheetmetal i can use the brake press at work, you cant get the die-and-C-channel trick to work accurate enough for 3 to 6mm sheetmetal. Anyways for half inch flatbar, most shops dont have the dies anyways, and a little misalignment isnt a big problem on only a narrow bend line.

I'm jealous, and i do need a decent shop press...
 
   / Landscape Rake Build #60  
Thanks Rob, I appreciate the compliments. Now if I only had space and money for a lathe, and a mill, and a gas torch, and, and, and...
 

Tractor & Equipment Auctions

2010 Toyota 7FDKU40 7,350lb. Straight Mast Diesel Forklift (A60460)
2010 Toyota...
UNUSED FUTURE BOBCAT-E SERIES EXCAVATOR (A60432)
UNUSED FUTURE...
TANK MANIFOLD (A58214)
2011 VOLVO A40F OFF ROAD DUMP TRUCK (A60429)
2011 VOLVO A40F...
UNUSED FUTURE FT36C STAND ON SKID STEER (A52706)
UNUSED FUTURE...
2018 INTERNATIONAL RH613 TANDEM AXLE DAY CAB (A59575)
2018 INTERNATIONAL...
 
Top