Landscape Rake Build

   / Landscape Rake Build
  • Thread Starter
#161  
tlbuser said:
Maybe nobody else thought about cheating the process :) Think I'll stick with the heat lamp option over direct flame though. I'll definitely give it a whirl soon. , I don't have the full required redneck gear so mine may not work as well :(
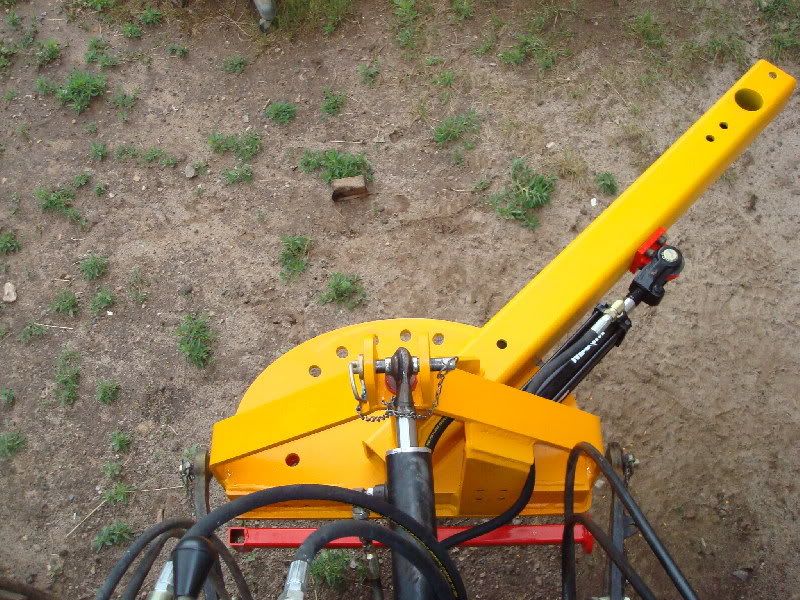
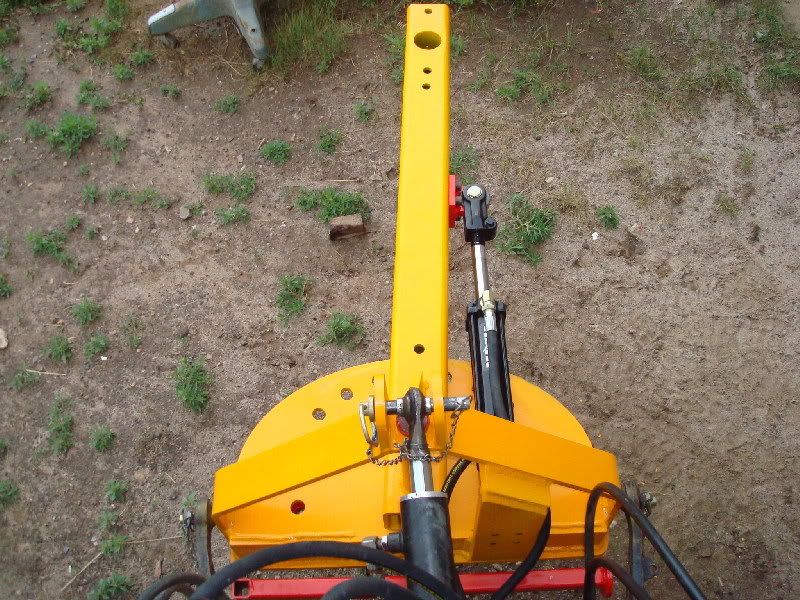
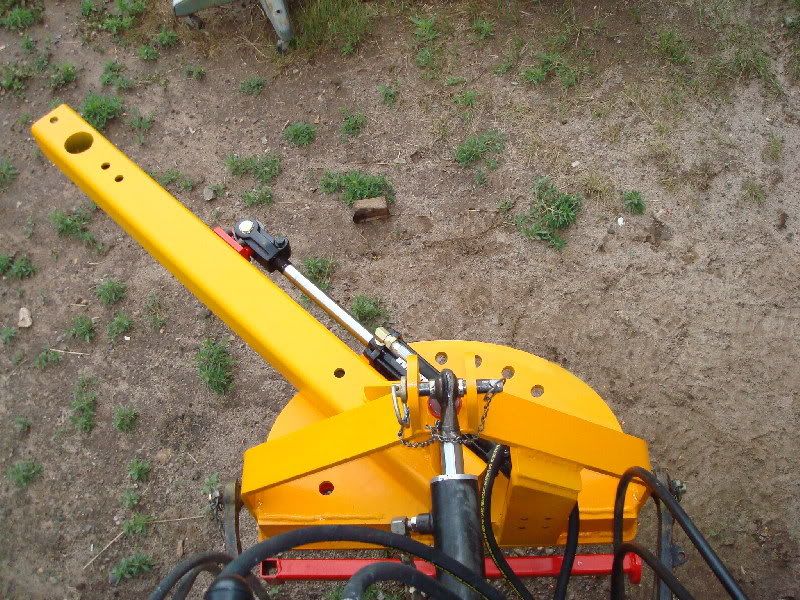
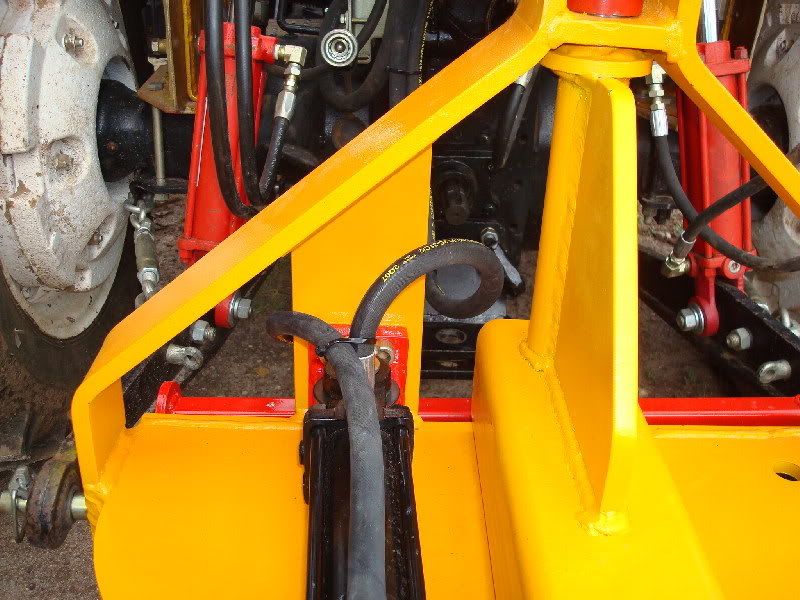
The stand add-on was a definite plus. Did you get powders from HF too? The colors look really good.

TLBuser - your post cracks me up, The redneck gear IS important or your results may vary;)
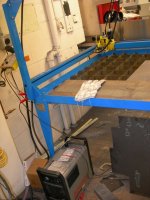
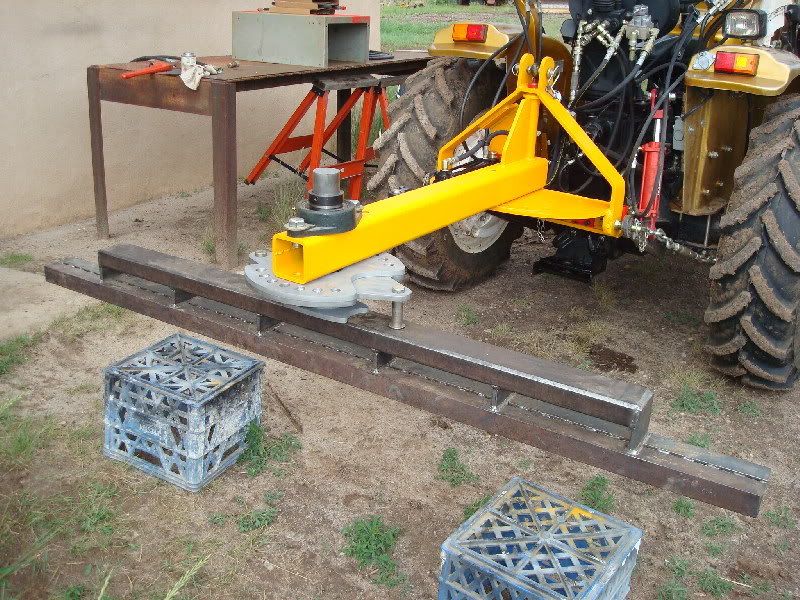
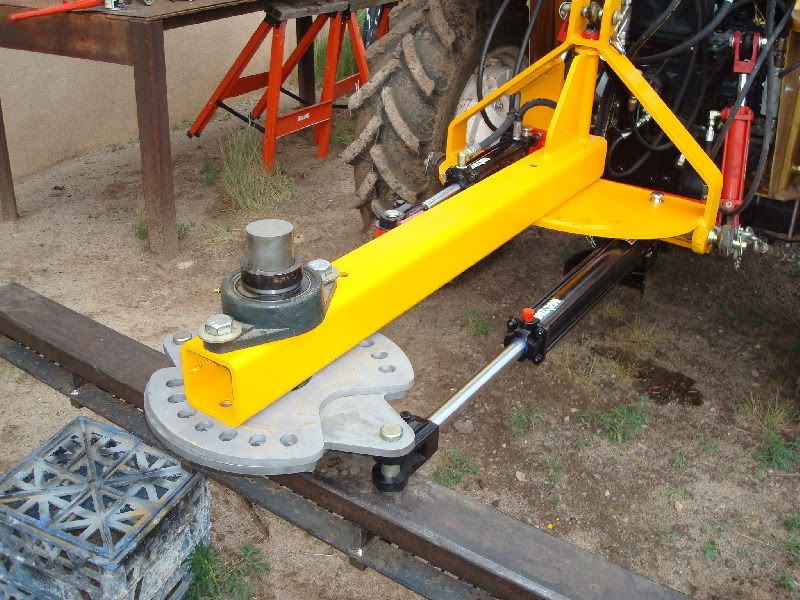
. Thanks for the stand add on compliment, it really was a last second decision to make that. I'm sure glad I stood back to look and think a second before starting the powder coat process, I believe that paid off. The powders are from Harbor Freight, 16 oz for 3.99 made in India, based on the results it seems to be OK. I have no experience with powder coatings other than what you saw in the photos so I have nothing to compare it to. How does the heat lamp work? how large or thick a part have you been able to cure using that technique? I thought those two 25 thousand BTU's heaters would have worked allot better than they did. After babysitting those heaters for three hours, that's when I decided to try something radically different to make some forward progress. These parts are big and heavy, the A frame alone weighs in at 102 pounds.

Larry
 
   / Landscape Rake Build #162  
GuglioLS said:
LOL - Mike Better check page 15 reply # 150, we were posting at the same time and you may have missed some really good close ups of the powder coating and my redneck powder coating "system". I sure am glad you brought up the idea of powder coating. If it were not for your suggestion I would have never even considered it, after reading up on it a bit, and finding out it's not really all that hard or expensive to get the best, most durable finish possible. Thanks! (Easy clean up too)


Larry

Glad to have made the suggestion. I don't have the space at the moment to powder coat; but I'm anxious to see more of your redneck oven in action.

Yes, powder coating tends to be thicker than paint, so it's common for some scraping and filing to be done to make the parts fit again. Or one can add extra clearance during the fabrication process to allow for the coating.

Primer is not as critical from my limited experience with powder coating, especially in dry climates like ours; but I have had some parts primed, then finish coated when I knew they were going to be exposed to long periods of moisture.

Keep up the excellent work.

Matt
 
   / Landscape Rake Build #163  
GuglioLS said:
How does the heat lamp work? how large or thick a part have you been able to cure using that technique? I thought those two 25 thousand BTU's heaters would have worked allot better than they did. After babysitting those heaters for three hours, that's when I decided to try something radically different to make some forward progress. These parts are big and heavy, the A frame alone weighs in at 102 pounds.

Larry

Well, the largest part I have done is a buddy's soft tail frame. Thickest has been 3/8 plate. I bought a new to me toy, a 1973 JD350B and had to make some bushings for the undercarriage which got powder coated. Time will tell if that helped with abrasion resistance.
Does your buddy have a plasmacam cutter with z-axis control? I have a heck of a time keeping the z-axis aligned.
 

Attachments

  • Picture 016.jpg
    Picture 016.jpg
    119.3 KB · Views: 215
   / Landscape Rake Build #164  
Something else to try on the powder is to coat it, then heat the part as if curing, but only long enough to "gel" it. Then coat again, and let fully cure in the curing oven. This method probably won't work with the weed burner heat source though... If you can work out the process, this makes for a very durable finish, provided you have done your part cleaning/prep properly.
 
   / Landscape Rake Build #166  
tlbuser said:
Well, the largest part I have done is a buddy's soft tail frame. Thickest has been 3/8 plate. I bought a new to me toy, a 1973 JD350B and had to make some bushings for the undercarriage which got powder coated. Time will tell if that helped with abrasion resistance.
Does your buddy have a plasmacam cutter with z-axis control? I have a heck of a time keeping the z-axis aligned.

That plasma cutting system looks like a Plasma Cam unit. It should comes with a standard torch height control, and now has a new digital height control on the newer system.


Digital Height Control or Torch Height Contol is a new feature on the DHC2 Model plasma cutting table.
 
   / Landscape Rake Build
  • Thread Starter
#167  
tlbuser said:
....snip.....Does your buddy have a plasmacam cutter with z-axis control? I have a heck of a time keeping the z-axis aligned.

TLBuser -

Yep it's a plasmacam, just like yours in the picture you posted :eek: you have a plasma cutter? sweet :cool: . His has a Z axis stepper motor, it's manual or software controlled, and he fiddles with it allot. I think it's due to a combination of table and part warp-age. Do you use your plasma cutter much? What kinds of parts have you made? and do you use autocad or the plasmacam software to design parts? If I keep at it, one day I may have to invest in one. But so far I have a good gig going with them - Trade my mechanical and electronics skills to repair their equipment in exchange for metal and plasma cutting, it's a win win situation.

Larry
 
   / Landscape Rake Build #168  
PlasmaCam is located about 1/2 way between Larry and me and I've always wanted to see one in action and find out how others like it.

As for the Z-axis fiddling, I'm guessing a servo motor would be better than a stepper motor. I was looking at laser engravers a couple of years back when I thought about starting a small business with one. The unit I wanted to get used servo motors. They are more expensive than steppers; but are more accurate too.
 
   / Landscape Rake Build
  • Thread Starter
#169  
J_J said:
Here is some good reading about the different powder coat paints.

Spray Tech Systems, Inc. - Powder Coating Basics


Harbor Freight powder paint is Polyester Urethane.

Hey J.J. interesting read (short and sweet) Seems the Polyester Urethane powder I used from Harbor Freight is OK after all. Good thing to as it's already a done deal -coated and cured, I'm not about to strip it off. My climate is mostly bone dry, average of about 15% humidity or less year round. You said bare metal rusts in a couple hours, I have sand blasted parts setting around for two weeks now, and it's as good as the minute I blasted it. I have 30 year old metal setting outside unprotected and it's still got the black mill slag and not a spec of rust. I love the dry desert southwest. I've lived or visited all over the country and know what ~100% Humidity with 90+ temps are like, and what it does to metal, so I can understand in your area that bare metal rusts in no time at all.

BTW - Tonight I started working on your metal bending anvil, put a couple of hours into it. I will soon post pictures of my progress. Are you going to start a new thread documenting what it's going to be used for?

Larry
 
   / Landscape Rake Build #170  
   / Landscape Rake Build #171  
GuglioLS said:
TLBuser -

Yep it's a plasmacam, just like yours in the picture you posted :eek: you have a plasma cutter? sweet :cool: . His has a Z axis stepper motor, it's manual or software controlled, and he fiddles with it allot. I think it's due to a combination of table and part warp-age. Do you use your plasma cutter much? What kinds of parts have you made? and do you use autocad or the plasmacam software to design parts? If I keep at it, one day I may have to invest in one. But so far I have a good gig going with them - Trade my mechanical and electronics skills to repair their equipment in exchange for metal and plasma cutting, it's a win win situation.

Larry

Yea, that's what i was wondering. Mine is servo controlled not stepped. The plasmacam guys have never really been able to tell me why either. Using software control, once setup and "calibrated" I shouldn't have to manually adjust it every time we set it up but........The table gets used quite a bit. I made a garden gate for one of our customers and she is always referring people to us to get one like hers. Made a couple of signs for friends, some caliper brackets and a rock bucket/grapple combo for me. I need to get back on it to make a thumb like Rob's for my little backhoe. Maybe I have ADD or something, never enough time to do everything :)
Maybe your buddy didn't share very well, Plasmacam software will import autocad, g files, etc. I think your trades are a better deal than what I get. I like autocad for drawing because I still haven't figured out how to set dimensions in plasmacam :rolleyes:
 
   / Landscape Rake Build
  • Thread Starter
#172  
TLB -
I had a few parts plasma cut for SkunkWerX, I double checked the motors on my Buddy's PlasmaCam, and found they are servo motors after all. The Z axis motor is rather small.

Our Monsoon season is here, so no progress on the rake this past week.
All the rain and mud has given me the opportunity to make J.J.'s anvil for his hydraulic press. I wonder what he's going to use that for?................
J.J. - Your Anvil construction is complete :D , here are a few of the steps it took to build that... First round up the steel parts, turn the ends flat, drill a 1/4" hole clean through three inches of solid steel for the blade holder screw. Then use every 1-2-3 and 2-4-6 block I had to get the part up the the 1/2" solid carbide mill bit.


Center the bit, mill a 1/2" wide X 3/4" deep slot, cut the anvil knife, drill and tap for 1/4-20, start boring out the holder to 1" id x 1" deep


Final counter bore, test fit the knife blade, cut some DOM (Drawn Over Mandrel) a.k.a.seamless tubing for the mounting stub, square up ends of the DOM, test fit.


Cut the knife edge to 35*, cut the knife holder to 45*, assemble and post pictures.


The only thing left is heat treat the knife and ship it. I will do that sometime Saturday. With any luck I should make some progress on the rake too.

J.J. - I hope you find your metal bending anvil satisfactory and that is gives you many years of service.

Larry
 
   / Landscape Rake Build #173  
You forgot to post the pic where you came back to the saw & said: "Darn...Need to find another 3" clamp..."
 
   / Landscape Rake Build #174  
Larry, Looking good. On the seamless tubing, do you have a way to keep the tubing secured to the anvil? On my receiver, I have a bolt in the side to secure the top half .
 

Attachments

  • snapon press 001.jpg
    snapon press 001.jpg
    914.5 KB · Views: 201
   / Landscape Rake Build
  • Thread Starter
#175  
Defective said:
You forgot to post the pic where you came back to the saw & said: "Darn...Need to find another 3" clamp..."

HaHaHa -
Yea that darn saw, Not a problem though, I just weld them clamps back together ;) I'm sure you figured out when the blade got close to the clamp, the clamp is removed then placed above blade to finish cutting :) So far I've been lucky doing it that way.

Larry
 
   / Landscape Rake Build
  • Thread Starter
#176  
J_J said:
Larry, Looking good. On the seamless tubing, do you have a way to keep the tubing secured to the anvil? On my receiver, I have a bolt in the side to secure the top half .

Thanks J.J. -

Not to worry about the mounting stub, got that secured in place with lead free solder composed of SnSb5, (95% tin, 5% Antimony) melting point is 232-240*C (450 - 464* F). SnSb5, has good shear resistance so it will not come out under normal use. If for some reason you ever had to replace it, just heat it up and slide it out.


Larry
 
   / Landscape Rake Build
  • Thread Starter
#177  
I guess this rake build is turning out to be insane.

OK here is the latest -
I got the swing cylinder hydraulics plumbed to test it out under power. Ran the cylinder to it's extremes in both directions, amazingly I got exactly full 90* swing. I guess designing this stuff in CAD really does work after all. Next was to test fit the tine holding bar, it fit so I took it off and apart to weld on the index plates and the 1" ID DOM seamless tubing for the angle cylinder clevis pins.


I tack welded the DOM in place so the 1" pins and holes were parallel to each other. Last was to apply the finish coat and re install it onto the boom. After that I plumbed in the windrow angle cylinder which also acts to keep the blade parallel to the line of pull no matter what the swing angle is. (articulation) My next post will be a video showing how all that works...


I guess I'll have to bolt the tines on it tomorrow so that is will be DONE!!!!

Larry
 
   / Landscape Rake Build
  • Thread Starter
#178  
Here it is, the moment of truth.. will it work?, does it work?.... you be the judge.


In the first segment of the video, I gave the rake tine holder a little nudge, if you watched the video, the flange bearing I added sure does make it smooth, If I had not stopped it, there is no telling how long it would have spun around like that.


Larry
 
   / Landscape Rake Build #179  
Absolutely fantastic Larry.
Everything works great and fits perfectly. Guess it's time to bolt on the tines and give it a rip now, eh?
 
   / Landscape Rake Build #180  
That looks and works great!

How about some pictures of your Redneck Ingenuity...err...Yankee Ingenuity powder coating oven?
 

Tractor & Equipment Auctions

30ft Highway Trailer Co. Lowboy (A61306)
30ft Highway...
CAT D8 (A58214)
CAT D8 (A58214)
2019 CHEVROLET SILVERADO CREW CAB TRUCK (A59823)
2019 CHEVROLET...
2018 LARK UNITED MANUFACTURING S/A GUARD SHACK (A55745)
2018 LARK UNITED...
2012 NISSAN 110 FORKLIFT (A55745)
2012 NISSAN 110...
Unused 2025 CFG Industrial H15R Mini Excavator (A59228)
Unused 2025 CFG...
 
Top