Let's See Your Workbench

   / Let's See Your Workbench #61  
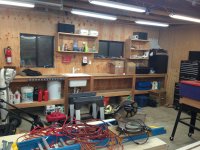
Here is what you can see in mine, it is full of projects in various stages, and it is never completely clear. 2012-01-07_06-16-33_95.jpg2012-01-07_06-16-42_803.jpg
 
   / Let's See Your Workbench #62  
2000 sq ft of space and all I have for now is this tiny thing in the corner:

NCM_0054.jpg

Come to think of it, I took that down to level the floor with gravel! Oh well, back to the drawing board. :D
 
   / Let's See Your Workbench #63  
I noticed that...I also think I saw some welders in some shops...that and gas fumes not so good....but really any spark given enough pent up fumes and Kabooom....You're right.

I keep my Miller next to my gas cans but all the welding gets done outside. The shed has wood floors too.
 
   / Let's See Your Workbench #64  
One thing that pops out as i look at all the pics, lots of us are a little hazardous (myself included) when it comes to storing the flamables in our work areas.

Flammables are bad enough. Add a little black powder and lots of smokeless (gun) powder and it gets worse.
 
   / Let's See Your Workbench #65  
Lee that looks like a REALLY nice start to your shop/upstairs all open or gettign sectioned off for living storage work shop??

Make sure to get additional skirt boards under them to keep critters from getting under the slab when ya eventually get some concrete in there. It took 8 or 9 years for me to get the concrete in mine and I ended up re-doing the stairs going up into my 2nd floor. It was a straight staircase that went into the middle (spot like yours but stairs went straight up along back wall. I took them out and put in a set like yours in the corner tho.

Mark
 
   / Let's See Your Workbench #66  
16 ft workbench from leftover plywood and 2x4s. Now if I could just get to it
 

Attachments

  • image-2435117545.jpg
    image-2435117545.jpg
    558.1 KB · Views: 362
   / Let's See Your Workbench #67  
12-15 years ago I made a few shop tables from some 4x8 sheets of 3/4" w/laminate with 2x6 apron and legs. They've remained sturdy as heck over the years and were very inexpensive to put together. I've got 'em for assembly and also for a very large outfeed table for the cabinet saw. I made sure to leave plenty of "overhang" from the apron for being able to clamp all the way around the tables.

These shots were of the work of course, but you can see a bit of the tables. I'd still build them the same way today, they've worked so well.


   / Let's See Your Workbench #69  
Big Green Egg table I bet!
Started out as a bunch of cedar 2 x 4's

But not mine, regrettably. :( It was for a buddy, though...so that's almost as good...and the shop smelled great with all the processing of the cedar during the build.
 
   / Let's See Your Workbench #70  
How could I show you my work bench? I haven't seen it in a while my self. I have seen little pieces every now and then but mostly it has pretty good camo.
 
   / Let's See Your Workbench #71  
Some really good set ups! Giving me a few new ideas
 

Attachments

  • IMG_0019.jpg
    IMG_0019.jpg
    860.2 KB · Views: 392
  • IMG_0130.jpg
    IMG_0130.jpg
    920.8 KB · Views: 408
Last edited:
   / Let's See Your Workbench #72  
This shows my lay out. I have a desk for finishing work, a wood workers bench, a metal area, and most of my tools in or on rollers/roller carts. This lets me take them out of the barn to work. I also have outlets all around the outside of the barn.

This shows my finish area, a log bowl carving bench, my wood working bench, and behind there is a router on an old vanity along with my table saw all on wheels. You can see all the white buckets, i have each labeled and put in shelving between the studs to save room.

my bandsaw and metal working area, behind the band saw is another bench. Along one wall I have a fold down shelf that a chop saw is on.
 
   / Let's See Your Workbench #73  
Lee that looks like a REALLY nice start to your shop/upstairs all open or gettign sectioned off for living storage work shop??

Make sure to get additional skirt boards under them to keep critters from getting under the slab when ya eventually get some concrete in there. It took 8 or 9 years for me to get the concrete in mine and I ended up re-doing the stairs going up into my 2nd floor. It was a straight staircase that went into the middle (spot like yours but stairs went straight up along back wall. I took them out and put in a set like yours in the corner tho.

Mark

Thanks Mark. The space under the boards is closed off now that the final grade is finished outside.
 
   / Let's See Your Workbench #74  
Mine was from a kit. The steel legs and bottom shelf are all bolted together. I put a solid wood door on top then wrapped the door with 18ga. galvinized sheet metal and installed a 12 receptacle outlet strip. It works well for my little garage and holds the weight of everything I've put on it - so far.
The worst part about it is it catches all my tools and incomplete projects so there's never any room on it and I can never find the tool I'm looking for!

IMG_0375.jpgIMG_0376.jpgIMG_0377.jpg
 
   / Let's See Your Workbench #76  
Thanks Mark. The space under the boards is closed off now that the final grade is finished outside.


Lee: I have 2 to 3 8" T&G skirt boards buried under the final grade at my place because of the critters. I have Styrofoam underlay insulation so HAVE to keep critters away and radiant barrier too so warmth in winter when heat goes in (someday maybe.)

This is what the stairs look like going up to the 2nd floor NOW


This is what the corner looked like after the Straight steps were tore out (prepping for concrete, my older brother helping.) You can see some of the skirt boards but at this point I think 2 were below grade. In top right corner you can see the 2nd floor original opening. I cut it out back to the wall and moved that cut out section of floor forward to gain space in the center of the 2nd floor FLOOR. It was about 6' worth of floor space move but it made my 2nd floor layout better.

The original straight staircase also was close to the corner maybe 42" from the wall so limited the access some. I can eventually add a 2nd floor door where the NEW floor area is at and steps or deck outside...


(BTW that post is straight just a camera lens distortion :))

Mark
 
   / Let's See Your Workbench #77  
OK, I am fascinated...is that a VW engine and if so, what's it for?:steeringwheel:

Yes, good catch Iowachild. VW Type 1 - 1776cc hot rod motor to my trike I built in 1977, from a 1966 bug. I'm replacing the axles to my swingaxle frame so the motor and transaxle had to come out. I also have another trike I built in 1999 from a 1973 bug. The wood barrel is the '77. I love building trikes and working on air-cooled VWs. (On my workbench!)
Sorry to go off topic but a chance to show off my passion is just beyond my limitations!

2007_0830_142410AA.JPG2007_0629_213721AA.JPG
 
   / Let's See Your Workbench #78  
Sorry all. I hope my last off topic post didn't kill/ruin this thread for everyone. :sorry:
 
   / Let's See Your Workbench #80  
I really like the multiple outlets, as you never seem to have enough. I'd have put them about a foot higher up though to keep them out of harm's way for the big things that will wind up on there sooner or later.
 

Tractor & Equipment Auctions

2015 Peterbilt 348 Dump Truck (A55973)
2015 Peterbilt 348...
2015 TEXAS PRIDE TRAILER  30 FLATBED GOOSENECK TRAILER (A58214)
2015 TEXAS PRIDE...
Towable Chemical Applicator Sprayer (A59228)
Towable Chemical...
2008 TRANSCRAFT 48X102 STEEL FLATBED (A58214)
2008 TRANSCRAFT...
2017 CATERPILLAR 305E2 CR EXCAVATOR (A60429)
2017 CATERPILLAR...
MANIFOLD TRAILER (A58216)
MANIFOLD TRAILER...
 
Top