OP
buggyman1
Platinum Member
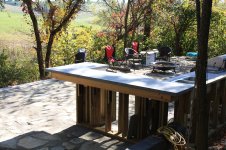
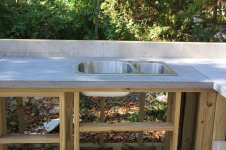
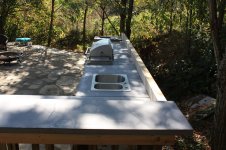
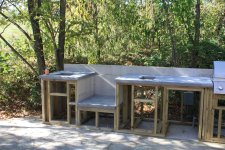
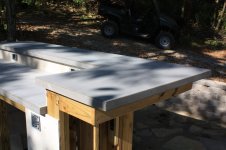
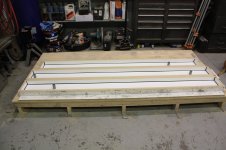
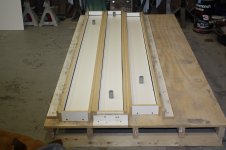
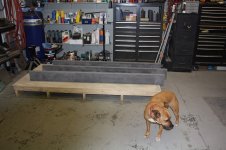
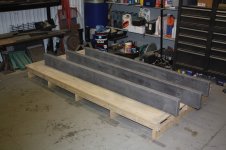
Got the counters in place tonight") They look great. Big thanks to my brother in law Rick, and friend Chad for helping with the muscle (could not have done it without them). Almost no pin-holes this time, vibrating is the key i think. Everything fit perfect, i'll have to shim a little to get everything perfectly level, but that was expected. Sorry there's no pics, but it got dark on us (tomorrow i'll post some). One more pour (the backsplash) and i'm done with the counters. I'm really happy how they turned-out so far. I prob. will pour them for my indoor kitchen as well.
They look great. Big thanks to my brother in law Rick, and friend Chad for helping with the muscle (could not have done it without them). Almost no pin-holes this time, vibrating is the key i think. Everything fit perfect, i'll have to shim a little to get everything perfectly level, but that was expected. Sorry there's no pics, but it got dark on us (tomorrow i'll post some). One more pour (the backsplash) and i'm done with the counters. I'm really happy how they turned-out so far. I prob. will pour them for my indoor kitchen as well.
They look great. Big thanks to my brother in law Rick, and friend Chad for helping with the muscle (could not have done it without them). Almost no pin-holes this time, vibrating is the key i think. Everything fit perfect, i'll have to shim a little to get everything perfectly level, but that was expected. Sorry there's no pics, but it got dark on us (tomorrow i'll post some). One more pour (the backsplash) and i'm done with the counters. I'm really happy how they turned-out so far. I prob. will pour them for my indoor kitchen as well.