Polebarn lean-to posts

/ Polebarn lean-to posts #1  

fishpick

Platinum Member
Joined
May 20, 2006
Messages
837
Location
The part of NY with high taxes
Tractor
L4760 & BX24
In the next month or so I think I'll be starting on my lean-to on my barn - since the estimates I have gotten from contractors are ridiculous compared to the amount of work to do.
Anyhow - I'm just gonna do it myself after I draw up some plans and get them off to the town for a permit.
So - my question starts with the main posts... Anyone have opinions about using the backhoe to dig the holes for the timbers? I know most contractors would use a big auger - but since I have a BH and no PHD - I don't see any real issue... comments?
 
/ Polebarn lean-to posts #2  
You have to consider what those posts do. The obvious answer is that they hold up the roof. So digging a hole with a backhoe and putting the post in that hole seems feasable. The other function of the post is to hold the roof down during a wind storm. This is where I think you might run into problems. The upward force on the roof during a windy day is tremendous!!!!

Having the post in a hole that is solid all the way around lends tremendous strength to the pole. Packing soil or pouring concrete locks that post in place. If you dig that hole with a backhoe, you will make it very dificult to lock that post into place, unless you use concrete to fill in the entire hole.

I think it would be cheaper to hire out the holes to be drilled with an auger or rent one versus paying for all that cement.

Eddie
 
/ Polebarn lean-to posts #3  
You bring up a valid point, Eddie. Wouldn't a Wacker compactor achieve the same results for a much lower rental fee? I am facing the same dilemma.
 
/ Polebarn lean-to posts #4  
I had the same situation, I had dug holes for a lean-to with a backhoe and ended up with very elongated holes even tho I was only going 40" deep. It took more quickcrete and the posts were never as solid as if I used a post hole digger. It probably would have worked out and been solid once it was constructed, but unfortunately we decided to sell the farm so I took everthing apart for a new barn on another place. I will be using a post hole digger for the posts from now on.
 
/ Polebarn lean-to posts #5  
I dug the holes then set 4' construction tubes into the hole, backfilled around the tubes then poured them full of concrete. When the concrete was almost set up. I inserted steel bars about 30" long with a 90 degree angle bent into the bottom and a few holes drilled in the top.

When all was dry, I compacted the soil as best as I could and used lag screws to attach the posts to the steel bars. It withstands both the weight of substancial snow wright and the uplift of winds up to well over 60mph.
 
/ Polebarn lean-to posts #6  
Have a look at the Footing Tube made in New Brunswick, Canada. It is a one piece heavy polyethylene footing and tapered pier form that uses the weight of the backfill to hold down and stabilize the pier. It has the added advantage of being slippery poly which, in conjunction with it's taper, will minimize or eliminate frost bonding/lift. They can now be had in lengths up to 8' (two piece) for use in new construction excavations that are too deep for a 4' pier/footer. (When there is a need for a pier close to the new foundation, for example, and the excavation is already 8')
 
/ Polebarn lean-to posts #7  
Jeff,

I'm not an engineer, just a home builder/remodeler, so I can't support this very well. Maybe others can help me out? Here is how I understand compaction.

Undisterbed soil is considerd 100% compact. It's also called virgin soil. There are exceptions to this, but overall, if it has never been dug in before, it's probably undesturbed and 100% compact.

When moving dirt and building up pads, the goal is to get that new soil as close as possible to 100% compaction. When I worked in California, the inspectore would send a signal into the ground, similar to how radar works. He's measure that signal to determine the amount of compaction in the soil. Our goal was something like 97% in order to pass the inspection.

Even with heavy equipmen, sheeps foot rollers ,building it up in lifts, and adding water, we didn't always pass the inspection. It's not easy to get soil compacted enough to pass a California inspection!!!

Using a Wacker brand, or jack-hammer styler compactor dos work, but it's slow going and takes allot of room. There are hydraulic tampers that pack the earth with a much smaller footprint, but again, it's even harder to get compaction with them. When I did pipe jobs, we ran the Wackers in the trench on top of a layer of sand. The sand was jetted for compaction, but teh dirt fill had to be hand packed. This was extremly dificult to do and time consuming. We literally spend days filling and compacting pipelines that only took one day to dig and install!!!!!

It would be extremly hard to get good compaction on a post that is dug with a backhoe and filled with dirt. It's not something that you will notice while building, and maybe if the weather never gets bad, you might never notice.

Here's what might happen. Rain water will penetrate dug earth much, much faster then virgin soil. It will literall fill up that hole just like a cup of water. The bigger the hole, the worse this is! Now the soil that might have 70-85% compaction is allot less. This soil will take a very long time to dry out. Now lets say there is a wind storm, thunder storm, or some sort of extreme weather with strong winds that come in. With these very common conditions, you can have total failure in your posts.

Locally, it's fairly common with carports. There was one that I know of that just came out of the ground last week. I don't know the exact details or soil conditions, but the wind pulled up the posts on two corners. Then the building twisted and snaped off the posts on the other side. The roof colapsed with those two poles half way out.

Eddie
 
/ Polebarn lean-to posts #8  
My thoughts are along the line of Eddie's. I've built or help build a couple pole barns. Always used a post hole digger (2 man) I rented. Used 6x6 post and used a 12" auger that gave a little room to move the pole to get in correct position. After digging the hole I added about a foot of crushed rock for a footing. After pole in place, backfilled the hole with 3/4 minus crushed rock.

Here, no permit needed for out-buildings. Did I do it all by the book, I'm not sure but I know the first barn, 30x60, 12' eves, is still standing and we've had a couple wind storms over the past 30 yrs's it has been standing. The 2nd barn is at my son's and is only 3-4 yrs old and no problems.

I'd never give thought to using a backhoe for digging the post holes.
 
/ Polebarn lean-to posts #9  
rent a skidsteer with an auger.
 
/ Polebarn lean-to posts
  • Thread Starter
#11  
I appreciate the replies and they made sense... until I started thinking about the fact that if I dig a 12" diameter hole with a PHD - and set in it an 8" pouring tube and place the 4x6 inside that... and fill the tube with concrete... and backfill around the tube with soil - that's got about the same resistance to being pulled out of the ground by direct upward force as a hole dug with the backhoe.
I'll likely use a PHD - but more from the perspective of ease.
 
/ Polebarn lean-to posts #12  
I agree that putting a sonitube in a hole and the trying to pack around the tube with cement doesn't make any sence either. I've seen people do it, and I've seen them post pictures of it on different threads. It could be that I just don't get it and they are doing it under some principle that I'm just not familiar with, but it might also be that they are doing it because it made sense to them at Home Depot when they bought the sonitube.

My use and understanding of what a sonitube is used at a round form for above ground pours. If you need the concrete footing to come up higher then ground level, then you fill the hole in the ground with concret and then place the sonitube on top of the concrete or just an inch or so below grade.

This is rather common in Pier and Beam homes, Decks in wet areas where you don't want the posts touching the ground and on some piers that I've seen.
The real trick is figuring out how tall you want the sonitube to be above grade and cutting it to the correct length.

Eddie
 
/ Polebarn lean-to posts #13  
I'm about to build a leanto on my barn too, and I plan to do it as Eddie last described: 36" deep, 12" auger, 18" of 12" sonitube at the top of each hole about 2/3 burried. Then fill with concrete and post anchors. Except for the top 6" or so, the holes will be in virgin soil. I plan on 7 6x6 posts to support 35 feet of steel-roofed open leanto. The leanto span is 18' set on 2x8's every 2 feet with 2x4 purlins. I hope it is good enough.
 
/ Polebarn lean-to posts #14  
Gittyup said:
I'm about to build a leanto on my barn too, and I plan to do it as Eddie last described: 36" deep, 12" auger, 18" of 12" sonitube at the top of each hole about 2/3 burried. Then fill with concrete and post anchors. Except for the top 6" or so, the holes will be in virgin soil. I plan on 7 6x6 posts to support 35 feet of steel-roofed open leanto. The leanto span is 18' set on 2x8's every 2 feet with 2x4 purlins. I hope it is good enough.

Something doesn't make sense here.

Your leanto is going to be 35 feet long and you are putting in 7 posts? How far apart are your posts going to be? It almost sounds like you are putting them in every six feet, or a littel under. Will this be a solid wall, or do you plan on being able to access the leanto through the space between the posts? I'd go twice that distance, or almost 12 feet apart.

With an 18 foot span, I would gp with two 2x12's screwed and glued together with half inch CDX plywood ripped to size for the full length. Then I would put them up every four feet (or slightly less) and run the purlins on the flat every four feet. On the side that attaches to the existing building, use joinst hangers designed for 3 1/2 inch beams. Be careful, because it's easy to confuse the 3 inch ones with the larger ones that you need.

I would also add a brace from a few feet lower on the wall and angled up to the beam at a 45 degree angle. This will give you a triangle look that ties the beam into the building at two seperate points. It's a huge strength issue that if done, will add tremendous strength to the entire building.

For the headers on top of the posts, I'd notch the top of the posts on the outside portion to mount a pair of 2x10's with the plywood sandwiched between them.

To add strength and stability to your posts and roof, put braces on the tops of the posts about 2 feet from the top at a 45 degree angle that tie into the header.

After the posts, header and braces are in place, install some Simpson line straps to tie them all together. This will make a huge difference during high winds. On an extremly windy day, there is thousands of pounds of preasure lifing up on a roofs overhang. With a leanto, that can be an almost unbelievable amount of preasure!!!!

That 18 foot span has me nervous, so you really should check with an expert before going that far. Was that how far from the building you will be, or is that how long your beams will be due to the pitch of the roof?

Eddie
 
/ Polebarn lean-to posts
  • Thread Starter
#15  
EddieWalker said:
I agree that putting a sonitube in a hole and the trying to pack around the tube with cement doesn't make any sence either. I've seen people do it, and I've seen them post pictures of it on different threads. It could be that I just don't get it and they are doing it under some principle that I'm just not familiar with, but it might also be that they are doing it because it made sense to them at Home Depot when they bought the sonitube.

My use and understanding of what a sonitube is used at a round form for above ground pours. If you need the concrete footing to come up higher then ground level, then you fill the hole in the ground with concret and then place the sonitube on top of the concrete or just an inch or so below grade.

This is rather common in Pier and Beam homes, Decks in wet areas where you don't want the posts touching the ground and on some piers that I've seen.
The real trick is figuring out how tall you want the sonitube to be above grade and cutting it to the correct length.

Eddie

OK - and makes sense... but then if you suggest fundamentally "drilling a hole in the ground, throwing a post in it, and filling with concrete" - the argument people throw back is "frost heave" will grab the sides of the un-smooth concrete and try to lift the posts up and out (which I have never seen when someone goes below the frost line - but I "hear" it happens - or rather hear people "say" it happens)

At any rate - this got me thinking about all the structures I have seen built over the years - those I have helped build - those I have built myself... And then all the discussions about wind at our new house... And I got to calculating - because what I was reading here in this string started me churning.

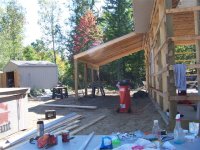
My lean to (proposed) is about 12 X 40 or 480 feet^2. Now - it's also not directly into the wind - so really anytime I now start talking about wind speed - it's a fractional value since an updraft speed will not exceed the 3 second gust average. Anyhow - here's what I came up with using accepted calculations and values:
lean to = 480 sq ft.
5 posts in the ground, 1 every 10 ft.
Wind pressure equation: Pressure = ï½½ x (density of air) x (wind speed)2 x (shape factor) - The shape factor (drag coefficient) depends on the shape of the body it impacts upon.
Now - stealing from some pre-baked(1) math out there - and assuming that this is a flat vertical surface (like a wall) - at a 60mph gust speed - you net 10.5 pounds / ft^2 - so for this surface - a 60 mph gust blowing right straight out of the ground up would yield 5040 pounds pressure.
OK- then we have the weight of the structure to contend with...
The OSB comes in at let's say 50# / sheet(2) - and for the 480 sq ft - I need 15 sheets... that's 750#
5# nails
the 5 posts themselves are around 100# each for a total of 500#
20 - 2x8 joists(3) come in at 491#
3360 ln inches * 7.5in * 1.5 in = 3780 cu in = 21.875 cu ft... cu ft * specific gravity of white pine * wt water = 21.875 * .36 * 62.4 = 491#
headers are around 200#
cheap shingles(4) approx 225 #/sq, 100 sq ft = 1 square... so 480 sqft = 4.8 sq * 225 #/sq = 1080#

So - the ROUGH total of the structure sitting on the barn and the posts in these holes we are talking about is... 2526#... and that's not including other weight that would be added!

All that math translates to an "unopposed" force of 2514# in a 60 mph wind gust.

Calculus not withstanding in a friction /post surface area calculation - and the updraft pressure transferred to the building - lets for sake of argument is half the balance of the pressure... that leaves 1257# of upward force over 5 posts - or 251# per post...

I don't see - backhoe dug, drilled, tubed, concreted - whatever - down 42" as code dictates - any post pulling out at double, triple or even quadruple the force under the strain of a full 60 mph wind blowing right straight out of the ground.

References:
(1)Beaufort scale - Ark Anchors
(2)http://www.cwc.ca/products/osb/sizes.php
(3)http://www.ruraltech.org/projects/conversions/briggs_conversions/briggs_ch01/Chapter01_combined.pdf
(4)Removing Old Roof Shingles
 
Last edited:
/ Polebarn lean-to posts #16  
You are correct. Posts are a little under 6' apart. I do not plan on closing in the wall. The posts will sit just a couple of feet back from a steep embankment. So, side access between posts is not possible anyway. I spaced them closer to support the headers and rafters without needing the 45 degree supports.

The 2 x 8 rafters will sit on top of two 2x12 header boards bolted to each side of the posts. Each rafter will have two opposing straps, one to each header, no notches. The eave will be fitted with fascia and drip edge, but no soffit.

The actual span to the first header will be 17', with an over all length of 18'. The span is what made me choose to put them 2 feet apart.

I waffle on adding an extra support mid-rafter connecting back to the building. To me this will create a place for birds and squirrels to nest in. However, given the long span, I'll probably add them.

The leanto is protected from most prevailing winds. Bank barn is to NW with another embankment also to the NW into which the building is built (2 story bank barn). Even when very windy, it is a well protected area. My real concern is snow, as the pitch will be shallower than I'd like due to windows on the bank barn wall above the leanto.
 
/ Polebarn lean-to posts #17  
Fishpick,

I'm not qualified to argue with you on your math, nor do I even understand your equations. My knowledge on wind comes from a guy who used to build in Florida for hurcanes and the forces of wind on house eves. He quoted me numbers allot higher they what you came up with, but I got so many numbers in my brain that I'm not sure which is correct to actually post them.

Frost heave is another thing that I'm not knowledgable on enough to be able to say how deep or what will happen in your area. On posts for buildings, there are allot of other factors that come into play, as compared to a fence post. I do know that the side preasure of the soil does allot more to secure a post or footing in the ground then the bottom footprint does. How much that is, I can't say for sure. Maybe an engineer will help me out here, but in reality, it's not the point. What is important is that you always build everything as strong as possible. Having the post in a hole that is not solid is taking a chance on the integrity of the building. Digging the holes with the backhoe means that you will be putting a hole in the ground that I feel is too big to get proper compaction if you fill the dirt back in. You could fill the hole with concrete and solve this problem, but that would take a rediculous amount of concrete. The question is wether to buy all that extra concrete or get a post hole digger. Rent or buy, I think the post hole digger is the much cheaper way to get the same results.

Eddie
 
/ Polebarn lean-to posts #18  
Gittyup said:
You are correct. Posts are a little under 6' apart. I do not plan on closing in the wall. The posts will sit just a couple of feet back from a steep embankment. So, side access between posts is not possible anyway. I spaced them closer to support the headers and rafters without needing the 45 degree supports..

The angles supports don't actualy add significant strength to the beams. What they do is create a triangle, which locks the top of the post in with the roofline. Imagine a tree swaying in the wind. That is what a post does to a very small degree. When you add those two angled braces to the top, you eliminate this movement. It's also called "racking" in home building.

The 6 foot spacing allows you to use smaller sized lumber for your beams. A pair of 2x6 on 6 foot centers should be plenty with the plywood sandwiched between it. Without the plywood, it would probably be strong enough too, but the added strength of that plywood between to beams is significant!!


Gittyup said:
The 2 x 8 rafters will sit on top of two 2x12 header boards bolted to each side of the posts. Each rafter will have two opposing straps, one to each header, no notches. The eave will be fitted with fascia and drip edge, but no soffit.

The actual span to the first header will be 17', with an over all length of 18'. The span is what made me choose to put them 2 feet apart.

I did a quick google search on for span tables and looked at a few sites. None of them list a 2x8 past 16 feet. It's too small for that much of a span. They do have 2x10's on 12 inch centers, but just barely. This is not taking into consideration snow loads, just what could be used at a minimum. If you build it, use 2x12's, double up 2x10's with plywood in the middle, or order engineerd beams.

For what 2x12 will cost, it would be worth your time to price engineered wood I beams. They look like OSB with wood 2x4's on either edge.


Gittyup said:
I waffle on adding an extra support mid-rafter connecting back to the building. To me this will create a place for birds and squirrels to nest in. However, given the long span, I'll probably add them.

My real concern is snow, as the pitch will be shallower than I'd like due to windows on the bank barn wall above the leanto.

Snow can be very heavy. If you build it, but cut a few corners to save a hundred dollars or even five hundred dollars, what have you actually saved if it collapses?

As for birds or squirels, they will nest on your shelves, in your tools and just about any place they want to. It's not like you can stop them, they will do what they want if you leave the lean to open. What you really nead to worry about is wasps. They terrorize me all summer long when I go to grab something off a shelf and find a nest of them inches away from my hand!!!!!

Eddie
 
/ Polebarn lean-to posts #19  
All good points, Eddie. Perhaps I have undresized the rafters. Will have to rethink this.

No worry about wasps. They don't like the shade very much.
 
/ Polebarn lean-to posts #20  
I just did this same thing off my barn, only my span wasnt quite as far (14').

I dug my posts with my backhoe, these is nothing wrong with using this method. I filled between the posts with dirt and used a compactor to pack the sand the best I could. Then I used Quikrete around the posts. So what if it takes a couple more bags, its cheaper than renting an auger.

I also used 2x8's for my roof. However I put mine on 16" centers instead of your 24". I used floor joist hangers on the main header off my barn for support. With 16" centers on your 2x8's I think every third 2x8 was tied into my trusses, which are spaced at 24". I also put 2x6's the length of the lean two directly under my joist hangers for extra support at the header.

Its not the prettiest lean to ever but it is rock solid, no chance of this thing blowing away or collapsing. With your wider span you may want to consider 2x10's for the roof. I would definitely go to 16" centers though.
attachment.php

http://www.tractorbynet.com/forums/attachment.php?attachmentid=97481&stc=1&d=1204954414
97480d1204954345-polebarn-lean-posts-
 

Attachments

  • 100_1739 (Small).JPG
    100_1739 (Small).JPG
    82.2 KB · Views: 4,349
  • 100_1962 (Small).JPG
    100_1962 (Small).JPG
    52.5 KB · Views: 4,346
  • 100_1961 (Small).JPG
    100_1961 (Small).JPG
    67.3 KB · Views: 1,370

Marketplace Items

2017 Ford F-550 Signalier ATR 45ft Bucket Truck (A61568)
2017 Ford F-550...
2015 JLG Skytrack 8042 (A60462)
2015 JLG Skytrack...
Triple Sink Table (A60352)
Triple Sink Table...
2023 Kubota M4-061 Deluxe MFWD Utility Tractor with LA1154 Front Loader (A55315)
2023 Kubota M4-061...
2006 John Deere 250D 25 Ton Articulated Dump Truck (A59228)
2006 John Deere...
2018 22ft. Tycorp Vector Belt VB-16H (A60352)
2018 22ft. Tycorp...
 
Top