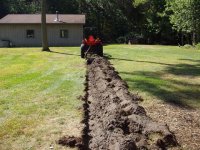
</font><font color="blue" class="small">( Okay, here's my first little run.
I think I may need those little circular blades that go before the plows to cut off the chunk of sod when I flowp it over.
I can see now how if my right tire was in a trench, I'd need the plow to be offset the other way in order for it to be even.
)</font>
The coulters (little round things - they should be big round things, 18 inches or so - if under 16" they are wore out, not worth the effort....) help 95% of the time, there are rare cases when you are better off without.
Yes, plow should have the bottom links tilted the other way once you are plowing. The plow should always be level when in the ground - whatever position the tractor is in.... You know you can use your tractor side link for fine adjustments, as well as for hooking up to the 3pt? That crank on there.
One year you plow down the left side of the field, back up the right side, throwing dirt to the outside. Do not plow when driving from one side to the other. As you kewep plowing down one side, up the other, you will meet in the middle. This will leave 2 slight ridges, one on each side of the field. And it will leave a bigger dip, or deadfurrow, in the middle of the field. Next year, you start going down the middle of the field, and return right next to that first path, throwing the dirt inward to the middle of the field. You continue going up & down, eventually getting to the outside edge of the field. This pattern will leave a hump in the middle of the field, and 2 shallow dead furrows one on each side. Notice that alternating these plowing patterns will fill in the dead furrows from the previous year, and keep your field level.
Oh, you plow the end rows (headlands) last, should only take 2-3 passes to get them plowed. As you pack the soil, they plow harder, but that is how it is.
An irregular field, or one you wish to actually move some ground, create a ridge on one side - then plow it how best you can. If a field is very big, you break it up into strips, alternate furrows and mounds.
It is not normal to till the ground before plowing, but on difficult soils one does what works, I won't say not to.
Your plow needs the top link longer, so the rear bottom ends up level with the front one.
Your plow doesn't quite look 'square', in that the rear wheel looks out to the right a bit. However, once in the dirt maybe that corrects itself. It is not a real big 'off', perhaps tilting the bottom arms the other way will take it up.
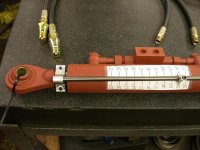
A hyd top link is fine, but if it drifts on you (the cylinder leaks down over time) then it would _not_ be something I'd want, it would require adjustment every time you start the tractor. This is something you set once, and never have to mess with again - sort of the opposite of what a hyd top link offers you....
All in all you look pretty close for a first effort, good job. Make the top link longer. If that does not help, let use see what condition your plow lays are in (the lowest part of the bottom, that cuts the ground) - if the front corner is rounded at all, can be worn out & difficult to get the plow to suck in properly. Dry ground would make that _very_ noticable.
Wow, green grass. It was -12 degrees last nite.....
--->Paul