Midniteoyl
Super Member
- Joined
- May 20, 2013
- Messages
- 5,128
- Location
- N. W. Indiana
- Tractor
- Kioti CK3510SE HST, Ford 3400, Gizmow ZTR, Simplicity 7016H
Thats cool :thumbsup:
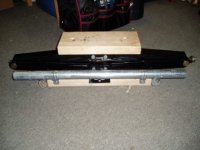
Need a way to hold two pcs of round pipe together to weld? There are ways of using angle iron, hose clamps, etc etc, but I wanted something that held 4 places and allowed access to tack weld in multiple places without it pulling out of square. I had seen pics similar to this but no measurements or instructions how to build one or where to buy. So here we go....
1-Vise Grip brand 11SP clamp
2-1" flat washers
4- 3/8"x 6" round bar
2- 1/4"x5/8" roll pins, or stove bolts would work too
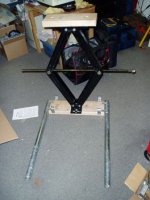
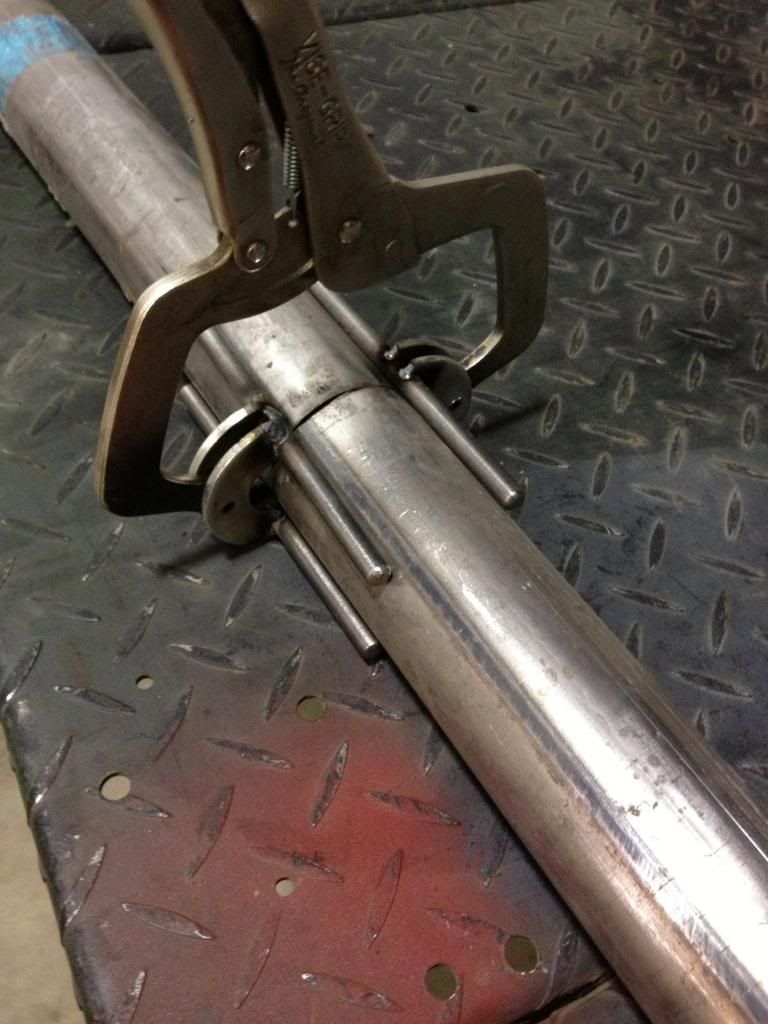
Drill/grind off the rivets holding the pads on the clamp.
Cut 2 washers in half, I used a thin cut off wheel on my angle grinder. (ya I was a chitdip and in the pic, I had cut 4 washers before I realized it, dumb moment)
drill 7/32" hole in cut washers in the center
drill 15/64" hole in the clamp existing hole (where the pads were riveted on)
Trim the washers to allow the round bar to recess into the washers a bit. Die grinder works well here.
Install the washers, 2 per side, and allow some space between them and the clamp with the roll pins or bolts, to allow them to swivel.
Line up and weld the round bar to the washers keeping an eye on them staying strait.
There you have a clamp with a wide variety of sizes available. Also keep the original swivel pads as they can be reinstalled if needed to turn the clamp back to original if needed.


Ok, so I figured if it takes any more than 5 minutes to plan, source parts and make it - then it would be just as quick to roll it out. Luckily the 2 main parts were in sight in the planning stage and then a quick trip to the cable tie storage area and it was done.


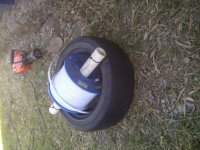
I restore old tractors quite often and it is not rare that the motor is frozen Therefore I created a handy tool to help me, when the cylinders have been left with rust solvent a while then I put this on the PTO so the engine is under tension while I gently taps on the pistons with the a mallet and a piece of wood. View attachment 358042
That sure is a nice one! Also, I have no idea how it works. Would you expand a little on that?
That sure is a nice one! Also, I have no idea how it works. Would you expand a little on that?
I would guess that the yoke goes on the tractor's PTO shaft and the cylinder/spring is attached to a solid structure with the "yoke" shaft riding in the cut outs in the cylinder. The now compressed spring puts constant rotational tension (pulls) on the yoke's shaft to help turn the PTO. Since the tractor's PTO is engaged, it is in essence coupled to the engines crankshaft. Any rotation of the PTO translates to the crank turning and producing piston travel. This pulls the pistons downward while Tor can tap the pistons from the top with a mallet to help free them. Is that correct Tor?
would you have plans for this ??
thank you