Step by step photos of new garage

   / Step by step photos of new garage #131  
I put a ridge vent on my pump house 6 x 8 feet and 8 feet to the ridge inside. It works great! I have not detected any leaks. Even in the Texas summers, the pump house is relatively cool. It remains relatively warm in the winter. On really cold days I leave the two 100 watt lights on and it stays warm enough that I don't have to worry about pipes freezing. The building has 4 inches of insulation in the walls and door and 6 inches in the ceiling.
 
   / Step by step photos of new garage #132  
roger check your opening on the ridge vents. The ones i have sit on top of the ridge but they call for 1.5 inches of space total. ONe poster suggested the type that sit on the ridge and you shingle over them. That might work for you. They sell both types at lowes, home depot, etc
 
   / Step by step photos of new garage #133  
firemanpat2910 said:
When I cut the plywood back to install mine, you could watch the heat lifting the saw dust out of the hole.

Just a technicality, but heat absolutely does not rise! Warm or hot air rises, but heat doesn't. This is a very common misconception. Heat always goes from somthing that is warmer to something that is colder, and never vice versa, and heat is only transferred via conduction, convection or radiation, and that's it. The earth is 100% heated only by the sun's radiation, because the sun is much to far away for either conduction or convection, thank goodness, or we would burn up.
 
   / Step by step photos of new garage #134  
kmdigital said:
Just a technicality, but heat absolutely does not rise! Warm or hot air rises, but heat doesn't. This is a very common misconception. Heat always goes from somthing that is warmer to something that is colder, and never vice versa, and heat is only transferred via conduction, convection or radiation, and that's it. The earth is 100% heated only by the sun's radiation, because the sun is much to far away for either conduction or convection, thank goodness, or we would burn up.


:rolleyes:
 
   / Step by step photos of new garage
  • Thread Starter
#135  
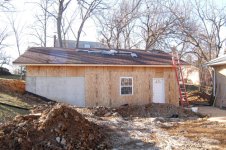
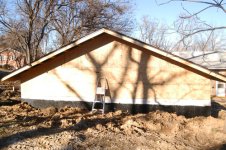
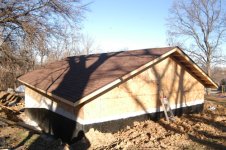
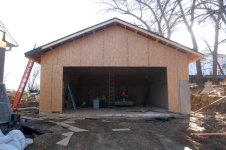
well step by step things are getting done, now more slowly now I am back at work 6 days a week.

We got the door window and sheeting all done plus roofing, then I did bracing in the trusses and at last the back filling or some of it.

I am hoping that I finish this garage before my granddaughter gets out of high school and her mother pictured her is my age.

Roger
 

Attachments

  • 1.jpg
    1.jpg
    192 KB · Views: 546
  • 2.jpg
    2.jpg
    266.6 KB · Views: 441
  • 3.jpg
    3.jpg
    193.3 KB · Views: 446
  • 4.jpg
    4.jpg
    275.4 KB · Views: 439
  • 5.jpg
    5.jpg
    256.9 KB · Views: 481
  • 6.jpg
    6.jpg
    175.5 KB · Views: 509
   / Step by step photos of new garage #136  
Fear not, your progress is not in doubt. It will be finished before you realize it.:D
 
   / Step by step photos of new garage #137  
Roger,

Nice to see all the progress your making. Isn't it fun to look back and remember the hill and dirt that was there before you started, and to know that an idea you had has turned into an actual building? That's one of my favorite things, to turn pictures in my brain into reality.

I think you'll find that things really start to slow down now as far as noticable progress. You'll work just as hard, but it will be tougher to see the changes. Then all of a sudden, it will be done. This is what happens to me when I build something.

Thanks for the updates,
Eddie
 
   / Step by step photos of new garage #138  
ok i can weight in on the bracing issue as im an engineer for Alpine (now ITW building components group) Home

The links posted showing various rows of lateral and diagonal bracing are indicated as TEMORARY bracing ment to be used during the erection of the trusses. a separate PERMANT bracing plan can be issued by a design engineer.
The truss drawing you show will indicates what permanent bracing the component truss needs. This information that is circled on your truss drawing. IF you use a diaphragm on the roof (OSB sheathing) you do not need any other diagonal and or lateral bracing of the Top chord (TC). Temporary bracing can be pulled off as you put down the permanent sheathing.

From your pics it looks like your BC still needs bracing. Your drawing indicates that 1 continuous lateral brace is required ever 10' OC or less. you can contact your truss supplier for a CLB detail, they should have one on file. It will show you what is considered appropriate material for CLB bracing, and how to attach it.

Additional bracing is needed on the gable ends to. But it is relatively minor due to your low 90mph wind criteria. Again Mytec has a detail of standard gable bracing that can be applied (ask the fabricator for a copy).

Next time sheet the gable on the ground (or laying down on the wall plate temporarily supported flat) BEFORE you stand it up and it avoids your sheathing problem.
 
   / Step by step photos of new garage #140  
I am glad to see that you are proceeding so well. I am not sure how far ahead or behind you that I am. I have to order more shingles today evidently math was not my strong point when it came to figureing the amount I need and I forgot to add in the new front porch. We ordered 40 squares and I checked to make sure that is what was delivered. Now I only have to order 17 more squares. once the new shingles get in and get delivered then all I have left to do on the outside is finish about a dozen sheets of sideing. I have my new garage doors ordered and they should be in in probably in a month so I can get them installed. Inside I am going to use 7/16 OSB on the walls instead of sheetrock. The price is not that much more and If something happens that i want to hose out my garage floor it wont hurt the OSB I figure if the wife does not like the look of it then I can texture it just like sheetrock and you wont be able to see the difference. I did several more things than just my garage so I am still seeing big changes on a regular basis. I put a new front door in to let more light into my living room since the garage covered up two of the four windows that was in that room. I also added a roof to the existing front porch and that has really tied the two front sections of the house together nicely appearance wise. I will try and post some more pictures when I get time.
 

Tractor & Equipment Auctions

2016 CATERPILLAR 730C2 OFF ROAD DUMP (A51246)
2016 CATERPILLAR...
HYSTER H55VM STRAIGHT MAST FORKLIFT (A51406)
HYSTER H55VM...
2012 PETERBILT 587 SLEEPER (A54313)
2012 PETERBILT 587...
19200 (A50324)
19200 (A50324)
2018 BMW 430I  4DOOR CAR (A54607)
2018 BMW 430I...
2020 HINO 268 26FT NON CDL BOX TRUCK (A54313)
2020 HINO 268 26FT...
 
Top