Any one have an opinion on this.
Info:
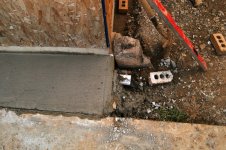
I have two brick layor that will do this small job. In front of garage 2 rows of 4x6 columns of brick. total of 360 bricks. or 48 sq.ft.
1 brick layer said to put up the brick 1st and then the siding to the top of the brick
2nd brick layer said put the siding on 1st and j channel then run the brick to the siding
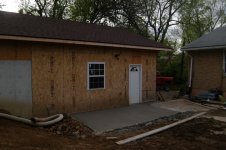
I am doing the siding but not sure how to aproach it.
Any ideas.
Info:
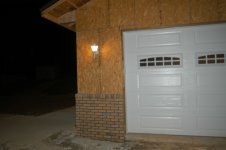
I have two brick layor that will do this small job. In front of garage 2 rows of 4x6 columns of brick. total of 360 bricks. or 48 sq.ft.
1 brick layer said to put up the brick 1st and then the siding to the top of the brick
2nd brick layer said put the siding on 1st and j channel then run the brick to the siding
I am doing the siding but not sure how to aproach it.
Any ideas.