Takin it to the MAX

   / Takin it to the MAX #101  
Like taking apart a car door, Washing machine, steering sector shaft on a Kubota, etc, it is so easy, the second time you do it. Thanks for allowing me to avoid the 'First Time"
Mike

The Fuse box does not require the removal of any plastic- it is located on the right side just forward of your firewall. If you want to remove the plastic kick plate area and the instrument panel it will require a Phillips screwdriver and a 10mm socket. Remove the (2) screws that hold the two halves of the kick plate centered below the steering wheel. then remove the (2) plastic button retainer's located just forward of where your feet typically sit when driving. There is a metal band that encapsulates the fire wall - remove the two bolts and lift off. This will expose the remaining bolts that attach the rest of the dash and kick plate. Remove that and with some fiddleing with the rubber gas overflow. the plastic can be wiggled out and free from tractor. Dash has plastic wiring connectors that can be unplugged easily..
Hope this helps
 
   / Takin it to the MAX
  • Thread Starter
#102  
Wow that seat is beautiful! A work of art. I've been curious as to how you handled all your extra wiring. It seems to be something you have some expertise in, maybe a how to?

When doing electrical it seems knowledge becomes cumulative, I have been doing it a long time both professionally and on personnal projects. I really want to help but not sure where to start? I believe a job is only as good as you want to make it, and it takes serious time to do right. I have extensive wiring harnesses on Max and building those to route through the tractor while avoiding damage takes a lot of planning. Trick is to make it look Oem, like it was supposed to be there, I use Oem style plugs where I can. Anything you wire has to be removeable in the future, so plugs are mandatory for quick servicing. The harnesses should be able to remain on the tractor even on major servicing so route your wiring to follow Oem harnesses where you can. It takes a lot of time to go this far with accessory wiring, so I consider who may have to work around it later, will it make sense to them? Will they just cut it off to get at what they want? Plugs in smart locations are a good idea. It is very easy to get overwhelmed, so don't even start without drawing yourself a picture or schematic first. There is nothing worse than forgetting to run a wire and having to pull it in later. Consider everything you may want to add first, how you will use it, and where it will go. There is so much to consider, load, fuse rating, wire gauge, terminations, requirements of device you are wiring.... There is a reason I have a thinking chair. I am not trying to discourage anyone, just being honest, planning and skill go together here. My basic suggestions are.... Never go too small with wire gauge, solder and use heat shrink when possible, always have a fuse in your circuit, higher amp devices use a relay, use plugs at devices for servicing, add mechanical protection(use wire loom etc), and route your harness safely, secure everything well too... Vibrations on floppy wiring will only end up with broken wires. I probably have about six of my own wires for every Oem wire on the tractor(or more). So I really have a lot of thought and time invested in my wiring. But I trust my wiring... That is important too. I find Yahoo "images" to be a good source for schematics and quick and different ways of wiring things, just search what you want to wire.... Internet is more valuable than wire strippers sometimes.
 
   / Takin it to the MAX
  • Thread Starter
#103  
Does your television get in the way of refueling?

One... It's not a television
Two... No is the answer to your question. I fuel it with the monitor in place, but it comes right off it's mount as well.
 
   / Takin it to the MAX
  • Thread Starter
#104  
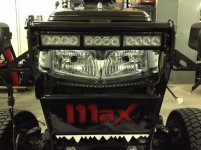
I have been busy finishing my strobe lights. It was worth the effort but I need a break, ALOT of wiring but my 6 zone contoller with twenty plus flash patterns is really cool. Psychedelic and almost seizure inducing comes to mind... No way anyone's not gonna see me out there. I need to take a video for this one, lol, and the only mounted pic I have right now is of the crash bar unit mounted.

image.jpg
 
   / Takin it to the MAX #105  
I have been busy finishing my strobe lights. It was worth the effort but I need a break, ALOT of wiring but my 6 zone contoller with twenty plus flash patterns is really cool. Psychedelic and almost seizure inducing comes to mind... No way anyone's not gonna see me out there. I need to take a video for this one, lol, and the only mounted pic I have right now is of the crash bar unit mounted. <img src="http://www.tractorbynet.com/forums/files/mahindra-owning-operating/405850-takin-max-image-jpg"/>

It looks like you are building a tricked out tow truck with all those fancy lights. You could definitely collect some Trophy Cups with that Tractor!
 
   / Takin it to the MAX #106  
Black Max thank you for answering my wiring question. Your response was very informative and extremely helpful! Thanks again.
 
   / Takin it to the MAX
  • Thread Starter
#107  
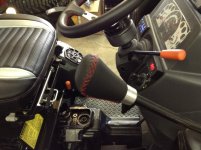
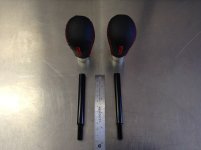
Updating my build thread, so I will start with a really simple mod. My joystick knobs were not very exciting so I decided to replace them, my shafts are standard 3/8-16 thread so it's almost unlimited what you can use. They match my steering wheel and for the backhoe I found the shafts a little short reach wise, so thanks to some more tuner car technology I am gonna try these 3 3/4" shifter extensions which will thread right on. I won't bother mounting the backhoe knobs until after I paint the booms.

image.jpg

image.jpg
 
   / Takin it to the MAX
  • Thread Starter
#108  
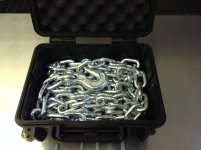
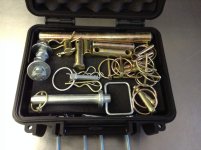
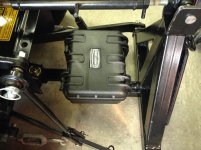
Here is another simple mod I did this morning... I found this impact resistant and waterproof storage box on sale($38) at Princess Auto. I don't have very much room on the Max25 so my solution which will work for me 98% of the time was to mount it on my drawbar. It clears all the 3point arms, holds my chain(3/8 x 14') and pins and clips and I still have room for other things if needed. I am guessing about 40#'s of weight without the drawbar. It removes with the drawbar and will stay on the tractor until I need the backhoe. Perfect storage solution that works for me and how I will use my tractor.

image.jpg

image.jpg

image.jpg

image.jpg
 
   / Takin it to the MAX
  • Thread Starter
#109  
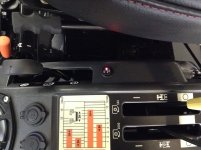
All I can say about this mod is.....Mmm...... Heated seat.... Finished wiring and mounted the High/Low/off switch, allowed me to finish one side of the tractor so here is the rear fender in black all back together. I painted the other fender Friday so when I finish my E-lock diff mod I will be very close to finishing the tractor.

image.jpg

image.jpg
 
   / Takin it to the MAX
  • Thread Starter
#110  
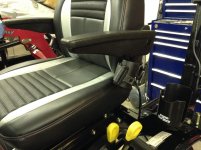
I was able to mount the retractable seat belts from my stock seat to my new seat today. I figured why reduce safety for a little added comfort... I had expected to have to change seats when I use the backhoe but it turns out the new seat, being bigger and having armrests and now with seat belts rotates around with good clearance. The only mod I had to do was trim one inch from the seat slider arm, it hit my PTO levers. It stuck out to far anyways... Now it looks better too. I can honestly say the seat was more work than I expected to mount, if I had a non backhoe Max25 seat and mount it would have been easier.

image.jpg
 

Tractor & Equipment Auctions

Marliss Industries Grain and Soybean Drill - Selling ABSOLUTE NO RESERVE (A52748)
Marliss Industries...
FORD 540 TRACTOR (A51247)
FORD 540 TRACTOR...
MI-T-M PRESSURE WASHER (A52472)
MI-T-M PRESSURE...
EZ-GO MPT 1000 Electric Utility Cart (A51694)
EZ-GO MPT 1000...
2015 FREIGHTLINER SPRINTER VAN (A52576)
2015 FREIGHTLINER...
2006 Cadillac STS Sedan (A50324)
2006 Cadillac STS...
 
Top