check
Elite Member
- Joined
- Sep 26, 2008
- Messages
- 4,162
- Tractor
- 2009 Kubota BX25
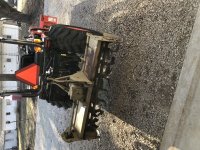
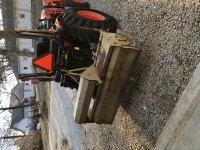
Rock, are you going to bolt that tooth bar in? It looks like it has tabs for bolting. Enjoy. Jon
Of course he is. He's real smart - look at the tractor he ordered!
Rock, are you going to bolt that tooth bar in? It looks like it has tabs for bolting. Enjoy. Jon
Oh, side note. I put a gauge on the loader line and checked pressure. I was reading low at around 2175 PSIG compared to the WSM range of 2425-2475 PSIG. So I used the Kubota shims (from the BXPanded kit) and shimmed it up to 2525 PSIG. I have not used the loader since, but I suspect that 350 PSI increase may make a noticeable change in loader performance. I know that the way it was (no shims behind that spring), you would stall the loader and never pull a rear wheel off of the ground. So the loader was not strong enough in lifting or curling to get a rear wheel (loaded tires) to lift. From my experience with my little BX, you should be able to at least get a tire to lift a slight amount under full strain. I'm expecting that now I may be able to get that.
You will notice the difference on the hydraulics. Mine was about 200psi low, shimmed it up to 2450psi, and could tell the difference for sure.
I always suspected that the pressure was lower than should be, but I decided that I would not even take a peak at it until I had the 50 hour service point in front of me. I kind of chalked it up to break in pressure, leave the pressure low and during the 50 hour service job, take a look and adjust as needed. I was tempted to jack the pressure to the common +10% (2475 + 250 = 2725 PSI) but I shoved 3 thin washers behind the spring, tested it and saw that I was just a hair over the max factory recommended pressure and thought... what the heck, I'll leave it go at that. I could always go up again a bit if I need to, but I really hope that everything feels "matched" at this moderate pressure setting. I think I'll be fine as is.
Super awesome to hear! I hope you love your B2650 half as much as I do mine!Man, I just want to thank you for all your updates. I just took delivery of mine, which I set up exactly like yours, just a few days ago.
It's my very first tractor ever and your posts have been invaluable to me every step of the way, from original research to use and now upkeep!