welding on landpride

   / welding on landpride #21  
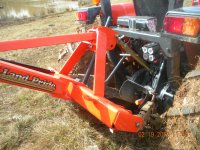
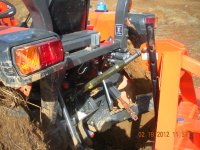
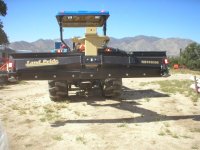
Candyman, I think you are going to have to hook up to that blade and take some photos. Maybe some before and after your friend welds the adapter plates on to show everyone the problem and the fix if it works. I dont think the top link distance will change a lot if you just drop straight down. The lift arms are on a circular tangent line and fartherest away from the tractor should be level, then get closer as you lower or raise from that point. Since you are lowering your arms to hook at the bottom of the possible lift the 3rd arm distance wont change. You will have to make sure that when you raise it all the way up, that it doesnt get into your tractor as the higher you lift it, the closer it is going to come> I know some of my implements get really close to the tires when raised as high as they go and you will be exceeding that by at least 8" looks like. Just watch closely when the first lift happens for tire to bar clearance. The other pinch point is going to be the 3rd arm watch closely as you come up to make sure it doesnt jam at the tractor or the implement since you will be raising much higher, I think you may find that you wont have clearance at the tractor and possible on the blade either. You could modify the blade but not the tractor so watch those three points.
 
   / welding on landpride
  • Thread Starter
#22  
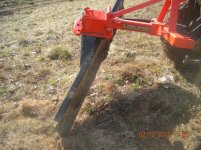
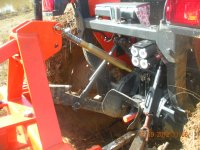
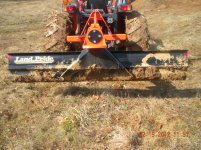
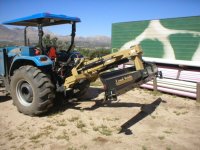
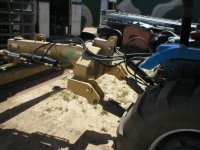
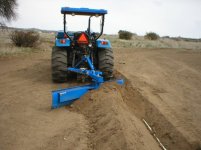
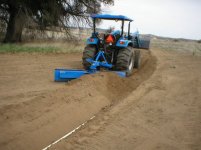
the blade is so wide & deep that i can`t get the angle all the way down into the last adj. hole { blade hits the ground}
yes i can pick it up as the pix shows by adj. the top link in all the way but then there is not enough back tilt to do any good.

gary,
i think you know what i mean.

jamming,
you might be onto sometning about the tubing.

c/m
 

Attachments

  • DSCN2309.jpg
    DSCN2309.jpg
    844.2 KB · Views: 198
  • DSCN2310.JPG
    DSCN2310.JPG
    911.5 KB · Views: 230
  • DSCN2312.jpg
    DSCN2312.jpg
    813.2 KB · Views: 204
  • DSCN2313.JPG
    DSCN2313.JPG
    799.4 KB · Views: 199
  • DSCN2314.jpg
    DSCN2314.jpg
    897 KB · Views: 217
  • DSCN2315.JPG
    DSCN2315.JPG
    883.2 KB · Views: 208
   / welding on landpride #23  
You need a top and tilt setup bad.. I see you have the remotes..Mtnviewranch is an advertiser on here, and he can help for sure. I believe this will solve all your problems. This will allow you to adjust the height and angle on the fly from your seat. you will be able to get that blade down at the angle you need and back up for transport.

James K0UA
 
   / welding on landpride #24  
I think you should get some loads of stone for the muddy spots.
 
   / welding on landpride #25  
If you plan on running that blade tilted the way you have it in pic #3, you dont need much " back tilt". With the much smaller area cutting into the ground, it will bite pleanty good.

And that is ALOT of angle for cutting a ditch. Because after one pass, your tractor will no longer be on leven ground for the second pass.And even so, after you make a pass and reverse back for the second, the blade will no longer be that close to the ground.
 
   / welding on landpride #26  
Thanks for the photos. Helps tremendously.

Few things:

>That blade is awfully wide for ditching using that tractor. It is what you have so it will have to do. Just don't tilt it that much to try to do the a ditch in one pass. As already stated, the second pass will have the wheels running in the first pass and therefore, lower (like when plowing with the wheels in a furrow).

>The lift arms are set at the center hole in the lift bar. Try putting the pins in the next hole higher to get more lift. In other words, try the pins in the highest hole. I think those vertical bars are correctly called "leveling bars".

>The top link should be a lot shorter. Then you can swivel the blade's edge forward until the cutting edge is closer to the rear wheel (NOT TOO CLOSE!). That will also slightly lift the blade off of the ground and give more clearance.

You will then be more "plowing" the ground instead of "dragging". The results should be better.

>Even though there are two mounting holes on the blade for the top link it looks like the top link may hit the tractor with the welded lift pin extensions that you have planned. Check that geometry before continuing.

>As others have said - your situation is prefect for a Top & Tilt set-up.

You really have a muddy mess this time of year. Congratulations on not getting the tractor stuck! I would have probably been up to the floorboards in muck.
 
   / welding on landpride #27  
CM, go find that quote that I sent you back on Jan 22, you would really benefit from the Top and Tilt cylinders. ;)

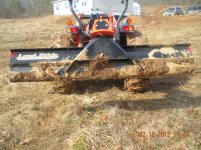
I have done what you are asking about and want to do. Here are a few pics. On the Land Pride blade, you can see where I have extended the lift points down and forward. They really only needed to go straight down, but by going forward the blade is now able to be raised with the top link very high for transport.

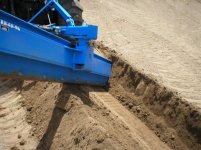
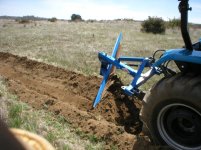
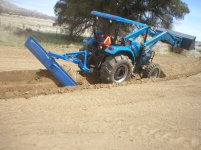
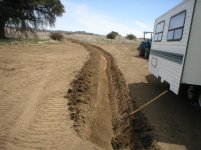
The pics with the blue MidWest blade is where a ditched for several hundred feet. Worked great. I made 2 passes to get the trench 18" deep.
 

Attachments

  • P5080008.JPG
    P5080008.JPG
    120.9 KB · Views: 165
  • P5080007.JPG
    P5080007.JPG
    127.7 KB · Views: 171
  • P5080003.JPG
    P5080003.JPG
    122.7 KB · Views: 168
  • P4070006.JPG
    P4070006.JPG
    134.2 KB · Views: 187
  • P4070002.JPG
    P4070002.JPG
    134 KB · Views: 160
  • P4070008.JPG
    P4070008.JPG
    130.5 KB · Views: 173
  • P4070009.JPG
    P4070009.JPG
    118.2 KB · Views: 192
  • P4070012.JPG
    P4070012.JPG
    112 KB · Views: 172
  • P4070011.JPG
    P4070011.JPG
    114.1 KB · Views: 200
   / welding on landpride #28  
candyman,

You can see from MtnViewRanch's photos how to tilt the blade forward to "plow" a furrow. Great photos from him.

Also, others have spoken highly of his T&T products.
 
   / welding on landpride #29  
GW nailed most of it. It looks like you have one more hole adjustment to shorten your vertical lift rods to the 3 point lift arms which will help you a lot. Also you need to swing the blade so the tip is just about center on you tire or at least to the outside of your tire, then you are digging where your wheels are running. You really need to watch unscrewing that top link as it looks like is is just about to come apart in some of the photos. They will unscrew completely. Move the top link down to the bottom hole in your blade and it will give you a bit more lift also.
I also wouldnt continue with the proposed modification as it looks like you will run into clearance problems with the top link. I think you will be happy with the performance if you do the 3 thinks we have recommended. I have pulled a lot of blades from the little cheapos for 8n to the huge 1600 pound Rhino on the back of a dual wheeled Ford 9000 tractor and never had to modify the blade to make them work. I didnt see that you blade swiveled at the front to offset it, that is a nice feature to have on a back blade.
Try what we suggested and let us know how it works. It think you can dig a good ditch with the top link shortened all the way up. You can likely back off to the next hole up on the tilt after you swing it around. It may take a littl bit to get it set just right and may would a hydraulic top link be handy for ditching and box blade work. I am like you and dont have one but every time I do blade work or box blade work, I swear I am going to lay out the money for one. A actually have a regular hydraulic cylinder that I might could make work. If I ever get out of Algeria and back home I may try it out.
 
   / welding on landpride #30  
As pointed out, you have another hole of adjustment on your lift arms to take advantage of ...and, you can always get a shorter toplink but, as you say (and others seem not to have appreciated) just shortening the toplink changes the "angle of attack" of the blade.

If your landpride is like mine, I have 30" of offset which is how I do my ditching, so that the tractor stays level and I use the tilt of the blade to cut the ditch ...but, if you don't use the offset, can't you use subsequent passes? on each successive pass, the tractor will tilt, no?

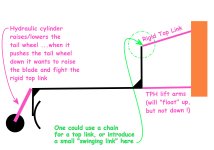
In my case, I use a short toplink with a swinging toplink adapter (HF) to get the length when I need it and to allow compliance in the blade. I have posted this picture before, but it explains my geometry, which is quite satisfactory for my ditching ...and other purposes, and allows the hydraulic tail wheel to function best.
 

Attachments

  • toplink problem.jpg
    toplink problem.jpg
    474.9 KB · Views: 180
  • swinging toplink adapter HF.jpg
    swinging toplink adapter HF.jpg
    574.2 KB · Views: 161

Tractor & Equipment Auctions

2012 Jaguar XJ Sedan (A50324)
2012 Jaguar XJ...
2018 CATERPILLAR 336FL EXCAVATOR (A52141)
2018 CATERPILLAR...
STIHL TS420 CUTQUICK SAW (A50854)
STIHL TS420...
2016 FORD TRANSIT 250 VAN (A51406)
2016 FORD TRANSIT...
2017 Ford E450 Super Duty 20 Passenger Bus (A47384)
2017 Ford E450...
2019 MACK GR64F TANDEM AXLE CEMENT MIXER TRUCK (A52577)
2019 MACK GR64F...
 
Top