Wood Stove Rebuild

   / Wood Stove Rebuild
  • Thread Starter
#41  
Keegs,

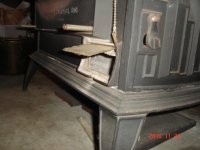
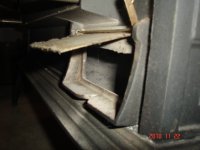
They are essentially interlocked unless you remove the four corner rods. There are four long corner bolts/rods that run from top to bottom of stove. They thread into top of stove. I did not disturb them from the top but unthreaded the nuts from the bottom. I used a rubber hammer to tap the stove from several directions to loosen things up. I also didn't remove the left and right insert - they were fine and I wasn't sure the screws would come out.

Also, once you remove the top the sides will come apart easily. The sides hold the lower fireback in place. I did a dry fit before assembly.

The trick is lining up the four rods, passing them down through the side inserts and getting them to come through the four bottom holes. I had LUCK! It took about 10-15 minutes to do this part and it was luck... When looking into the stove from the open doors you can not see the back 2 holes in the bottom or the rods.

I viewed your reassembly PDF - man I wished I saw that before I put the thing back together. One thing I didn't do as part of the reassembly instructions was to cement in the lower fire back. But I figure a 30 year stove is a 30 year stove...

I cemented the bottom, top and all four sides together both inside and out. I also put new gaskets in the top and changed the stove pipe angle from top to rear entry.

Hope this helps...

Let me know.


lloyd
 
   / Wood Stove Rebuild #42  
Keegs,

They are essentially interlocked unless you remove the four corner rods. There are four long corner bolts/rods that run from top to bottom of stove. They thread into top of stove. I did not disturb them from the top but unthreaded the nuts from the bottom. I used a rubber hammer to tap the stove from several directions to loosen things up. I also didn't remove the left and right insert - they were fine and I wasn't sure the screws would come out.

Also, once you remove the top the sides will come apart easily. The sides hold the lower fireback in place. I did a dry fit before assembly.

The trick is lining up the four rods, passing them down through the side inserts and getting them to come through the four bottom holes. I had LUCK! It took about 10-15 minutes to do this part and it was luck... When looking into the stove from the open doors you can not see the back 2 holes in the bottom or the rods.

I viewed your reassembly PDF - man I wished I saw that before I put the thing back together. One thing I didn't do as part of the reassembly instructions was to cement in the lower fire back. But I figure a 30 year stove is a 30 year stove...

I cemented the bottom, top and all four sides together both inside and out. I also put new gaskets in the top and changed the stove pipe angle from top to rear entry.

Hope this helps...

Let me know.


lloyd
Got it...Thanks man.

The price on the fireback, the right insert and a tube of cement (corking gun size tube) came to $157. I placed the order with DISCOUNT STOVE AND FIRE. Of the three vendors I checked with they seemed to have the best prices. So far I'm into this project for $257.

They mentioned in that replacement doc to follow the owner's manual instructions for a break-in routine. Something about starting out with several small fires to break in or cure the new plates.

I'll post pics.

Cheers..
 
   / Wood Stove Rebuild #43  
Last fall I disassembled and inspected the stove and cleaned and polished all the sections. The stove looked to have been well used but all the outer sections were in good shape. The inside fireback and side pieces needed replacing and one of four tabs that hold on the cast flue section had broken off.

I ordered the replacement fireback parts and a tube of stove cement and luckily I found the broken tab in the ashes at the bottom of the stove. The parts were on back order and it took a few months for them to arrive as I recall.

This spring I took the tab and the rear section of the stove to a local tractor repair guy who was able to weld the tab back on for me. The stove sat it pieces on the floor all summer reminding me all the while I was up there of my yet unfinished project.

While working on the Maine house this past week...and waiting from the joint compound to dry in the bathroom one day, I turned my attention to the wood stove rebuild project.

I remembered that it took some time to remove the inside fireback and side pieces. In fact, I had to almost completely disassemble the stove to get those parts out and so I wasn't sure how easy putting it back together was going to be. I decided I should dry fit eveything first.

Well it went together pretty easily. The OEM replacement fireback is a perfect fit and the tab that broke off seems to be holding up. I replaced all of the flat head screws with new stainless screws.

I have to take it all apart again and reassemble it with the stove cement next. I'll take some pics when I'm done.

Thanks again Lloyd for the tips.
 
   / Wood Stove Rebuild
  • Thread Starter
#44  
keegs,

Sounds like a successful project. I cleaned the chimney the other day. I get about a pint of ash and it is mostly from the top 3 feet of the pipe. We have had a few fires in the stove... much to the chagrin of my wife. She complains that it is too hot... I figure I work hard at making firewood I should enjoy when I want : )!!!! I do like the heat though. They are great stoves. I missed a deal on two Resolutes in perfect working order for $300 each!!!!

I just rebuilt an AMES PLOW CO. cider press. I will start a new thread and post pics. I would like some advice on making regular and hard apple cider - so....

TIA

lloyd
 
Last edited:
   / Wood Stove Rebuild #45  
keegs,

Sounds like a successful project. I cleaned the chimney the other day. I get about a pint of ash and it is mostly from the top 3 feet of the pipe. We have had a few fires in the stove... much to the chagrin of my wife. She complains that it is too hot... I figure I work hard at making firewood I should enjoy when I want : )!!!! I do like the heat though. They are great stoves. I missed a deal on two Resolutes in perfect working order for $300 each!!!!

I just rebuilt n AMES PLOW CO. cider press. I will start a new thread and post pics. I would like some advice on making regular and hard apple cider - so....

TIA

lloyd

Well...I used to play doubles tennis with a guy who owned a farm here in Jersey. In order to qualify for the farm tax rate he needed to generate a certain amount of revenue from the farm. He produced a variety of produce during summer and in fall he'd make cider. He alway brought stuff to sell to the games.

His apple trees (mostly winesap and macs...) were old and produced small gnarly apples, good to eat but not much to look at. His cider production process attracted lots of yellow jackets. I recall him working inside a plastic tent.
 
   / Wood Stove Rebuild #46  
Was really glad to run onto this thread, I have a Dutchwest EX large that we've had probably 12 to 15 yrs and this year I need to take it apart and replace the cement in the joints. The past couple of fire seasons, it has become harder to control the burn so I think a rework is in order. I've got to get moving, Fall is upon us.
 
   / Wood Stove Rebuild #47  
Lloyd E - I hope you are still on this list. The tumbnails of the disassembled Resolute were exactly what I have been looking for! And it's been 7 years since you posted those photos! I got a Resolute for $50 10 years ago. Am finally installing it in my shed. Doesn't seem cracked or damaged, but not getting a good draw. Might have to add an additional lenth of stovepipe. I didn't put a damper on the stack, as my more recent Encore doesn't have one. Of course, the Encore has a catalytic converter. What do you guys think? Will not be running this stove hard. Am here in Maryland, so the weather is reasonably mild most of the time. By the way, I used to go to the Vermont Castings factory in Randolph frequently during the mid-1980's. That was an exciting time there. As soon as I could afford one of their stoves, I got one. Never have had any problems with it. Just have had to replace the catalytic converter.
 
   / Wood Stove Rebuild
  • Thread Starter
#48  
Heron,

Actually it has only been 2 years... but who's counting : )! I would clean it thoroughly with a vacuum cleaner. Is the damper working on the stove unit - opening and closing? Also take out the air intake in front - where the an-irons are attached and clean. I find my stove needs to be kept clean to burn properly. How many elbows do you have in your pipe? On the side - left - towards lower back there is a small draft opening... make sure it is open. Do you have a manual?


lloyd
 
   / Wood Stove Rebuild #49  
You might also take a peek, with a strong flashlight, into the thermostatically-controlled air damper at the rear.... there's a LOT of fine ash that will fall into that horizontal air passage at the rear of the stove by passing through the vent holes at the bottom of the burn box from the inside.

I've found mine will not draw well if there's a collection of ash in there; vacuuming it out makes a big difference. (TIP: I made a small scraper to reach in and pull out as much ash as I can that way first, then vaccum out the remainder- that stuff will plug a vacuum bag in a hurry!)
 

Attachments

  • Wood stove vent-1.JPG
    Wood stove vent-1.JPG
    156.1 KB · Views: 594
  • Wood stove vent-2.JPG
    Wood stove vent-2.JPG
    134.7 KB · Views: 391
   / Wood Stove Rebuild
  • Thread Starter
#50  
irving j,

I will do that to the new/old stove as this saga continues.

I picked up the same stove used on kijiji yesterday - great deal! It came with shelves, screen(in better shape than mine) and handle for door - which I needed. The stove interior is in better shape than mine but there are a few problems with it: broken glass in one door, front air baffle completely burnt out and someone at some point cut the legs down to 2" - duh! Even came with a thermometer - $22 value up here!

But between the two I can make a very good working unit with lots of spare parts to boot.
I wish this would have happened last year before I ordered the part!

The more I move these things around the lighter they seem to get!

Lloyd
 

Tractor & Equipment Auctions

2022 CATERPILLAR 279D3 SKID STEER (A51246)
2022 CATERPILLAR...
8x12 Custom Built Chicken Coop (A51573)
8x12 Custom Built...
2009 KUBOTA M7040 TRACTOR (A51406)
2009 KUBOTA M7040...
2016 Chevrolet Tahoe SUV (A51694)
2016 Chevrolet...
Redirective Crash Cushion Guardrail (A51692)
Redirective Crash...
2018 Wacker Neuson WL 38 (A53472)
2018 Wacker Neuson...
 
Top