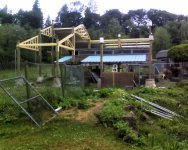
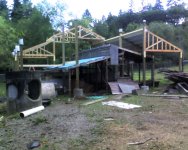
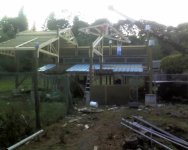
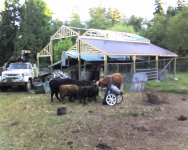
My Horse Barn in Progress

   / My Horse Barn in Progress #31  
When you finish, and you're bored, you can come build me one just like it.:D
 
   / My Horse Barn in Progress #32  
Nice looking setup. Wish I had thought my shop through more like this. I also liked your setup for the drag harrows. Do you have any better pictures of it you could post?
 
   / My Horse Barn in Progress
  • Thread Starter
#33  
Nice looking setup. Wish I had thought my shop through more like this. I also liked your setup for the drag harrows. Do you have any better pictures of it you could post?

Thanks. The drag harrow setup was pretty easy. I bought a cheap 3PH carry-all, some 4x4s, some big bolts, some short lengths of chain, and a couple of ratcheting strap-ties. At some point I'll probably switch the straps for chains or cables so they don't rot away, but it works really well.

I posted some pics on this thread:
http://www.tractorbynet.com/forums/attachments/150448-ideas-homemade-3-pt-hitch.html
 
   / My Horse Barn in Progress #34  
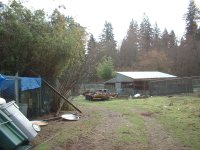
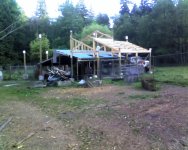
Thanks, Tom. I realize the new code requires a ground, but I'm not required to get any of this permitted since this is an agricultural building on a registered farm. Therefore, I'll pretend it's still 2007 and put a couple of ground rods at the barn location.
I'm jumping ahead of what I've read so far, but as long as it's installed as a primary service (2 ground rods & tie the neutral and ground busses together) it will meet NEC requirements.
 
   / My Horse Barn in Progress #35  
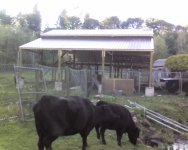
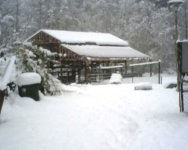
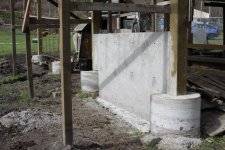
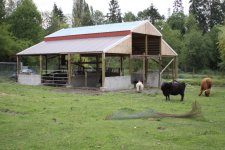
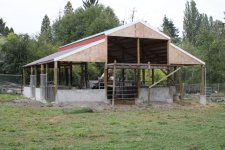
Here are some pix of the 25 year old phesant barn we've been remodeling into the new cattle barn.

Barely got the roof on the first year before the rain and snow hit.

Now 2 years and 48,000# of concrete later, we're about 1/2 way done.
 

Attachments

  • Barn.jpg
    Barn.jpg
    328 KB · Views: 349
  • Barn 005.jpg
    Barn 005.jpg
    128.4 KB · Views: 373
  • Barn 020.jpg
    Barn 020.jpg
    136.6 KB · Views: 305
  • Barn 024.jpg
    Barn 024.jpg
    153.6 KB · Views: 299
  • Barn 029.jpg
    Barn 029.jpg
    104.3 KB · Views: 249
  • Barn 032.jpg
    Barn 032.jpg
    122.3 KB · Views: 343
  • Barn 068.jpg
    Barn 068.jpg
    137 KB · Views: 298
  • Barn 110.jpg
    Barn 110.jpg
    98.4 KB · Views: 266
  • Barn 117.jpg
    Barn 117.jpg
    71.2 KB · Views: 328
  • Barn 119.jpg
    Barn 119.jpg
    104.3 KB · Views: 296
  • Barn 123.jpg
    Barn 123.jpg
    236.2 KB · Views: 246
  • Barn 141.jpg
    Barn 141.jpg
    228.6 KB · Views: 317
  • Barn_023.JPG
    Barn_023.JPG
    235.5 KB · Views: 385
  • Barn_034.JPG
    Barn_034.JPG
    240.6 KB · Views: 816
   / My Horse Barn in Progress
  • Thread Starter
#36  
Here are some pix of the 25 year old phesant barn we've been remodeling into the new cattle barn.

Barely got the roof on the first year before the rain and snow hit.

Now 2 years and 48,000# of concrete later, we're about 1/2 way done.

I can certainly appreciate how much work you've done, Cyril! I don't know if having an old barn to start with makes things better or worse.

As far as the electrical entrance goes, common sense tells me I should be fine if I just treat it like new service and ground it at the barn with a couple of rods and tie the ground and neutral busses together, as you said. However, I've had three different electricians I know tell me that according to the most recent NEC (2008 I think), ground and neutral have to be tied together in one place and one place ONLY - the main service entrance to the house. ALL outbuildings have to maintain a separate ground and neutral if they are tied into the main panel at the house. Additionally, for any outbuilding, you have to install ground rods at the outbuilding location and tie them to the ground in the sub-panel out there (but NOT to the neutral). I think the rationale is that if a whole bunch of things went wrong all at once, you could possibly be sending return current through the ground (literally - through the soil). Apparently according to the 2008 code, the (separate) ground from the house even has to be oversized as much as the rest of the wires for long runs! The rationale there is that if there's a fault where return current flows through the ground wire (as it's supposed to do), the higher inductance of the small wire means that it will take a few extra milliseconds for the current to build to a point that it trips a breaker or other protective device.

As far as I'm concerned, most of my life has been spent before 2008, and if a shared ground/neutral was good enough then, it's good enough for me now.

By the way, the rules may be different in your state depending on whether or not they've adopted the most recent NEC/IEC. Or if I've got it wrong, along with my three electrician friends, let me know!

Josh
 
   / My Horse Barn in Progress #37  
I can certainly appreciate how much work you've done, Cyril! I don't know if having an old barn to start with makes things better or worse.

As far as the electrical entrance goes, common sense tells me I should be fine if I just treat it like new service and ground it at the barn with a couple of rods and tie the ground and neutral busses together, as you said. However, I've had three different electricians I know tell me that according to the most recent NEC (2008 I think), ground and neutral have to be tied together in one place and one place ONLY - the main service entrance to the house. ALL outbuildings have to maintain a separate ground and neutral if they are tied into the main panel at the house. Additionally, for any outbuilding, you have to install ground rods at the outbuilding location and tie them to the ground in the sub-panel out there (but NOT to the neutral). I think the rationale is that if a whole bunch of things went wrong all at once, you could possibly be sending return current through the ground (literally - through the soil). Apparently according to the 2008 code, the (separate) ground from the house even has to be oversized as much as the rest of the wires for long runs! The rationale there is that if there's a fault where return current flows through the ground wire (as it's supposed to do), the higher inductance of the small wire means that it will take a few extra milliseconds for the current to build to a point that it trips a breaker or other protective device.

As far as I'm concerned, most of my life has been spent before 2008, and if a shared ground/neutral was good enough then, it's good enough for me now.

By the way, the rules may be different in your state depending on whether or not they've adopted the most recent NEC/IEC. Or if I've got it wrong, along with my three electrician friends, let me know!

Josh

We haven't adopted the 2008 NEC yet. The data I'm giving you is per previous versions of the NEC. The basic rule here is if you have a ground from the main panel to subpanel (4 wire) the ground and neutral MUST be seperated. If you have no ground between the main panel and subpanel (3 wire) the ground and neutral in the subpanel must be bonded.

The purpose of ground rods is to remove transient voltages. Transient voltages are induced into the structure or wiring system from outside the power system to the structure. Examples could be a lightning strike near the structure or induced voltages from nearby high power lines. You can think of them as being similar to the static charge you build up when you rub your feet across a carpet. Although transient voltages can be much greater than what you get from a carpet.

The purpose of bonding the ground and neutral together is to create short circuit fault protection within the system. Ground rods cannot create short circuit fault protection. (It's fun with new apprentices to tie a 20 amp breaker directly to a ground rod with #8 wire and make the apprentice explain why the breaker is not tripping! Simple Ohms law on a 25 ohm ground rod shows that current flow does not exceed 20 amps) To put it simply, bonding the neutral and ground is what keep you from getting electricuted when something shorts.

The purpose behind not bonding the neutral and ground in a 4 wire feeder from main panel to subpanel is because the neutral is the return current path in the system and if the ground wire is bonded at both ends it creates a parallel return path for the current and 1/2 of the return current will be on the ground wire between the panels. Basically, your grounding circuit now has voltage on it!

The 2008 NEC may have removed this option because too many electricians don't understand how the grounding system works and wire subpanels incorrectly creating an unsafe system. If you treat your panel as a main panel with your 3 wire feed, bond your neutral and ground, and set your ground rods as planned - it will be fine.


I sometimes think that building the barn from scratch might have been easier as I have had to disassemble the old barn at the same time that I am constructing the new. Also since this is currently my ONLY barn, I have had to try to maintain the usability of it at the same time.

FYI - my barn is 42ft wide by 36ft long. Very close to the size of yours. I related very quickly to how much work is involved in the project you took on. Unfortunatly my ground inside the barn won't support a cement truck until I have all the footing walls in and dig out 6-12" of soft material and fill to subgrade with crushed rock. Which on the low side is about 33" above existing grade. As a result, I have approx 60 tons (2000 bags) of concrete to mix and poar by hand before I will be able to resort to a truck for the floor. Thank God for cement mixers!!

Your barn looks beautiful. Keep up the good work and keep the pictures comming. I'm jellous of your floor and walls! Right now where the cattle come to the feeder in what will be one of the back stalls, I have about 8" of mud! I ran out of weather before I got the center in the back done and I have water flowing accross the center of main floor with about an inch of mud there. At least I got the uphill side done and with pallets on the ground for the hay to sit on it stays dry and I don't have to pack it five hundred feet to feed any more. I'm suppose to bring in another 6-1/2 ton in a couple of weeks, but it's wet enough now that I don't know if they will be able to get it back there and into that barn. I might be back to packing it on top of the car again. I have a 30x36 maintainance bulding near my front gate where I used to store it. Looks like I might have to make room to store it there again for the winter.
 
   / My Horse Barn in Progress
  • Thread Starter
#38  
We haven't adopted the 2008 NEC yet. The data I'm giving you is per previous versions of the NEC. The basic rule here is if you have a ground from the main panel to subpanel (4 wire) the ground and neutral MUST be seperated. If you have no ground between the main panel and subpanel (3 wire) the ground and neutral in the subpanel must be bonded.

The purpose of ground rods is to remove transient voltages. Transient voltages are induced into the structure or wiring system from outside the power system to the structure. Examples could be a lightning strike near the structure or induced voltages from nearby high power lines. You can think of them as being similar to the static charge you build up when you rub your feet across a carpet. Although transient voltages can be much greater than what you get from a carpet.

The purpose of bonding the ground and neutral together is to create short circuit fault protection within the system. Ground rods cannot create short circuit fault protection. (It's fun with new apprentices to tie a 20 amp breaker directly to a ground rod with #8 wire and make the apprentice explain why the breaker is not tripping! Simple Ohms law on a 25 ohm ground rod shows that current flow does not exceed 20 amps) To put it simply, bonding the neutral and ground is what keep you from getting electricuted when something shorts.

The purpose behind not bonding the neutral and ground in a 4 wire feeder from main panel to subpanel is because the neutral is the return current path in the system and if the ground wire is bonded at both ends it creates a parallel return path for the current and 1/2 of the return current will be on the ground wire between the panels. Basically, your grounding circuit now has voltage on it!

The 2008 NEC may have removed this option because too many electricians don't understand how the grounding system works and wire subpanels incorrectly creating an unsafe system. If you treat your panel as a main panel with your 3 wire feed, bond your neutral and ground, and set your ground rods as planned - it will be fine.


I sometimes think that building the barn from scratch might have been easier as I have had to disassemble the old barn at the same time that I am constructing the new. Also since this is currently my ONLY barn, I have had to try to maintain the usability of it at the same time.

FYI - my barn is 42ft wide by 36ft long. Very close to the size of yours. I related very quickly to how much work is involved in the project you took on. Unfortunatly my ground inside the barn won't support a cement truck until I have all the footing walls in and dig out 6-12" of soft material and fill to subgrade with crushed rock. Which on the low side is about 33" above existing grade. As a result, I have approx 60 tons (2000 bags) of concrete to mix and poar by hand before I will be able to resort to a truck for the floor. Thank God for cement mixers!!

Your barn looks beautiful. Keep up the good work and keep the pictures comming. I'm jellous of your floor and walls! Right now where the cattle come to the feeder in what will be one of the back stalls, I have about 8" of mud! I ran out of weather before I got the center in the back done and I have water flowing accross the center of main floor with about an inch of mud there. At least I got the uphill side done and with pallets on the ground for the hay to sit on it stays dry and I don't have to pack it five hundred feet to feed any more. I'm suppose to bring in another 6-1/2 ton in a couple of weeks, but it's wet enough now that I don't know if they will be able to get it back there and into that barn. I might be back to packing it on top of the car again. I have a 30x36 maintainance bulding near my front gate where I used to store it. Looks like I might have to make room to store it there again for the winter.

Thanks for the clarification, Cyril. That's good to know.

I can't imagine mixing 60 tons of concrete from bags!! You must be so sick of it already. I know around here you can go to some of the ready-mix places and buy concrete a yard at a time. They send you home with a big bumper-pull mixer full of it. Then you bring back the trailer when you're done, and either turn it back in or fill it up again for another load. You pay a little more than you would for a concrete truck, but it should be way less than you'd pay by the bag. I don't know if that's an option where you live, but if so it could save some wear and tear on your back.

I'm starting to deal with a lot of mud now too, but thankfully it's all on the outside of the barn. I'll be glad when I'm done backfilling and grading and have the gutters in place.

My wife and I just decided this morning to go ahead and bring in the gravel for the driveway to the barn now, rather than after the barn is done. That should hopefully allow us to drive up to it without sinking in the mud. The only problem is, I need things to dry out before I can get a dump-truck out there.

Since we had no good option for hay storage, we ended up buying a used 48' furniture van trailer. It works pretty well and is close to the barn. We can fit about 300-400 square bales in it. Someday, when the barn's done, I'll build a real hay storage shed nearby.

Thanks again for the electrical advice, and for comiserating. It's always good to know when somebody has it worse than you do!! LOL. Looks like you're over the hump though. There's light at the end of the tunnel for both of us.

Josh
 
   / My Horse Barn in Progress
  • Thread Starter
#39  
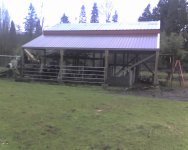
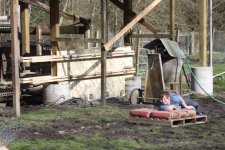
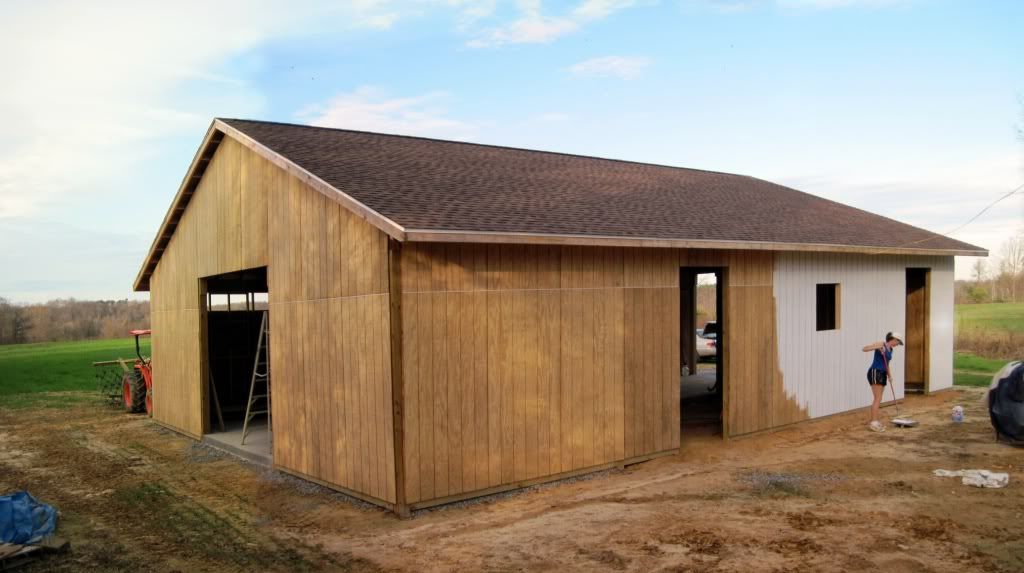
Here are some more recent pics of the progress. I've now got the sheathing completely done on three sides, and partly done on the fourth. I'm still waiting on the weather to stay dry long enough to get a load of rock screenings to finish off the horse stalls. After that, I shouldn't need to drive the tractor into the stalls anymore, so I can finish off those final walls. In the meantime, the wife has started priming the T1-11 that's already up. Hopefully we'll get enough warm, dry weather to finish the paint in the next few weeks.

I have several window openings framed out, but I still need to cut out the holes and install the windows. It's a little tricky installing windows in T1-11. At this point I'm planning to just nail the window flanges to the outside of the T1-11, peel and stick the flashing, then cover the perimeter with some well-caulked wood trim. Anybody have any suggestions/improvements to this plan?

IMG_0392.jpg

IMG_0394.jpg

IMG_0395.jpg

IMG_0401.jpg

IMG_0409.jpg

OutsideBarnPanorama.jpg
 
   / My Horse Barn in Progress #40  
your build looks great!

Id suggest you get a air less sprayer it will save you in the long run save a lot of time and it gets paint in to the wood cracks with out braking your back

tom
 

Tractor & Equipment Auctions

2019 John Deere 8295R MFWD Tractor (A50657)
2019 John Deere...
2023 AVANT 735 COMPACT WHEEL LOADER (A51242)
2023 AVANT 735...
2014 Kinze 1100T Dual Auger Grain Cart (A50657)
2014 Kinze 1100T...
2013 VERMEER RTX1250 RIDE ON TRACTOR (A51242)
2013 VERMEER...
Payment Terms (MUST READ) (A50774)
Payment Terms...
2021 Doosan DX350LC-5 Hydraulic Excavator (A49346)
2021 Doosan...
 
Top