At Home In The Woods

   / At Home In The Woods #821  
After you get all the blocking up and the rough plumbing and electrical, take plenty of pictures before the sheetrock goes up. You will soon forget exactly where everything is and having pictures will be a useful reference.

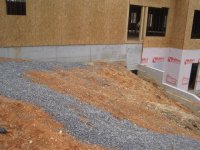
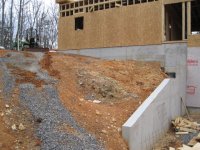
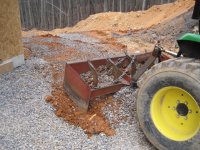
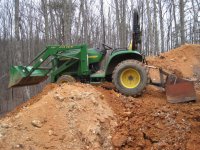
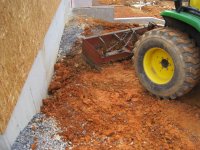
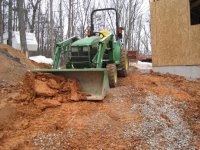
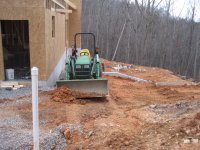
Obed, as hitecountry said take photos or videos, (I did both). Also you should go back to the beginning of this thread and double check some of the many good suggestions that were given to you. Once the sheetrock goes up its too late then. And not to bust your chops but as Eddie said clean up the site. In addition to how the place looks removing scrap wood and debris can also eliminate a source of food for termites. You are building a home in THEIR environment. My first house that I built was on a wooded piece of property and sure enough after 10 years I had termite damage. So this is something you might encounter, I hope not. I spent quite a bit to have Terminix come out and treat the house, of course some damage was already done. And finally, the house looks great, thanks for all of the photos.
 
   / At Home In The Woods #822  
After you get all the blocking up and the rough plumbing and electrical, take plenty of pictures before the sheetrock goes up. You will soon forget exactly where everything is and having pictures will be a useful reference.

Absolutely! I took lots of pictures of my house during construction and have used them all. My only wish is that I had taken more. I recently added a deck on two sides of my house and was easily able to show the carpenters where all the framing components are and the location of plumbing and electrical inside the walls.:thumbsup:
 
   / At Home In The Woods #823  
Agree on lots of pictures before drywall. Blocking is great, we also blocked where the kitchen cabinets go so they got screws in each corner vs. screws where the studs happen to be. Easier to hang (so better job is more likely) and a stronger hang.

Yet another silly suggestion: Put a 2" and 2.5" conduits from your basement to your attic. If you want to add things later, you won't have to figure out how to fish wires between floors. One conduit for low voltage, one for AC. The 2.5" is so you can push an HDMI video cable through there.

When you are focused on electrical stuff, let us know. Also let us know when you focus on low voltage wiring.

Great pix, looking good, bet you can't wait to get it water tight.

Pete
 
   / At Home In The Woods #824  
In addition to how the place looks removing scrap wood and debris can also eliminate a source of food for termites. You are building a home in THEIR environment. My first house that I built was on a wooded piece of property and sure enough after 10 years I had termite damage. So this is something you might encounter, I hope not. I spent quite a bit to have Terminix come out and treat the house, of course some damage was already done. And finally, the house looks great, thanks for all of the photos.

Speaking of termites, there is a termite treatment which you can have applied during construction. It is called Tim-bor, and is a boron based material that is sprayed on the hose after the framing is complete. Essentially, it prevents termites by making the wood of the house toxic to them.

If you put it on during construction is it relatively inexpensive, and much more effective than treatment after they invade the house.

I had it applied on our house three years ago and as I remember it was about $1000 for the whole house.

A lot of contractors don't even know about it, and don't like to do it because it is just one more step that they have to take. Of course they don't have to live with the house, and I have never seen a new house with termites. They see no benefit at all, but I sure do.
 
   / At Home In The Woods #825  
Termite treatment and leaving some empty conduit to run wiring in the future are both very good suggestions. The scrap wood around the house needs to go elsewhere as suggested.
 
   / At Home In The Woods #826  
And, as for blocking, you might want to be considering blocking for towel bars, hand rails, curtains, blinds, and such. Get them in place before the trades. It's easier to run a wire around a block than a block around a wire.

Stair rails and cabinets are another good place for blocking.
 
   / At Home In The Woods #828  
After you get all the blocking up and the rough plumbing and electrical, take plenty of pictures before the sheetrock goes up. You will soon forget exactly where everything is and having pictures will be a useful reference.


You may want to include a tape measure in some pics as a reference.


.
 
   / At Home In The Woods #829  
BORAX based material. Not boron!!!

.

What element do you think is in Borax?


The chemical name for Borax is Sodium tetraborate decahydrate. Its chemical formula is Na2B4O7. Boron is one of the elements that makes up Borax, and plays a key role in its use as a disinfectant.

I certainly don't think it would be inappropriate to refer to any Borax based material as a Boron based material and I'm sure that's what CurlyDave meant.
 
   / At Home In The Woods #830  
What element do you think is in Borax?


The chemical name for Borax is Sodium tetraborate decahydrate. Its chemical formula is Na2B4O7. Boron is one of the elements that makes up Borax, and plays a key role in its use as a disinfectant.

I certainly don't think it would be inappropriate to refer to any Borax based material as a Boron based material and I'm sure that's what CurlyDave meant.

You guys make me laugh...and that's a good thing!
 
   / At Home In The Woods #831  
You guys make me laugh...and that's a good thing!


.......and I always thought Borax came from 20 mule teams. :confused2:

Don
 

Attachments

  • 415kOqBW67L__SL500_AA280_.jpg
    415kOqBW67L__SL500_AA280_.jpg
    17.5 KB · Views: 178
   / At Home In The Woods #833  
If you have clay, put something on the ground around the foundation after backfill so the rain doesn't splash the clay all over the outside of the wall. It will make a mess on the walls.
 
   / At Home In The Woods
  • Thread Starter
#834  
Today I worked on grading the area underneath the back porch and deck. Framing for the back porch and deck are supposed to start soon. I have a deadline to finish grading this weekend so the two footers for the porch and deck can be poured this coming week. The deck and porch will run from the end of the garage (left in the first picture) to the retaining wall.

Here's what it looked like at the beginning. There are some very tricky spots due to the steepness. The area is boxed in by a long pile of dirt behind the house (not shown here) that limited the maneuvering room. I was standing on the dirt pile when I took these pictures. I've been concerned about grading this area all winter. Because of material supplies that have been in my way, I haven't been able to get to this task until this weekend.

I needed to cut off at least a foot of dirt at at the highest spot shown on the left. Doing so will make sure the bottom of the deck framing will be at least 12" above the dirt to minimize weathering of the framing due to rain water splashing up from the ground. I've seen plenty of decks sitting 1" off the ground; I don't want ours to be like that.

It didn't occur to me until this morning that I would have to leave some areas along the walls uncovered until the brick is laid. You can see the brick ledges on the retaining wall. I can't push dirt against the walls higher than the brick ledges until after the brick is laid. I was bummed by that realization because I wanted to have all the finish grading completed before the porch and deck go up while I can still access the area with my tractor. After the framing starts, I won't be able to get to that area with the tractor and will have to use a hand shovel. Yuk!

The last picture shows an orange flag that marks where the back corner of the porch will meet the back of the deck. I'm using the flag as a sort of grade stake. The height of the dirt there is about where I want it when I'm done.
 

Attachments

  • IMG_3257.JPG
    IMG_3257.JPG
    170.4 KB · Views: 283
  • IMG_3258.JPG
    IMG_3258.JPG
    158.1 KB · Views: 233
  • IMG_3259.JPG
    IMG_3259.JPG
    162.8 KB · Views: 245
  • IMG_3264.JPG
    IMG_3264.JPG
    184.6 KB · Views: 262
   / At Home In The Woods
  • Thread Starter
#835  
I used a board and a level to determine my grade. The scariest part to grade is close to the retaining wall. I really don't like feeling the tractor lean much to the side. I try to keep the tractor going as straight up and down as possible but sometimes I put the tractor in some positions that weren't much fun. A skid-steer would be great for this job.

I first tried to cut down with my box blade that knob of dirt that the end of the board is sitting on. The box blade wouldn't cut it. I'm not sure why this section of dirt was so hard. I ended up turning the tractor around and using the FEL.

My goal is to have the dirt against the retaining wall slope away from the wall for 6 feet to minimize water that reaches the wall. Doing so will help minimize freezing forces against the wall during the winter.
 

Attachments

  • IMG_3269.JPG
    IMG_3269.JPG
    191.1 KB · Views: 269
  • IMG_3267.JPG
    IMG_3267.JPG
    173.4 KB · Views: 259
  • IMG_3266.JPG
    IMG_3266.JPG
    167.7 KB · Views: 222
   / At Home In The Woods
  • Thread Starter
#836  
This first thing I did was scrape some of the gravel off the gravel path and move it for later use. The concrete slab crew made the gravel path when they were laying the slab to help keep the clay off their boots.

This big rock kept getting in my way so I moved it to a low spot near the driveway culvert that needs filling.
 

Attachments

  • IMG_3270.JPG
    IMG_3270.JPG
    176.9 KB · Views: 219
  • IMG_3263.JPG
    IMG_3263.JPG
    184.8 KB · Views: 244
  • IMG_3262.JPG
    IMG_3262.JPG
    176.7 KB · Views: 236
Last edited:
   / At Home In The Woods
  • Thread Starter
#837  
You can see the big pile of dirt on the left. I ended up building a ramp against the dirt pile so I could dump the extra dirt over the top of the pile.
 

Attachments

  • IMG_3286.JPG
    IMG_3286.JPG
    168.1 KB · Views: 324
  • IMG_3280.JPG
    IMG_3280.JPG
    196.1 KB · Views: 280
   / At Home In The Woods
  • Thread Starter
#838  
This area was filled with red clay by the excavator last fall. I'm not sure why he added fill here. He was not supposed to add to the natural grade and doing so here would just made the slope behind the house steeper. He added a good 12" of clay to this area. The clay has packed incredibly hard and has lots of rocks in it. I went back and between using the FEL and the box blade for digging the dirt. The tractor had an extremely tough time cutting through the clay. It was slow, slow, slow work. Often I would have to get my 6 foot steel digging bar and pry a rock out of the clay because that was faster than getting the rock out with the FEL. The boxblade was useless for digging rocks larger than a softball out of the packed clay.

The wife asked me why I did not use the scarifiers on the boxblade to break up the hard packed clay. Actually, I did not think of using them. However, upon reflection, I'm afraid that I would break them when they would inevitably catch on one of the rocks.
 

Attachments

  • IMG_3273.JPG
    IMG_3273.JPG
    173.7 KB · Views: 253
  • IMG_3272.JPG
    IMG_3272.JPG
    195.2 KB · Views: 240
  • IMG_3282.JPG
    IMG_3282.JPG
    167.4 KB · Views: 244
   / At Home In The Woods #839  
My goal is to have the dirt against the retaining wall slope away from the wall for 6 feet to minimize water that reaches the wall. Doing so will help minimize freezing forces against the wall during the winter.


Obed:

You should have drain rock and filter fabric immediately next to that retaining wall, not dirt or clay.

I have not seen a retaining wall designed in the last 30-40 years which did not have this feature. The force on the wall will be 2.5 times greater without drain rock than with it.

You really need to consult the engineer who designed that wall on this point. Who backfilled the wall before you started leveling? He is the one responsible for placing the drain rock and he should be called back to excavate and put the rock in if that is what the plan calls for.

If nothing else, look at your plans yourself. If the rock is supposed to be there, not having it is a big deal.
 
   / At Home In The Woods
  • Thread Starter
#840  
I have an air leak at the tire rim. We've had the tire re-sealed a couple of times. I'm thinking the rim might be damaged and won't hold a seal. I might have to buy a new one. I can fill the tire with a bicycle pump and work for a few hours before needing to air up the tire again.
 

Attachments

  • IMG_3260.JPG
    IMG_3260.JPG
    185.5 KB · Views: 305

Marketplace Items

1969 Lincoln Continental Mark III (A56857)
1969 Lincoln...
2022 CATERPILLAR 330 EXCAVATOR (A60429)
2022 CATERPILLAR...
2017 JOHN DEERE 470G LC EXCAVATOR (A60429)
2017 JOHN DEERE...
John Deere TX Gator (A60462)
John Deere TX...
2018 INTERNATIONAL 4300 NON CDL 26FT BOX TRUCK (A59904)
2018 INTERNATIONAL...
2022 BROCE BW260 SWEEPER (A60429)
2022 BROCE BW260...
 
Top