Barn/shop layout

/ Barn/shop layout #1  

PaulT

Gold Member
Joined
Apr 9, 2001
Messages
456
Location
New York - Upstate
Tractor
Kubota 2710
I have read several posts discussing workbench design, lighting design and layout, and I just posted a question about materials storage, but I haven't seen a thread on overall shop floor layout. I would like to hear about everyone's approach to overall floor plan layout. Did you ask other experienced folks? Did you surf the web for free floor plans? Did you just make it up as you went along? For the more experienced among us, any painful lessons learned you would share?

This thread will be very useful to me, and I'm sure this would help many others in the planning/fitout stages of their workshops as well. Thanks for your thoughts (and, of course, your pictures /forums/images/graemlins/grin.gif)
 
/ Barn/shop layout #2  
My layout was done as I went along. I built my own benches (except for one) and used Scorpion square head screws to assemble them. Doing it this way makes it a snap to change things around if I want to in the future. I added lights as I went along too. I'll try and post photos later. Gerard
 
/ Barn/shop layout #3  
Paul,

My layout was based on what I needed at the time as well as thoughts for future use.

Biggest thing I wanted was shelves, and lots of them!!!

For shelving, I installed:
Narrow (1' or so) shelves for holding small stuff and coffee cans full of bolts, nuts...
These can extend very high (out of reach) if you like. On the upper shelves, I have coffee cans with a 1/2" diameter hole drilled in the can, about 1" from top of can. I then take use a broom handle with a screw drilled into one end to reach the cans (insert screw into hole in can then bring the can down).

For larger "stuff", along the rear wall, I installed 4' deep shelves, 24' long.
The lowest shelf is about 4' off the ground so implements, garden tractor... can be stored underneath.
Then 1 more set of shelves, approx. 2 feet higher (6’ off the ground).
Having 10' ceilings now gives me about 4' for the very upper storage. Great place for storing the larger off season things (bicycles, holiday decorations...)
For the shelf at 4' (the lowest shelf), I store medium sized things. I use a lot of the Rubbermaid tubs. Since the shelves are 4' deep, it could be cumbersome to reach the back. To rectify that, I cut a sheet of OSB into 4'x16" sections. These go under everything. If I need to reach the back, I just start sliding this board out and the contents slide forward. You have to take the most forward stuff off this sliding plywood but I make it a point to put the rarely used stuff towards the back.
These larger shelves were built with 4x4 verticals every 8'. 2x4" framing with OSB for the shelves themselves (retrospectively, 2x6" would have been better).

I have another shelf that's a slight derivation of this setup.
It's a 4x8' shelf 3' off the ground, another shelf 4 1/2' above that. For this shelf, I store spare wood. Plywood and the like get stood vertically (so I don't have to un-stack everything if the piece I want is near the bottom). Spare 2x stock goes on this shelf as well. For the top shelf (7 1/2' up) I store misc. stuff that's rarely used or for future projects. (E.g. spare rolls of insulation).

Reading back through this not sure if it makes sense. But if you think you may have an interest, let me know and I’ll take pics.

Brian
 
/ Barn/shop layout
  • Thread Starter
#4  
Brian,

I think I follow your designs, but a picture is worth a thousand words /forums/images/graemlins/grin.gif It would help me to envision how to use your designs in my space if I could see your layout. I like the ideas you have outlined here.
 
/ Barn/shop layout #5  
Paul,

This pic shows one of the walls of shelving. The opposite side of the wall has the same type of thing but only on the upper side (workbenches below).
 

Attachments

  • 541012-MVC-682S.JPG
    541012-MVC-682S.JPG
    37 KB · Views: 764
/ Barn/shop layout #6  
Here's a pic of the 2 layer shelves.
Also, I forgot your design. If you have rafters like I do, I put some plywood in the center to store light stuff.
 

Attachments

  • 541013-MVC-683S.JPG
    541013-MVC-683S.JPG
    37.6 KB · Views: 882
/ Barn/shop layout #7  
Same set of shelves looking from other direction.
 

Attachments

  • 541018-MVC-685S.JPG
    541018-MVC-685S.JPG
    37.4 KB · Views: 726
/ Barn/shop layout #8  
Last pic.
Wood storage shelf. Not much in it now /forums/images/graemlins/frown.gif

Note the motion detector above it. Behind my right shoulder is the big door. Light comes on so I can see my way around when I return after dark.
 

Attachments

  • 541021-MVC-684S.JPG
    541021-MVC-684S.JPG
    35.8 KB · Views: 699
/ Barn/shop layout #9  
Paul,

I thought about what I wanted to do in it and tried to lay it out in some logical way. I needed space, lights, and electrical outlets to be building at least one motorcycle at a time, but still have room to park the other bikes, store the tractors and implements, and keep one bay open to work on cars or tractors, not to mention tool storage and etc. My shop has plenty of space for all those things but only two garage doors, so I had work around them. I had 110 and 230 volt outlets installed spaced around the perimeter where they would be handy and where I wanted my compressor. Likewise with some metal shelving that I had - some near the bike work area, some near the car / tractor work area, and some near doors and in the tractor storage bay. One idea that worked well was to put a good size shelf and hanger rod in between the bike and car work areas for all the helmets, motorcycle jackets, work coveralls, etc. One of the metal shelves is converted to a book case to hold all of the repair and parts manuals I have collected over the years. I still had room for my drafting table to do bike design, reding, and work at home.

One thing that helped was to move shelves and other things around and try them out before screwing them to the wall, and doing that before all the electrical outlets were installed.

I have bulk storage space under the water tank and over an office built in to one corner of the shop. I screwed big rubber-covered hooks into the walls of the tractor bay to hang the string trimmer, chain saw, and all the garden hand tools. Most importantly, I put an old but powerful stereo in too. Satellite radio is next.

Overall I'm very pleased with my layout. Like another poster said, all the OSB walls and anything attached to them are screwed on so it could all be moved or changed later if desired. It is a real luxury to have my own space for all these things and activities, and not to have to share space in the house garage.

Good luck with your layout and building.

Pete
 
/ Barn/shop layout #10  
some things to consider...
-put your compressor up in the rafters or out of the way. saves valuable space.run lines near your outside door and to your bench.
-put all electric at bench height.
-never too many outlets. the more the merrier.
-above my main workbench i installed nice kitchen cabinets that were being demo-ed out of my contractor friend's jobsite.
-under that flourescent tasklighting.
-stereo mounted under the cabinets...off of bench.
-speakers in the celing. i screwed 2x2 into side of old wooden speaker cabinets and layed that in the rafters and cut a hole in the sheetrock ceiling.not pretty but its a shop.
-refrigerator full of your favorit beverage.mine is beer.
-on the bench...good quality vise
-leave plenty room around your drill press for long objects.
-telephone line. telephone w/intercom into the house.
-a pair of bar stools so after your done working you can sit back w/your feet up on your bench w/a cold beverage of choice.
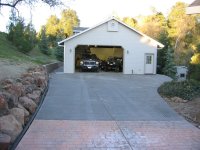
i have a small 24x30 garage the previous owner built.
i insulated,sheetrocked,brought extra power,phone etc. built everything inside.
i recently made a room within the garage.last winter my heater just was not keeping up with the cold. 80,000btu propane that i only turn on when i am out there. it was taking about 2-3 hours to heat up from the teens to 50 or 60 degrees as i did not have the ceiling fully sheetrocked. since i blocked off about a third of the garage (in an L shape) i can heat up my bench area in about 30 minutes.i used temporary studs w/whatever i had laying around...couple sheets of 3/4"ply,1/2"ply...made a cheap plywood door. it works great....when the time comes and i need to heat the whole garage i just remove 2 boards (about 10 screws)and its wide open to work on the car, tractor whatever. my suburban and crew cab diesel never fit in there anyway.the way its set up i can fit my wifes '72bmw 3.0cs in there or the bx22 and close the garage door. the bmw lives in there in winter but occasionally the bx will be in for something. a/c for the summer is the next thought.
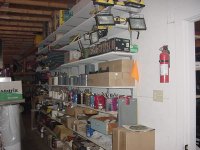
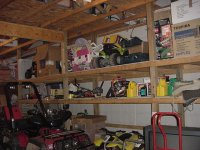
-anyway....i prefer cabinets over shelving..just my opinion. you can close the doors and no prying eyes.you can put locks on them to keep the kids out etc....i put a lock on my little area in my garage so the kids cant get in.
-plenty of light.go flourescent w/a cold start type ballast so you dont have to listen to that annoying hum.
-heater.
thats all i can think of right now.
sorry for the long drawn out post but thats what happens when im drinking my beverage of choice.
good luck...you'll change it all once or twice anyway so just dive in and get going
take care
scott
 
/ Barn/shop layout #11  
I certainly wouldn't say my shop was the best layout because it has been a work in progress for over 30 years.

A couple of ideas for any shop, which I find very handy are:

1. Mount as many things on wheels as possible so they can be easily moved from wall to center of shop if more space is needed.

2. Make all work areas the same height so it will just be a table for the long item project. This includes welding table, chop saw, table saw, mitre saws, ETC.

3. Make steel welding table (I like expanded metal top) with a completely flat top, so anything larger than the table can be put on it and lay flat. Throw a piece of 3/8 plywood on it and it becomes a woodworking table. A piece of cardboard & it is a paint table, or it is just a stand (already adjusted to the right heighth) for that 20' angle iron you are cutting off with your chop saw.

4. Now then for all the things you want on a normal welding table, either make them to mount as quick attaches for vises, or holders for hand tools low enough to be below table top heighth. This way you will use the table with the vise mounted most of the time and when you need a flat table, slip the vise off and the table is flat, without moving all the hammers, screwdrivers, ETC.
 
/ Barn/shop layout #12  
I just finished my 30' x 50' shop. As junkman said when it was under construction: "it's too small, start with a 200' x 200' and build out as necessary." Well, I didn't follow his advice and it is too small.

But, plan on building as large a unit as the land plot will allow. Oh, and the budget allows too.

How are you going to use the shop? Most of us use our shops for both storage and as a workshop. Think about walling off the workshop area so you can heat and cool it. If you work on cars, allow enough room to have a project car in this area and still have work benches. In my shop, I've built a machine shop area, I couldn't get a car in because that took too much space from the storage area. So, I'll have to put the car lift in the "storage" area.

Plan now on how you are going to heat it. This will dictate how you construct it. I chose to use 2" x 6" instead of 2" X 4" construction just so I could get more insulation in the walls. If you don't insulate it in New York, you aren't going to use it in the winter. Heating/cooling will also help you decide on the walling off the smaller area. I've placed my heater in the smaller machine shop, directly opposite a double swinging door. When I'm not in the shop I prop the doors open and the heater keeps the whole shop warmer. Close the doors and it gets toasty warm nice and quick.

If you work on cars, plan on a 12' ceiling so a lift can take a car up high enough to stand under. I built mine with 10' walls and arched truss ceiling, so I have 16' clearance in the center where the lift will go.

Put the air compressor outside the shop structure. Plan on building a cover around it. They are noisy and take up too much floor space.

Bring at least 100 amp service to the shop. Get as big a panel as you can and run separate circuits for as much as you can. Remember each 240 volt circuit will take 2 breaker spaces. I have two 12 breaker panels in my shop. One main and one for the machine shop--to many 240 volt motors for one panel.

Put windows in, don't make it gloomy. Think about open-able sky lights. Put man doors in convenient places, you don't want to have to open a garage door for access/exit. Think about fire hazzard exit. Make the man doors 3' wide so you can carry things through them. Plan the door swings so they open against walls instead of into the room (saves floor space).

Don't skimp on the garage doors. Put at least one in each end if you build it long. Make sure they are as tall as the sill plates will allow. Get sectional, insulated, roll up doors, when you get around to insulating it will be ready. If you have much vehicle storage in the shop, garage door placement will dictate how you can park the cars. A long wall alongside a garage door is not usable for car storage. Or, if you do place a car there, you won't be able to get it out in a year.

Put a toilet and sink in it. One will fit in a 3' x 7' space. Use a pocket door to keep from using floor space.

Others have already said it-you can't have too much storage. But it has to be planned, otherwise it will block windows, block garage doors and/or knock down the floor space. Plan for the place to park your roll around tool boxe(s) and roll around work bench.

Attached picture shows interior. Note: light shining on the floor from the windows, bathroom, double doors to the machine shop, 2'wide heavy duty storage rack, back door, ceiling drop cords, and the storage avove the shop area. The air compressor is just sitting there waiting to go outside.
 

Attachments

  • 541260-inside-sm.jpg
    541260-inside-sm.jpg
    69.1 KB · Views: 715
/ Barn/shop layout #13  
Front view. There is a F250 crew cab, tractor, two old cars and one motorcycle in here and I can squeeze one more car and several motorcycles in. Any more and the tractor gets evicted to the smaller 10'x20' shed in the picture off to the side.
 

Attachments

  • 541263-Shop front-sm.jpg
    541263-Shop front-sm.jpg
    97.2 KB · Views: 760
/ Barn/shop layout #14  
My original post discussed shelving.

The shop setup of my building is sectioned off and I have and concur with most of Scott's thoughts. (The shelving in my previous posts was in the storage section of the building).

A couple notes/alterations I've incorporated from Scott's post.

On the compressor, mine is elevated but not in the rafters. Bottom is about 5' off the ground and it's on its own 110v switch. I didn't put up higher so I could reach the drain in the bottom for removing condensation.

For speakers, I ran a couple outside as well. Nice when working outside the shop.

I wholeheartedly agree with the fridge!!! /forums/images/graemlins/grin.gif /forums/images/graemlins/wink.gif

I too only heat the workshop section (16x28'). I have a 75K btu Reznor that raises the temp more than 1 degree/minute.

For electric, also consider outside receptacles. Ditto on water. Great for running pressure washers and stuff.

I think we discussed running cable, phone, intercom, water, ele... to the building in a different thread. A 3 way circuit is handy (put a few receptacles on this circuit) so you can turn thing on/off from the house (block heaters, battery chargers...)

I use stackable lawn chairs instead of bar stools.

Dart board?

Cow pads on the floor in front of the work benches and stuff are nice. Keeps the cold off the feet in the winter (instead of standing on concrete).

If I recall your design, you have a sliding door. If not true and you're using an overhung door, don't forget electric in the ceiling in the event you want to add a garage door opener in the future.

Brian
 

Marketplace Items

2011 TROXELL 140BBL TRI AXLE VACUUM TRAILER (A60736)
2011 TROXELL...
17102 (A56859)
17102 (A56859)
2018 Kenworth W900 Ext. Day Cab (A62613)
2018 Kenworth W900...
2013 Haulotte 4527A (A57148)
2013 Haulotte...
1979 HEIL TRANSPORT TRAILER (A60736)
1979 HEIL...
2019 Allmand Night-Lite V-Series S/A Towable Light Tower (A60352)
2019 Allmand...
 
Top