Building my sunshade

   / Building my sunshade
  • Thread Starter
#31  
Scored a golf cart canopy off CL and by luck able to pickup while in town today. Not as good a deal as Ted, but think I can make it work as my tractor canopy. $40 just the canopy, no hardware. A sheet of polycarbonate roofing is $35, so still close to budget but better solution.

View attachment 655695
View attachment 655696

Wife convinced me painting it white might be better than blue. Picked up semi gloss white at HD.

Will have to tweak my original frame design, but can do. Club Car model.

Powerwashed when I got it home, decent shape.

I’ll be using Ted (LS mt125 owner) as inspiration.
 
Last edited:
   / Building my sunshade
  • Thread Starter
#32  
A bit of progress. After today’s bit of cleanup, trip to transfer station, meal with wife, I figured I could give the canopy some attention.
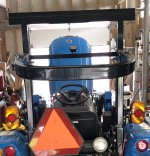
Placed the Clubcar canopy on the tractor just to get better idea what I had to do to frame. Doable, but...

Only 4 bolts hold the canopy on my old Ezgo, so figured it wouldn’t be a major time waster to give it a try. Not perfect, but it would be a much easier fit. Much cleaner on inside as for moldings too.

So how much effort would it take to mount the Clubcar canopy on my Ezgo? Surprisingly not much.
View attachment 656018

Lined it up, drilled 6 holes, 4 screws and 2bolts later - done. Might repaint it, but maybe not. Good chance I might try to upgrade next year. This GC is a ‘96 and running a bit rough.

Ezgo top is tied to tractor right now awaiting next step. Will take off tomorrow and figure approach for the frame.

Adjustments.JPG
 
   / Building my sunshade
  • Thread Starter
#33  
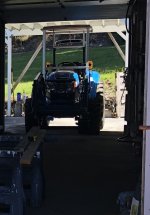
Think I got my canopy figured out
Test fit
View attachment 656482

Simpler than my original design, don’t think I need the frame along sides, just front and rear. Top will fasten with 4 bolts using the factory holes and easily removable. The whole frame is also removable, 2 bolts each front leg and rear has removable pin to ROPS.

Not much a metal fabricator so a challenge for me. Frame components are aluminum square tube, 1/8th I believe, 11/2x 1/12 and 2x3. Joints for the front cross members - 5/16th all thread and I will attempt to weld using the Map torch/ Al rod method. My first try. If strong enough I might remove the all thread.
 
   / Building my sunshade #34  
No pic David. I just get an invalid attachment.
 
   / Building my sunshade #35  
Me too, just invalid attachment. Eagerly awaiting pics....
 
   / Building my sunshade
  • Thread Starter
#36  
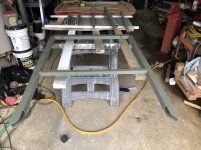
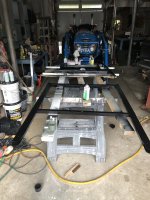
Progress on frame.
Front cross members “welded” in place. Could have used a better torch tip. I think mine is something like a pencil flame. Took significant time to get the aluminum up to the required 750° for rod to flow, especially the middle member where all that aluminum was a big heat sink. Obviously those on You Tube have practiced more than I. Not a welder by any stretch, but happy with my results. My only practice was a test joint, seems quite strong.
A bit of prep and frame is now primed, using a self etching primer.
IMG_1661.JPG

Pretty much decided I will leave the all thread for added strength, no real need to remove. Likely will replace nuts with nyloks, maybe even find some of the plastic caps.
 
   / Building my sunshade #37  
Looking good David! Whenever you want to visit the high desert, give me a holler.... we can build a 4 point frame like that for mine!
 
   / Building my sunshade
  • Thread Starter
#38  
Thanks Ted.
No immediate travel plans
 
   / Building my sunshade
  • Thread Starter
#39  
Today was a paint day.

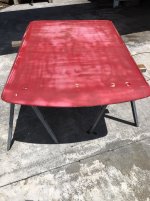
Scrubbed off the mildew and pressure washed the EZGO top.
I had painted red a few years ago and held up well.
IMG_1662.JPG

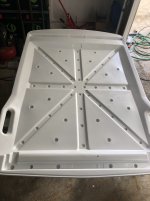
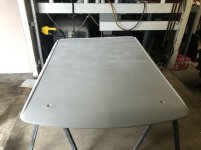
3 cans of plastic primer, 4 cans semi gloss
IMG_1664.JPGIMG_1668.JPG

I’ll call it acceptable.

Some how thought I had more gloss black than I found.
I think there are 4 different varieties. Just wasn’t going to make a special trip to town today.
IMG_1666.JPG
I think it will do.
 
   / Building my sunshade
  • Thread Starter
#40  
Slow start today
Got the rear support mounted and camera wire fed to front

Adjustments.JPG
 
 
Top