Bx24 --Step by Step attach the 3 point Hitch

/ Bx24 --Step by Step attach the 3 point Hitch #1  

Hotwheels

Silver Member
Joined
May 26, 2006
Messages
148
Location
Rescue, Northern California
Tractor
Kubota BX24, RTV900-Worksite
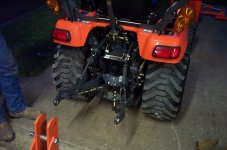
I usually keep the backhoe on my Bx24 because I have lots of digging to do. I have a box blade to attach and the BX24 manual helps some to understand how to attach the 3 point hitch, but it does not do the job for me. Not their fault, I just am having a hard time seeing how the parts fit on the tractor. Anyone have some step by step instructions (video or images would be better) for attaching the 3 point to the tractor and then to the box blade?
Thanks
JR
 
/ Bx24 --Step by Step attach the 3 point Hitch #2  
I experienced the same problem initially. For some reason, the instructions for the BX24 are not as clear as those for the BX22 and BX23.

The key to understanding how the setup works is to start by ignoring all the parts except the lower link pin (the long smooth rod) and the two bushings.

Slide the two bushings onto the long smooth rod, and practise fitting / securing that into the appropriate holes located on the frame of the BX24.

Once you understand how the lower link pin gets secured to the tractor with the bushings, then you can proceed to add the remaining 3P parts.
 
/ Bx24 --Step by Step attach the 3 point Hitch #3  
lp333 gives good advice above. I took a picture of a properly installed 3pt hitch and referred to this when it came time to hook it back up. Took me 5-10 times or so 'till I didn't need the picture. Also, once you take the 3pt hithc off, it helps to set it down in the position it attaches to the lift arms.
 
/ Bx24 --Step by Step attach the 3 point Hitch #6  
... I was hoping you would do that ...

Have you slid the two bushings onto the lower link pin, and then tried to practise fitting that into the appropriate holes located on the frame of the BX24 yet?
 
/ Bx24 --Step by Step attach the 3 point Hitch
  • Thread Starter
#7  
Have you slid the two bushings onto the lower link pin, and then tried to practise fitting that into the appropriate holes located on the frame of the BX24 yet?

The backhoe is still on ... the parts for the hitch are spread out on a worktable as I try to sort out how they attach to the tractor and the box blade. I did this once about 18 months ago, but it is not coming back to me now ....
 
/ Bx24 --Step by Step attach the 3 point Hitch #8  
Here's a pic I took after my dealer did a walkthru on installing the 3pt hitch. Might help you a little .

See this thread for my simple 3pt hitch storage solution to keep it all together once you remove it from the tractor. There's some more pics of the 3pt there.
 

Attachments

  • 3point_hitch.jpg
    3point_hitch.jpg
    384 KB · Views: 24,946
/ Bx24 --Step by Step attach the 3 point Hitch
  • Thread Starter
#9  
Thanks Tex -- I have been trying to find a larger size image of the hitch attached and yours is the best I have seen.
 
/ Bx24 --Step by Step attach the 3 point Hitch #10  
My issue was not figuring out where all the pieces went - but figuring out the best order to attach them. I slide the lower link pin through the lower links, put on the bushings and attach to the tractor - no prob. Fun starts when you spread the lower links to attach the check chain plate or lifting rods - get them aligned and attached without everything shifting and having the lower link pin come back out - PITA!

I tried different ways - and always wrestle with it - no to mention pinched fingers - always wear gloves since the first try....

A video from an expert would be nice.....

Tex - i like your storage setup. I just put the bushings on the cleavis pins in the tops of the lifting rods - how I got it from the dealer. That did cause me a little trouble the very first time I went to connect the lower link pin 'cause I didn't realize they were there....
 
/ Bx24 --Step by Step attach the 3 point Hitch #11  
I've only put my 3pt hitch on a couple of times, but I don't remember having the difficulty you are having. Once you get the check plate on, the lower link pin shouldn't come out. Seems like I may have loosened off on both turnbuckles of the check chain assy to make installing the check plate easier .... dunno for sure it's been a while.... now you've got me wondering :confused:
Hotwheels said:
Tex - i like your storage setup. I just put the bushings on the cleavis pins in the tops of the lifting rods - how I got it from the dealer. That did cause me a little trouble the very first time I went to connect the lower link pin 'cause I didn't realize they were there....

Never thought of that. Definitely a good place to store those bushings.
 
/ Bx24 --Step by Step attach the 3 point Hitch #12  
Thanks Tex, that picture was all that I needed. Perfect, one is going on my garage wall.
 

Marketplace Items

2014 RAM 2500 (INOPERABLE) (A58214)
2014 RAM 2500...
UNUSED SDLANCH SDLE20 EXCAVATOR (A60430)
UNUSED SDLANCH...
ASSET DESCRIPTIONS & CONDITION (A59904)
ASSET DESCRIPTIONS...
PALLET OF 15 4X8 GROUND PROTECTION MATS (A58214)
PALLET OF 15 4X8...
2018 WANCO WTSV PORTABLE ARROW BOARD (A60429)
2018 WANCO WTSV...
VALMAR AIRFLO 8600 PULL TYPE FERTILIZER SPREADER (A60430)
VALMAR AIRFLO 8600...
 
Top