BX25 3PT Modifications?

   / BX25 3PT Modifications?
  • Thread Starter
#11  
Thank You ConcordDriver...

I got-er-done, I should have kept my mouth shut and just gone and went
N' done the job w/o the 3 act play! HA!

Oh well, here are some pics, payin' it forward. The first two pictures are
both the left side only, a left and a right side view of the same hole. I
could have worded it better in the pics...oh well...anyone that's
upset I will refund all the money you paid me, maybe, someday. :D

3pt-1.jpg


3pt-2.jpg


3pt-3.jpg


3pt-4.jpg


3pt-5.jpg


3pt-6.jpg


3pt-7.jpg


3pt-8.jpg


3pt-9.jpg


3pt-10.jpg
 
   / BX25 3PT Modifications? #12  
Sorry Artisan, I got sidetracked and didn't get back to you on this. Looks like you got it on, good deal! :thumbsup:

Nice idea on the lynch pins on the upper arms, gonna have to steal that one... As far as taking it off as an assembly, you've probably figured it out by now, but here goes and this seems to work best for me.

1) Loosen your sway arms so there's alot of play in them
2) Remove the keeper pin from the Lower Plate assembly
3) With the pin out, and enough play in the sway arms, you can rotate the Lower Plate off the Lower Link Pin
4) In your case, remove your lynch pins from the upper arms and pull the bolts out and you'll be able to set the assembled 3pt hitch on the floor.
5) Push your Lower Arms to the center of the Lower Link Pin and you'll be able to slide the Lower Link Pin out of the collets and you're home free!

First time putting it on assembled will be a bit tricky, but you'll get the hang of it...

edit: I thought you had a cotter pin in the Lower Plate Pin, now that I look again I see it's a hairpin.
 
   / BX25 3PT Modifications?
  • Thread Starter
#13  
No problemo...

I see why some guys loath these things but it is actually a pretty cool
design. The heim ends stuck w/ rust or paint and the forethought to make
the check chains lengths the same and the myraid of almost infinate
adjustments can easily trip up a DIY'er / Weekend Warrior mechanic. I
bet ya I will find some cool ways to make this unrulie attachment attacher
attach attachments better some day. ( Did I just write what I thought I wrote? :laughing: )

So I added some Lynch pins at the top, OK THERE IS AN UPGRADE that
will facitilate an "easier' removal of the 3PT assembly as a whole when a
guy wants to re-laod his BH.

I hope some other cool 3PT upgrades materialize from other folks... I think
I rememebr seeing a hydraulic top link somewhere...

What did you* do to your 3PT hitch to make it "better" ?

*you=lurkers :D
 
   / BX25 3PT Modifications? #14  
Great job on the hitch install! :thumbsup:

Did you have to drill out the holes in the upper link pins for them to accept lynch pins?
 
   / BX25 3PT Modifications? #15  
Oh, and the nuts on the turnbuckles might need to be "broken free". I did not even know they moved till I asked on here...:D
 
   / BX25 3PT Modifications? #16  
Thank You ConcordDriver...

I got-er-done, I should have kept my mouth shut and just gone and went
N' done the job w/o the 3 act play! HA!

Oh well, here are some pics, payin' it forward. The first two pictures are
both the left side only, a left and a right side view of the same hole. I
could have worded it better in the pics...oh well...anyone that's
upset I will refund all the money you paid me, maybe, someday. :D

3pt-1.jpg


3pt-2.jpg


3pt-3.jpg


3pt-4.jpg


3pt-5.jpg


3pt-6.jpg


3pt-7.jpg


3pt-8.jpg


3pt-9.jpg


3pt-10.jpg

Artisan,

Yep, I quickly decided the cotter pins had to go after I snagged my skin too many times, did same as you. The bottom assembly is the real PITA getting all that assembled. As mentioned I am thinking the solution. I found out real fast that if there is any slack in the chains those 4 little shackle units bend all out of shape and wear through. Replaced two sets before I got the QH. Now I snug them up and they are solid.

I am thinking for the bottom bar to use a piece of 1" hex bar; weld a short piece of the existing rod and the bushing on one end; weld a 1" rod coupling on the other end about 2" short of the inside space; weld a piece of the existing rod and bushing to a cut off 1" bolt: put a 1" nut on the threaded portion as a lock nut: weld a handle on the nut; this way it can be shortnened to insert, screwed out to length, and locked by hand (no tools required); weld onto the center of the hex bar unit attachment points for the chains.

Still thinking the chains. Leaning toward a solid unit with the same type adjustment arrangement and maybe ball units on each end for flexibility. Infinite adjustability w/o tools.

Comments please before I start.

Ron
 
   / BX25 3PT Modifications? #17  
No problemo...

I hope some other cool 3PT upgrades materialize from other folks... I think
I rememebr seeing a hydraulic top link somewhere...

What did you* do to your 3PT hitch to make it "better" ?

*you=lurkers :D

Yeah, what you saw was the HydrauLink I'd guess... There's a huge thread somewhere on TBN about this piece of equipment. I really don't want to start another "war" on this, but I've got one and I wouldn't trade it for anything!

First, let me say, the HydrauLink IS NOT a Top-n-Tilt device. It does not allow for true hydraulic control of your attachment. You can adjust your attachment on the fly, but only in the "down" direction, because Mr Gravity is on your side... :)

What it really is is a no-muss-no-fuss fully adjustable toplink. Yes, most toplinks are adjustable, but with the screw types you adjust, test, adjust, test, adjust and then use. Most of the adjustment is done with the implement just touching the ground or barely off the ground, with you off the tractor doing the adjustment. If you load up your implement with ground contact, you can barely budge the screw adjustment because of the load on it.

With a HydrauLink, all that goes out the window... For instance, if I've got my Grading Plane on the 3pt and I really want to recondition my gravel drive to get the ruts out of it, I run the 3pt control fully down, crack the valve on the HydrauLink and ease forward just a bit. Close the valve and I'm now fully engaged on both blades of the Plane. If I've got a low spot in the drive, I can mound some gravel up on the low spot and then back over it the Plane. Then, instead of going with a full-down position, I'll set the Plane down and with the valve open, back up just a bit. This extends the 'Link and now only the back blade of the Plane is really doing work. Smooths the pile of gravel right out. And note, I never got off the BX to do these adjustments, just swiveled in the seat and worked the valve a bit.

For a rank amateur like me, it really makes it easy to figure out how your implements work at different positions, how much "bite" your going to get out of your Plane or Box. Drop the implement, crack the valve, move forwards or backwards (and I'm not talking alot here, just enough to put tension on the link and change the implement orientation), close the valve and try again.

One other good thing about it is that it does have some "flex" to it. If you have the teeth down on your Box and you're really digging with it, if you snag a big root or rock, the box will work around that obstacle a little better because there is some give in the system. Less broken tips or bent scarifiers... On the other hand, that flex sometimes inhibts your ability do dig with a Box. If I'm in really tough ground, I'll swap out the HydrauLink with an screw-type solid toplink and use it until I'm through with the really hard digging. But when I start smoothing things out, I'll find myself putting the HydrauLink back on.

If you're looking for an easily adjustable toplink, this one works really well... I'd say it's the toplink of choice, for what I do, for about 95% of my tasks.

Eagle
 
   / BX25 3PT Modifications? #18  
congrats on getting it done. three things I would suggest to change. The top lift arms, I used hairpin instead of lynch pins. Those lynch pins tends to pop out when its flipped wrong way.
The top link pin, put flat side on left, it will prevent the lynch pin rubbing on the sleeve jacket for pwrbynd.
third, the pin that holds lower plate on bar, remove the pin that goes upside down with tiny hairpin and get out your tap and tap it out for a bolt. This way you can use a bolt on top and just unscrew it just enough not to fall out but still can remove lower plate. No more tiny pin and hairpin clips.
 

Attachments

  • arm plate ready to install.jpg
    arm plate ready to install.jpg
    512.5 KB · Views: 746
   / BX25 3PT Modifications? #19  
Yeah, what you saw was the HydrauLink I'd guess... There's a huge thread somewhere on TBN about this piece of equipment. I really don't want to start another "war" on this, but I've got one and I wouldn't trade it for anything!

First, let me say, the HydrauLink IS NOT a Top-n-Tilt device. It does not allow for true hydraulic control of your attachment. You can adjust your attachment on the fly, but only in the "down" direction, because Mr Gravity is on your side... :)

What it really is is a no-muss-no-fuss fully adjustable toplink. Yes, most toplinks are adjustable, but with the screw types you adjust, test, adjust, test, adjust and then use. Most of the adjustment is done with the implement just touching the ground or barely off the ground, with you off the tractor doing the adjustment. If you load up your implement with ground contact, you can barely budge the screw adjustment because of the load on it.

With a HydrauLink, all that goes out the window... For instance, if I've got my Grading Plane on the 3pt and I really want to recondition my gravel drive to get the ruts out of it, I run the 3pt control fully down, crack the valve on the HydrauLink and ease forward just a bit. Close the valve and I'm now fully engaged on both blades of the Plane. If I've got a low spot in the drive, I can mound some gravel up on the low spot and then back over it the Plane. Then, instead of going with a full-down position, I'll set the Plane down and with the valve open, back up just a bit. This extends the 'Link and now only the back blade of the Plane is really doing work. Smooths the pile of gravel right out. And note, I never got off the BX to do these adjustments, just swiveled in the seat and worked the valve a bit.

For a rank amateur like me, it really makes it easy to figure out how your implements work at different positions, how much "bite" your going to get out of your Plane or Box. Drop the implement, crack the valve, move forwards or backwards (and I'm not talking alot here, just enough to put tension on the link and change the implement orientation), close the valve and try again.

One other good thing about it is that it does have some "flex" to it. If you have the teeth down on your Box and you're really digging with it, if you snag a big root or rock, the box will work around that obstacle a little better because there is some give in the system. Less broken tips or bent scarifiers... On the other hand, that flex sometimes inhibts your ability do dig with a Box. If I'm in really tough ground, I'll swap out the HydrauLink with an screw-type solid toplink and use it until I'm through with the really hard digging. But when I start smoothing things out, I'll find myself putting the HydrauLink back on.

If you're looking for an easily adjustable toplink, this one works really well... I'd say it's the toplink of choice, for what I do, for about 95% of my tasks.

Eagle

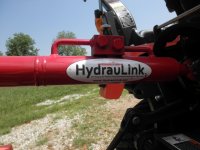
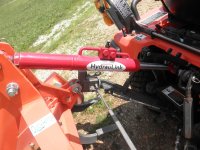
Well, this is timely as just today I was spec'ing out a possible two spool valve for my BX25 that I'd hook into the BH power beyond loop so I can use my old hydraulic top link. With fittings/adaptors and quick connects it was looking close to $300, then I'd need hoses. I know about the Hydraulink and had been waiting for them to intro the SCUT version but looks like that's never going to happen. So my question to you is which Hydraulink cylinder did you buy and do you find it too long for your BX (how long is it min/mas)? The first one they put to market was for larger tractors than the SCUTs, I thought. Any pic's if I may ask?
 
   / BX25 3PT Modifications? #20  
So my question to you is which Hydraulink cylinder did you buy and do you find it too long for your BX (how long is it min/mas)? The first one they put to market was for larger tractors than the SCUTs, I thought. Any pic's if I may ask?

Eh... Well, I can't rightly remember what model I ordered?? :eek: 
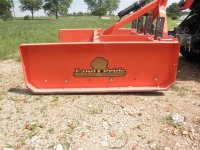
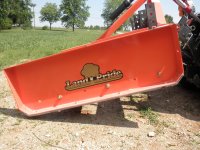
I know it works fine on my BX-25 running Land Pride implements. Got a 4' Box and Plane (model numbers in the sig block) and also have a just calibrated FIMCO 40gal sprayer that it works with too.

Make ya a deal... If you can sit tight for a couple of days, I'll get you the model number I'm using and some pics of it compressed and extended so you can get a good idea of the range of motion it will support. More to follow...
 

Tractor & Equipment Auctions

2016 Ford Explorer AWD SUV (A48082)
2016 Ford Explorer...
2025 Kivel 48in Forks and Frame Skid Steer Attachment (A49346)
2025 Kivel 48in...
2019 International DuraStar 4300 Adkins Mechanics Service Truck (A48081)
2019 International...
2007 Isuzu FTR Truck, VIN # 4GTJ7F1357F700209 (A48836)
2007 Isuzu FTR...
2007 GMC Yukon XL 2500 4x4 (MPV), VIN # 1GKGK26K57R243049 (A48836)
2007 GMC Yukon XL...
2004 Big Tex 10PI 16ft. T/A Pipe Top Utility Trailer (A49461)
2004 Big Tex 10PI...
 
Top