Creating a Workshop & Home

   / Creating a Workshop & Home
  • Thread Starter
#91  
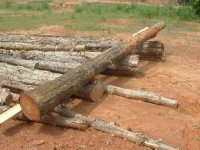
This will be my first beam. It's just over 16 feet long and will need to be cut down to 15 ft 4 inches when installed.
 

Attachments

  • 666756-Workshop 081.jpg
    666756-Workshop 081.jpg
    64.1 KB · Views: 499
   / Creating a Workshop & Home
  • Thread Starter
#92  
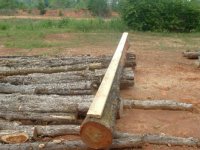
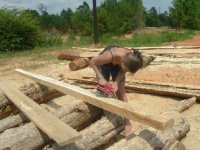
I've never done this before, nor have I seen anybody else do it. The idea seems simple enough.

Step one was to find a straight 2x6 and screw it to the log.
 

Attachments

  • 666760-Workshop 082.jpg
    666760-Workshop 082.jpg
    62.3 KB · Views: 537
   / Creating a Workshop & Home
  • Thread Starter
#93  
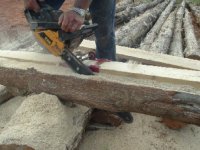
The attachment that keeps the chaisaw straight and rides along the 2x6 is from Hud-Son. I saw them on Ebay, but bought it directly from them for around $40. It's well built, powder coated with sealed bearings.

I have no refrence to compair it to any other brand or type, but I have no problem recommending this one.

I had a $400 dollar Husqavarna chainsaw for about four years that died on me. I filled up a five gallong gas can with the fuel mix and never emptied that can. So I feel comfortable saying I didn't use it a whole lot. The repair shop said the motor didn't have any compression and was unrepairable. I won't buy another product from them again.

This time I decided to buy a cheaper chainsaw and liked the Poulan Pro. It's got a 20 inch bar and 46cc engine. Lots of power and starts much easier then thas Husquavarna piece of crap.

Here is the first cut.
 

Attachments

  • 666768-Workshop 084.jpg
    666768-Workshop 084.jpg
    66.7 KB · Views: 551
   / Creating a Workshop & Home
  • Thread Starter
#94  
After the first cut, it was much easier to set up the 2x6. The board needs to be exactly one inch over to measure the cut. Otherwise, it's a very simple install.
 

Attachments

  • 666773-Workshop 088.jpg
    666773-Workshop 088.jpg
    59.7 KB · Views: 523
   / Creating a Workshop & Home
  • Thread Starter
#95  
This is the other side of the attachment. I had to drill two holes through my bar to mount it, but then it just bolts on.

The grooves the chainsaw makes will give the beam it's character. I want it to look old and distressed.
 

Attachments

  • 666776-Workshop 087.jpg
    666776-Workshop 087.jpg
    58 KB · Views: 522
   / Creating a Workshop & Home
  • Thread Starter
#96  
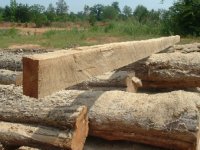
This is the first beam. It's 3 inches wide by 5 1/2 inches tall. Same as two 2x6's.

It's not perfectly straight, but pretty close. I'm gonna sand it lightly, just to knock off some of the fuzz from the chainsaw, but keep the grooves and imperfections.

I also need to shorten it to 15 ft 4 inches before installing it. I'll stain it in place after all the pieces are put together.
 

Attachments

  • 666786-Workshop 102.jpg
    666786-Workshop 102.jpg
    64.4 KB · Views: 516
   / Creating a Workshop & Home
  • Thread Starter
#97  
My girlfriend helped with sanding down the beams.

We wanted to knock off the bigger ridges and smooth it out enough to show the grain.

The girls are always close by to see whats going on.
 

Attachments

  • 667058-Workshop 124.jpg
    667058-Workshop 124.jpg
    54.7 KB · Views: 556
   / Creating a Workshop & Home
  • Thread Starter
#98  
Here she is working on some of the "character" spots. I want the beam to have imperfections. But to also look nice and show the beauty of the wood. After all, this is slow grown oak from my own land. Thats significant to me.

Side note.

In the background, you can see the clearing and the power poles. In another week or so, I'll have power to the place.
 

Attachments

  • 667063-Workshop 127.jpg
    667063-Workshop 127.jpg
    63 KB · Views: 564
   / Creating a Workshop & Home
  • Thread Starter
#99  
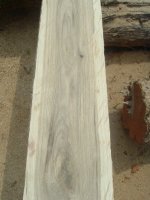
Heres a closer view of the finished beam. You can see how beutiful the grain is, but also the the imperfections from milling it with a chainsaw.

When it's stained, the imperfections should show darker, but he grain will just jump out at you.
 

Attachments

  • 667064-Workshop 125.jpg
    667064-Workshop 125.jpg
    44.2 KB · Views: 499
   / Creating a Workshop & Home
  • Thread Starter
#100  
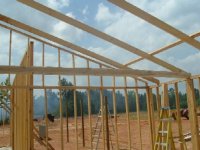
This is the beam installed. There will be three more pieces added to it creating a truss.

There will be two of these solid oak trusses in the living room.
 

Attachments

  • 667067-Workshop 130.jpg
    667067-Workshop 130.jpg
    49.3 KB · Views: 541

Tractor & Equipment Auctions

2015 Ford F-150 4WD (A50397)
2015 Ford F-150...
(1) HD 24ft Free Standing Corral Panel (A48837)
(1) HD 24ft Free...
2005 Bobcat S185 Skid Steer (A50490)
2005 Bobcat S185...
2010 Cadillac CTS Performance Sedan (A48082)
2010 Cadillac CTS...
2017 Ford Explorer XLT AWD SUV (A48082)
2017 Ford Explorer...
2025 Kivel 48in Forks and Frame Skid Steer Attachment (A49346)
2025 Kivel 48in...
 
Top