General freshen up of 1967 Ford 4100

   / General freshen up of 1967 Ford 4100
  • Thread Starter
#21  
I painted most of the small items today
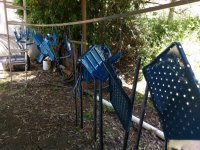
painting sundries.jpg

then moved back onto the front axle. I'd been waiting on genuine seals for the front hubs, having found that generic seals from the bearing supplier won't work. I got the l/h hub and spindle assembled, then started stripping down the r/h hub. Pulled the bearings out and then scooped out the old grease with a gloved hand prior to washing the hub out. Apparently this is not always done- the grease was slightly lumpy. Several loose bearing rollers and a chunk of broken bearing shell were floating loose in the hub. I double-checked the bearings that had come out, yep they're worn but intact. Someone has previously had a bearing failure and has fitted a new bearing without even getting the big chunks of the old one out!
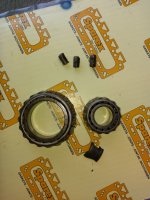
bearing bonus.jpg
 
   / General freshen up of 1967 Ford 4100
  • Thread Starter
#22  
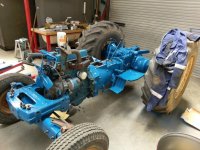
I got the main assemblies of the tractor back together last week. I was going to make a clutch alignment tool but I figured I have always lined up car clutches by eye, I read somewhere once that the human eye is very good at determining concentricity. So I eyeballed the spigot, friction plate and the PTO drive splines in the pressure plate, and rolled the two halves of the tractor together. had to rotate the shafts as it went together to align the splines- the big hole in the top of the bell-housing where the steering goes is very handy for this. Over the past few days I've got a little bit of time to start attaching footplates etc.
main assemblies back together.jpg

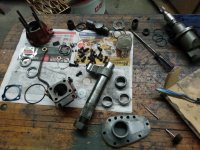
Today I stripped down the power steering column and cleaned & inspected the parts. The power steering has always worked fine but it has leaked oil very badly. I got the seal kit from bareco, it only really has the O-rings and the top seal, I guess since the power assist was all good the main piston rings should be okay.
This is most of the parts on the bench
power steering box stripped.jpg
The valve assembly involves a collection of round gizmos clamped together in a block.
power steering valve assembly.jpg
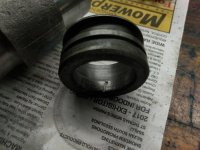
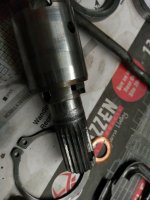
The uppermost of these houses the seal that runs on the column shaft. When I removed the seal, I found that the inside surface where the seal fits has been badly damaged, looks like it has been gouged by someone trying to replace the seal at some point- it actually looks like they have driven some pointed tool down beside the seal from outside to prise it out. Nice work Doofus. Also the shaft that the seal runs on is badly pitted on the sealing surface. I haven't decided how I will deal with this yet, I don't expect to be able to buy these components so some repair will probably be necessary.
power steering damaged seal housing 2.jpgpower steering pitted shaft.jpg
 
   / General freshen up of 1967 Ford 4100 #23  
Nice work. I have a little 3 cylinder Yanmar about ready to go back together. Painted the block last night. When you tear one of the machines apart it is amazing to me how many precisely machined parts are in one of these tractors. When it is scattered all over the floor the pile of parts looks like it should sell for 10's of thousands of dollars.
 
   / General freshen up of 1967 Ford 4100
  • Thread Starter
#24  
Yep there sure is a lot to a machine like this. The time spent repairing and even re-making the odd part here and there makes it clear just how important mass-production methods are in this kind of thing, can't imagine what it would cost to build it one part at a time.

I got the power steering assembly finished this afternoon. To repair the valve housing bushing that takes the seal, I filed the burrs away and then honed it to a smooth finish so that the damaged section was all below the surface and not above it, then used some Loctite 'quick metal' to fill the score mark before inserting the oil seal. I haven't used that stuff behind a seal before so I hope it does the job, just has to cure in place to stop oil tracking up the score mark. For the shaft I used a speedi-sleeve, I was a little concerned that the shaft size of the seal (7/8") might be too small a diameter to take a sleeve but the suppliers say it should be fine. A little quick-metal in the pitted and grooved surface before the sleeve went on too, I'm much more confident of it in that application. I sat the steering column in place to finish working on it, it'll come off again for paint.
steering box unpainted.jpg

I have a few more parts to prepare before the next lot of painting, hopefully the weather here will clear up again next week and I'll be able to move the tractor outside and paint the engine as well; I didn't paint it when the tractor was separated because I was going to use a high-temp enamel, I've had a change of mind on that so I'll have to do some masking before I coat it with primer then hit it with the blue stuff.

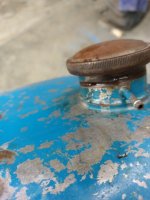
The next job is a repair on the fuel tank, the filler neck has a hole in it where it has been rubbing on the panel; there were only two bolts holding the tank in and those were loose, it had probably been bumping and rubbing for years.
fuel tank neck hole.jpg

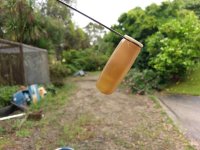
I drained the tank, will fill it with water before welding. I pulled the fuel sender out, the float is half-full of diesel so one more thing to fix. I guess I'd better check whether the sender actually functions before I try to repair the float, everything else on the machine has needed replacing so no reason why the fuel sender should be any different.
fuel sender float.jpg

I'm starting to see the light at the end of the tunnel now, might even get the panels painted next week.
 
   / General freshen up of 1967 Ford 4100
  • Thread Starter
#25  
A little bit more progress, I welded the hole in the fuel tank filler neck- filled the tank with water and used oxy-acetylene and steel filler rod. Checked the fuel gauge sender and it was open circuit- dismantled it and the variable resistor has disintegrated- I can easily live without a fuel gauge as the tractor will not be doing any long hours of work, perhaps somewhere down the track I will get the gauge functional but it's a very low priority. Fitted a new fuel outlet tap to replace the drip-drip-dripping one.
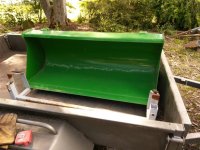
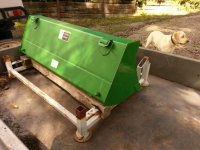
I found a new-old-stock JD loader bucket on an industrial auction site, went and picked it up today. A shade smaller than the old one, 1350mm vs 1500mm, but a good size for the machine I think. I had planned to make a quick-hitch arrangement for the loader, now at least the decision regarding what type of hitch has been made for me.
new bucket 1.jpgnew bucket 2.jpg
Clearly this is going to have to undergo a colour change before going on the front of the Ford.
 
   / General freshen up of 1967 Ford 4100 #26  
It’s coming along great Pete. I wish I had the time to tackle all my tractor projects. I have a few old Fords I’d like to tear down and fix up. I’ve seen a few buckets like that.....why they wouldn’t put a support in the center of the bucket for a grab hook is beyond me.
 
   / General freshen up of 1967 Ford 4100
  • Thread Starter
#27  
Thaks CF. Rather than a grab hook on the bucket, I plan to put a couple of hooks, as well as a 2" receiver hitch, on the quick-hitch frame. The old bucket suffered badly from being used for every lifting, pulling and pushing chore- I think it will be better to have a few simple implements with dedicated tasks. One of the main reasons why I'm keen to add a quick-hitch arrangement of one sort or another.
 
   / General freshen up of 1967 Ford 4100
  • Thread Starter
#28  
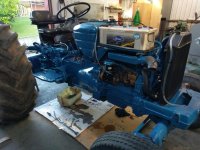
Three steps forward and two steps back. I got several more parts painted on Saturday and today I got a fair few of the sundries bolted up, cleaned out the power steering pump and fitted a new filter, made a gasket for under the power steering column and bolted it up, mounted the starter motor and generator, fitted the new radiator and hoses, got all the plates and brackets in place sufficient to mount the battery tray, installed new engine oil and fuel filters, filled up all the oils, put 20 litres of diesel in the tank, bled the injectors and fired her up!
first run.jpg
Good news is it runs, the lift arms go up and down- albeit jerkily as I didn't get the lift cylinder bled fully- the PTO operates (and stops, which it did not do before).
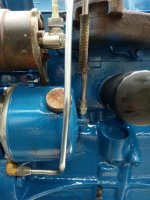
Bad news is the power steering has a couple of leaks, the feed pipe from the pump to the column has been brazed in a couple of places and one of the repairs leaks, I'll have to take it to the local truck brake guy who does pipe flaring, get him to make up a new pipe. It also leaks from one of the banjos on the pipe that sits on the side of the column- I annealed the copper washers before reinstalling this but it looks like it will require new ones.
steering banjo leak.jpg

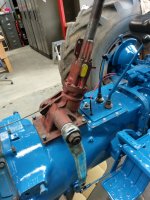
The really bad news is that oil was pouring out from under the base of the diverter valve like a garden hose. My dodgy shortcut fix didn't cut the mustard, I'll have to take the valve off and do the repair properly after all :(
diverter valve leak.jpg
Oh well, nothing ventured nothing gained- it's not going to take any more effort to fix it now than it would have a month ago, but I was actually beginning to see the end of this project and the full repair on this valve is going to be very time consuming. Sigh.

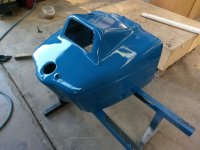
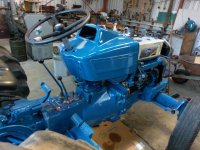
My painting efforts the other day included the first of the panel work- stripped the cowl to bare metal and put a few coats on it. I just had to sit it in place tonight before I finished for the week.
steering cowl stripped.jpgsteering cowl painted.jpgsteering cowl fitted.jpg

I've been putting in all of my days off on this thing for weeks now trying to get it ready for summer work such as towing my firefighting trailer, unfortunately this has meant that other jobs are not getting done. I'm going to have to get weeds sprayed next week, might have to abandon the tractor now until the new year.
 
   / General freshen up of 1967 Ford 4100 #29  
I feel your pain. Too many projects and not enough time. This thing they call a job really cramps my style!
 
   / General freshen up of 1967 Ford 4100
  • Thread Starter
#30  
I got all my grass mowed and my weeds poisoned so decided to give the tractor an hour or so this afternoon. I had a major win.
Unbolted the diverter valve and lifted it off, had a look at the O-rings. One of them had obviously moved out of position during installation and had been pinched. This was the O-ring that I was concerned about not being likely to stay put with the usual vaseline method; the BareCo overhaul kit was not super accurate with the O-ring sizes and this one was really just a shade too big for the recess it sat in.
I cleaned everything up again and selected an O-ring from my assortment that was half a size too small for the recess, rather than half a size too big. Generous application of vaseline and reinstalled the valve, again using the clamp spigots I had made for the broken bolt lugs. Reinstalled the battery and fired the engine up again; this time there was no leak at all from the diverter valve. :thumbsup:

Not as much success with the power steering leaks; I got a new pipe made up last week, left the old pipe with the brake shop and asked the guy to match the bends for me. He did a pretty good job considering that he didn't have the tractor in front of him, but the new pipe now passes in front of the cap on the steering pump reservoir.
power steering pipe new.jpg
I wrestled it out of the way as much as I could but this tubing is surprisingly rigid. The pipe does not leak.
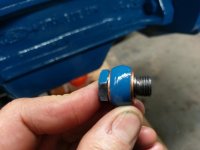
The other leak in the power steering is still a problem; I picked up some new copper washers when I dropped the pipe off, however the non-threaded part of the fitting is too long for the washers to seat. I tried stacking with one of the old washers (annealed) but this solution did not hold the pressure when bleeding the system; as soon as the steering hit lock, oil sprayed out. Might have to stack it with new copper washers but unfortunately I only bought four.
power steering pipe fitting.jpg
 

Tractor & Equipment Auctions

2024 KMC 7406 LOT NUMBER 11 (A53084)
2024 KMC 7406 LOT...
2001 John Deere M665 (A50120)
2001 John Deere...
2020 EZ-GO EXPRESS S4 GOLF CART (A51247)
2020 EZ-GO EXPRESS...
2016 Dodge Caravan (A51694)
2016 Dodge Caravan...
UNUSED X-STAR 101" X 25' BRIDGE PLATFORM (A51247)
UNUSED X-STAR 101"...
BUYERS 36X19 BLACK POLY TONGUE TRAILER TOOLBOX (A51248)
BUYERS 36X19 BLACK...
 
Top