Thanks again guys,
K7147,
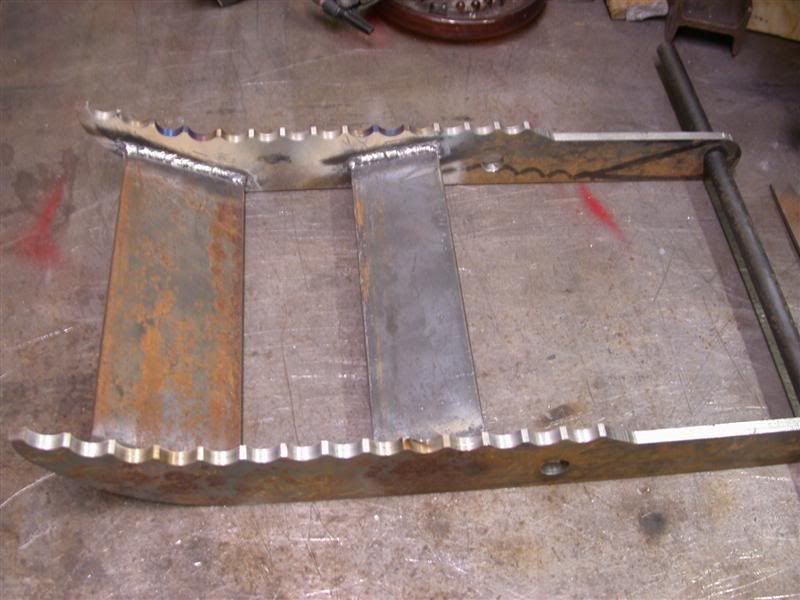
Of course proof is in the pudding so I need to get it done and welded to the backhoe to try it out. I'll probably post a video and some photos. (If it works

)
You know Eddie,
There is nothing like a bigger hammer if all else fails. LOL ... I've got a couple big ones in my tool boxes too....I'm not exempt from Murphy's Law either.
tlbuser,
Well, I'm hoping I've been good and she will do it again for me. I've got to get the parts welded and cleaned and then she will do her magic.
I do have some concerns as to what 63DH8 said:
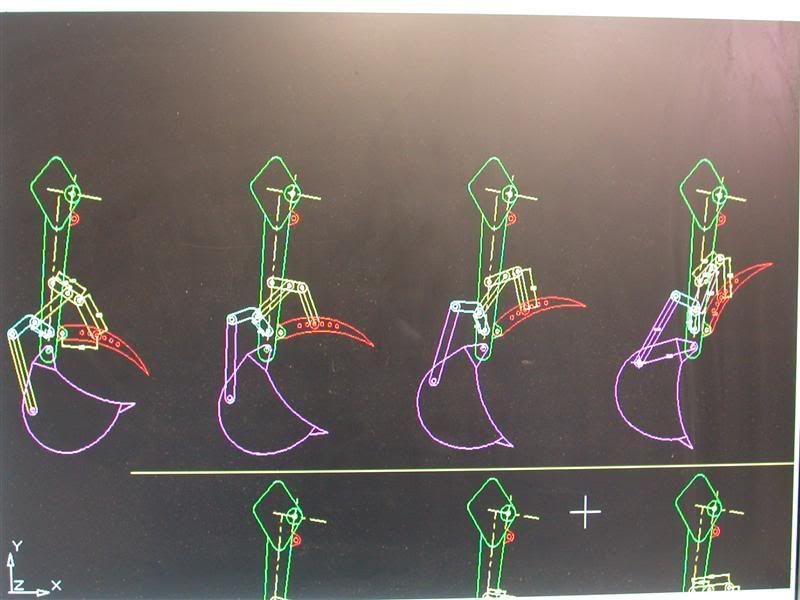
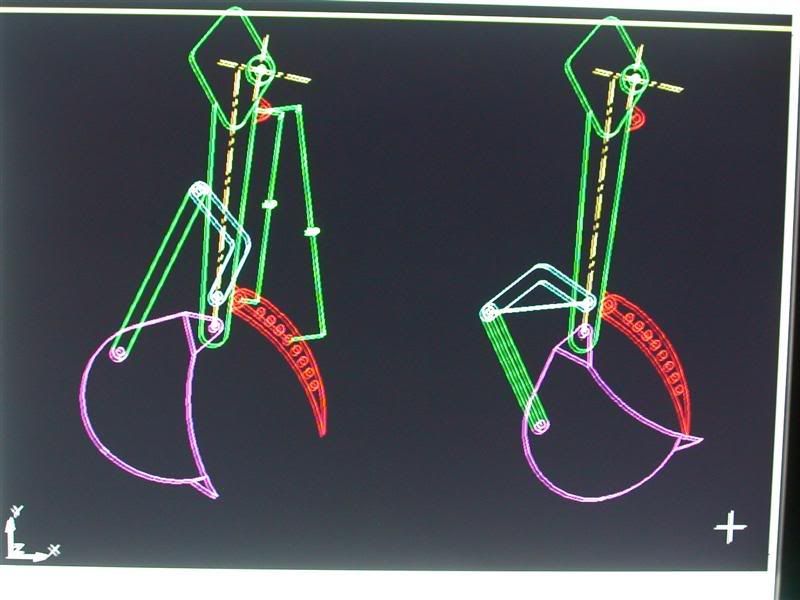
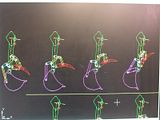
I used to work for an outfit that designed and built bucket thumbs. Unless you use a common pivot point, whatever you are carrying will "roll" in the thumb/bucket. Use your CAD to roll the bucket and thumb. You'll see how the thumb will be closer and further away as you roll the bucket. Our boss tried to get us designers to make a thumb that was prebuilt that would be welded onto the stick (excavator arm), but it wouldn't work due to the rolling effect. That made grabbing then rolling out the bucket impossible to do without dropping what was carried.
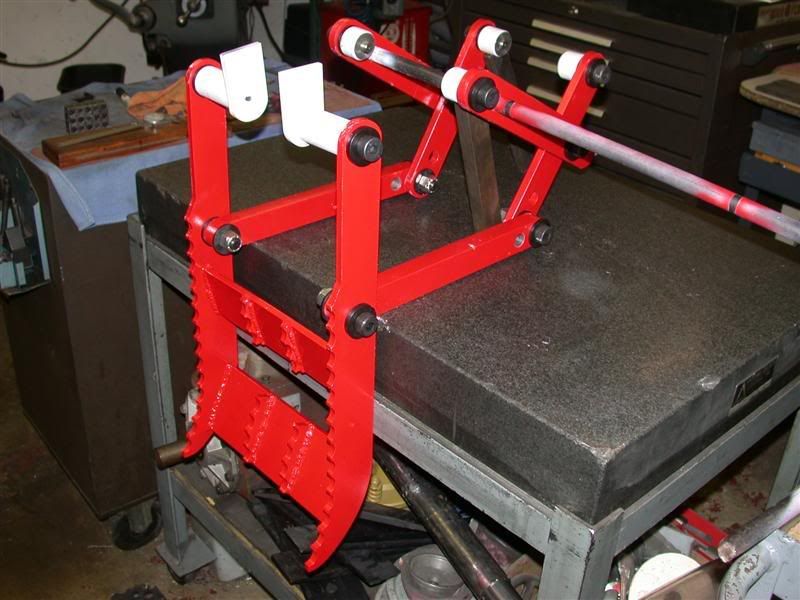
I used the CAD to move the linkage and bucket from the pivot points in the picture in one of the first posts where there are multiple drawings of it.
You can clearly see how the bucket and jaws are approaching each other.
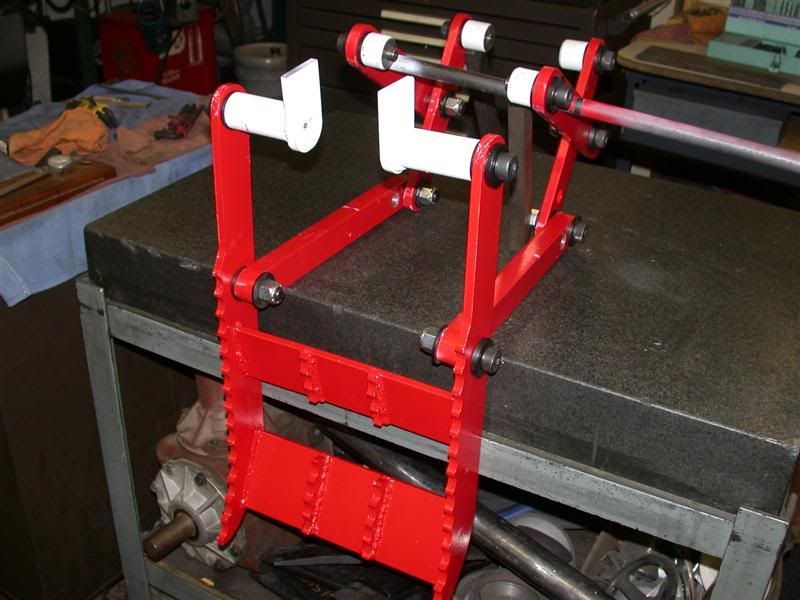
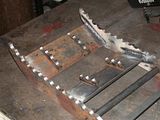
It seemed to me the bucket and jaws approach each other to "grab" stuff. Does anyone see a problem where if I "curl" the bucket to grab something it will drop out? I've welded 2 plates across the jaws to help with stability and to catch stuff.
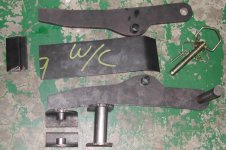
Maybe I should add some extra teeth on the plates ... kind of like a sharks mouth? I do have those drilled out remnants I could cut up and weld to them.
Sort of like this, except I would make the rear ones lower profile. Or do you think adding them makes no sense and could just collect dirt? It does look pretty cool though?
I'm worried I missed something here? I do realize the thumb pivot is about 4" away from the bucket pivot. I guess what he is saying if the object I pick up is smaller than 4" it could "roll" up the thumb towards the gap between them. But then again, I wasn't planning on using the backhoe for stuff THAT small. More like basketball or beach ball sized stuff.
If anyone has any input on this I would appreciate it.
Thanks,