OP
Huskerplowboy
Silver Member
Unfortunately, I had to go back to work today after a nice 3-day weekend  . Then, shortly after getting home this afternoon, a storm rumbled through and knocked out the power for a couple hours, ruining my plan to get some more fabrication done today. Maybe tomorrow or Wednesday I guess...
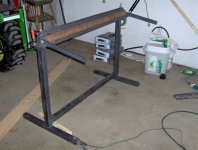
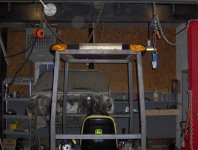
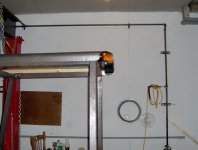
Saturday and Sunday were mainly spent on fabricating tooling to help me form the sheet metal for the roof the way I want it. Sort of a sheet metal brake, sort of. The big chunk of pipe was in the shop back when I bought the place, everything else except the handles was leftover steel from the cab or other projects. I had not intended to make a fancy stand for it, but after I built the bender, I discovered that i had a shortage of things long enough and heavy enough to bolt it to as an anchor. The stand ended up with casters under it and the bender bolted on, so later I could make a workbench top or maybe a mount for a compound miter saw or something else for it... I think this cab build is getting out of hand now that I'm building stands to hold tools I had to build to make pieces for the cab!
Sunday morning I also moved another project out of the shop to make more room for the cab. I have had an old pickup chassis in there for about 6 months and was working around it so far, but as the cab progresses, needed the space back...
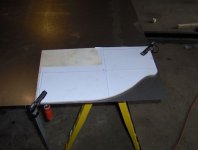
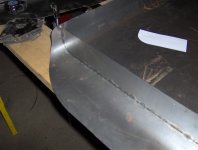
The bent piece in the second pic was 2" wide by 1/8" stock I had a scrap piece of. I have to do a little more grinding on the bender to fix a spot where the handles bind right at 90 degrees, so it can't go past 90 to allow for springback. An easy fix, just takes a little time.
My wife gets back from the in-laws tomorrow, so I may or may not get out into the shop til Wednesday. Here's what I plan to work on next:
- Finish up the LH fender piece for the frame: The channel is welded together, just need to add on the mounting tabs, weld nuts, etc and bolt it up.
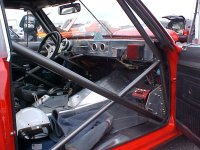
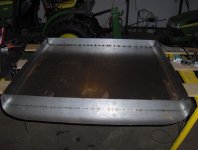
- Fabricate the roof: Need to cut and bend the main roof panel, cut out and weld in the end caps/bulkheads, and add in the substructure that will attach to the cab frame. At least I've finally decided on what it'll look like, just need to do it.
- Doors and Windows: After the roof is complete, I'll start tackling the door frames, rear window frame, etc. as well as the filler pieces around the pedals on either side of the cowl.
. Then, shortly after getting home this afternoon, a storm rumbled through and knocked out the power for a couple hours, ruining my plan to get some more fabrication done today. Maybe tomorrow or Wednesday I guess...Saturday and Sunday were mainly spent on fabricating tooling to help me form the sheet metal for the roof the way I want it. Sort of a sheet metal brake, sort of. The big chunk of pipe was in the shop back when I bought the place, everything else except the handles was leftover steel from the cab or other projects. I had not intended to make a fancy stand for it, but after I built the bender, I discovered that i had a shortage of things long enough and heavy enough to bolt it to as an anchor. The stand ended up with casters under it and the bender bolted on, so later I could make a workbench top or maybe a mount for a compound miter saw or something else for it... I think this cab build is getting out of hand now that I'm building stands to hold tools I had to build to make pieces for the cab!
Sunday morning I also moved another project out of the shop to make more room for the cab. I have had an old pickup chassis in there for about 6 months and was working around it so far, but as the cab progresses, needed the space back...
The bent piece in the second pic was 2" wide by 1/8" stock I had a scrap piece of. I have to do a little more grinding on the bender to fix a spot where the handles bind right at 90 degrees, so it can't go past 90 to allow for springback. An easy fix, just takes a little time.
My wife gets back from the in-laws tomorrow, so I may or may not get out into the shop til Wednesday. Here's what I plan to work on next:
- Finish up the LH fender piece for the frame: The channel is welded together, just need to add on the mounting tabs, weld nuts, etc and bolt it up.
- Fabricate the roof: Need to cut and bend the main roof panel, cut out and weld in the end caps/bulkheads, and add in the substructure that will attach to the cab frame. At least I've finally decided on what it'll look like, just need to do it.
- Doors and Windows: After the roof is complete, I'll start tackling the door frames, rear window frame, etc. as well as the filler pieces around the pedals on either side of the cowl.