My Industrial Cabin Build

   / My Industrial Cabin Build #111  
I forgot to mention, I pressurized both sides today and it holds fine. Looking forward to tomorrow and getting this monkey off my back.

There'll be other monkeys for sure. Your project reminds me of the first place that my wife and I built. We built several after that, and each was an adventure. With each one we learned from our mistakes before.

I have two pieces of advice. I'm not saying to follow my advice, but it wouldn't hurt to think about it. The first one is to build as many options into your house as you can. That applies everywhere from bottom to top. For example, you wondered whether to vent the crawl space or not. I'd say to put in a vent - you can always close it off, but it will be a real pain to put it in later. In fact, put access points in all 4 walls and close them all off. And if code allows, maybe frame for a side-wall access door in the crawl space wall as well. Why not? You simply don't know if you will need them, but it's the kind of thing that is easy to do now. Do think about access to the crawl space - you'll be surprised how often that access comes in handy.

When it comes to the framing, the same applies. If you don't know if you want a door or window in a particular area it doesn't hurt a thing to go ahead and frame for it. If you don't use it then no harm done. But the option is always there.

In our current house we just got through adding more drainage to the inside of our crawl space. What a pain. It would have been much easier and cost nothing if done in the beginning. This time we made it drain outside by gravity instead of into a sump pit with pump. BTW, there is no downside to more drainage. Sometimes when we change the land by removing vegetation and digging into the dirt it takes years before normal subsurface moisture movement adapts to the changes.

The other piece of advice is to take lots of pictures - particularly when it comes to the wiring and plumbing and before you put on interior wall coverings. And of anything that gets buried underground.
You'll be referring back to those pictures constantly down through the years. On our last build we took stills and did a walk-through video both.
good luck,
rScotty
 
   / My Industrial Cabin Build #112  
I agree with those 2 things, esp pics. I built in the days of film, i look at them a good bit and wish i had more.
 
   / My Industrial Cabin Build #113  
I noticed you said you were off a bit from one side of the pad to the other. If you don't have one, you might consider purchasing a self leveling laser level. I bought one last year from Lowe's for $150. Initially it was to find high spots in a gravity feed irrigation pipeline, but I've used it for many other things since. It would have caught that error.

A good friend has received formal training from CalTrans regarding proper gluing of PVC. He said the #1 most common mistake is using too much solvent. He said: "it IS a solvent ..."

In my new garage that is being built, I also was looking for black ABS sewer line and thought the plumber used white schedule 40 PVC instead. Wrong. But it was white pipe. DWV pipe (drain, waste, vent.) It is also about half the weight of schedule 40 pvc, as it is rated for drain only, not pressure. Never heard of the stuff before. (He also used PEX for water line, but that is another issue ...)

Regarding ..... "bride?" I thought that was your daughter! :laughing:
 
   / My Industrial Cabin Build
  • Thread Starter
#114  
Plumbing inspection passed. On to the next step.
 
   / My Industrial Cabin Build #115  
Great!!
 
   / My Industrial Cabin Build #116  
That's good news. Congratulations!!!
 
   / My Industrial Cabin Build
  • Thread Starter
#117  
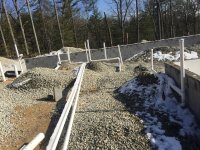
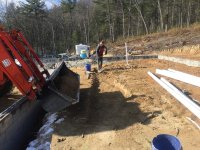
In coordinating with my cement /foundation guy, there was a little more I wanted to get done before they came in to fill the gravel and instal the insulation for the cement.
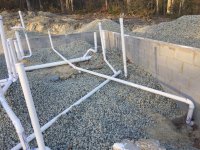
Radon mitigation, built in from the beginning, was important to me. I needed to run some conduits across the house to carry electricity's from one side to the other because the center of the house is open ceilings with post and beam.
So we needed to dig it out a bit to make it fit. IMG_8022.JPG
IMG_8025.JPG

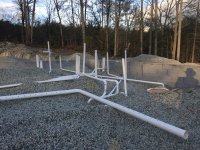
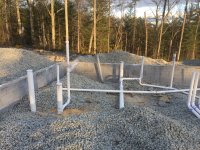
I am just realizing that I didn't take pictures of the radon pipe I put in. Here is a picture of the end of that pipe as well as a floor drain that I added for the boiler room. Drain pipe crosses from left to right and exits wall to daylight.

IMG_8069.JPG
 
   / My Industrial Cabin Build
  • Thread Starter
#118  
The radon pipe is set up in a U shape which follows the general U shape of the house. I emplacing the egress pipe on the opposite end of the house from our bedroom, incase the fan can be heard inside the house. My daughter took offense to that since her room is on that side of the house and I mentioned that she was only going to be there a couple more years and perhaps it would provide motivation to get out when the time came.:D

French drain. This was a tremendous amount of work. We put 3 coats of Dry Lock extreme, trying to seal every pinhole and crevice. I know it isn't possible but making the effort gets you a lot closer than not making it.


IMG_7967.JPG

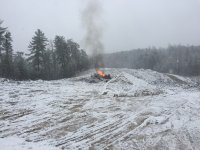
Building a house involves a lot of peripheral tasks as well. We had snow last weekend and this provided an opportunity to burn some of the debris. We will be burning for a several years before we get it to a maintenance level.

IMG_7979.JPG

IMG_7980.JPG

Burning a large pile is a full day but I prefer to stay out of the build site when it's raining or wet because it just turns into a big mud pit.

It also gives us a bit of a break and an opportunity to look around us and take in the beauty of the place.

IMG_7985.JPG
 

Attachments

  • IMG_8015.JPG
    IMG_8015.JPG
    3.1 MB · Views: 328
Last edited:
   / My Industrial Cabin Build
  • Thread Starter
#119  
So the snow melts and it's back to work. I started digging out the trench for the French drain. My foundation guy doesn't think I need it. the slope of the land and the planned slope behind the house should be enough. I think about all the trouble my parents had with their foundation as I was growing up and how much of a pain it is to put something like that in after the fact and decided that I was just going to bite the bullet and do it now. Do it once, do it right. Hopefully I will never have to think about it again.

IMG_8035.JPG

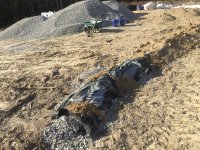
I dug out a 4-5 inch deep trench next to the footers all around the back and sides of the house, as well as the front , but not inside the center of the U because that will be cement courtyard and I don't think it will be an issue. The main roof slants toward the back of the house and gutters should channel water to a cistern but sometimes the rain here is intense and I imagine it might overpower the gutters. Also there is the slope of the land behind us that will saturate in a heavy rain and the water will flow down toward us. Again, the plan is too properly shape a swale into the land to carry that water away and never have it get up to the foundation......but just in case. put in a layer of stone, then the 4 inch corrugated drain pipe, holes facing down. then covered that with stone. Then covered with landscape fabric as a soil separation barrier. Then began the process of covering that. All told, I used 300 ft of pipe and a 3x300 ft roll of landscaping fabric.

IMG_8053.JPG

IMG_8051.JPG

IMG_8055.JPG

Because of overlapping at corners, the 300 ft roll of fabric came short of the last pipe....had to improvise with 10 feet from an erosion barrier.

IMG_8062.JPG

IMG_8066.JPG

IMG_8064.JPG

The digging and burying of the drain took 4 days first and last day was me working alone. One day I had two of my kids working with me and one day I had my wife there. I worked from sunrise to sunset each day.
 
   / My Industrial Cabin Build
  • Thread Starter
#120  
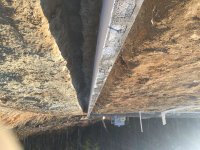
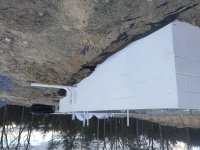
upside down pictures irritate me

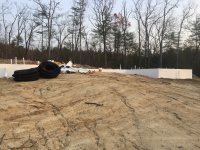
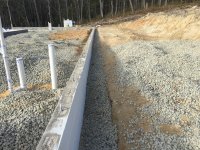
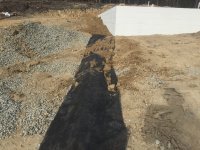
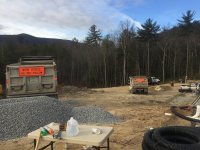
So as can be seen from some of the pictures there is more gravel than was there before. My foundation guy said we needed another 60 ton of fill, so I ordered 80......If there is any left over it will get spread on the road. We had 4 trucks show up all at once yesterday morning and another truck came back a few hours later.

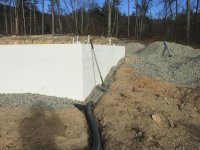
the last thing I did was put in the conduit for the pigtail to the well to come in the house. it is the grey pipe in the back. It is slanted to the side, intentionally. If I came straight up, it would have been in a wall. I want it to come up in the boiler room.

IMG_8072.JPG

One last picture of the floor drain for the boiler room. As I said, it goes out the wall to daylight, tied into the French drain. Hopefully it will never see a bit of use.IMG_8074.JPG

IMG_8049.JPG

And this his where I am now. Thursday, the crew will arrive and start working on filling the rock in. The materials will be delivered for the insulation and reenforcement of the cement. Over the Christmas break, I will probably get up there at least one day and clear and flatten the land behind the house where they are drilling our well and hopefully they can get started on that early in January. I expected to have the house under roof by now. Hopefully my experience can be of use to someone else. I have tried to include some of the mundane things associated with building so that realistic expectations can be drawn for anyone else preparing to do this.
 

Tractor & Equipment Auctions

(1) HD 24ft Free Standing Corral Panel (A51573)
(1) HD 24ft Free...
JOHN DEERE 7210R LOT NUMBER 269 (A53084)
JOHN DEERE 7210R...
2015 Ford F-550 Crew Cab Mason Dump Truck (A51692)
2015 Ford F-550...
JOHN DEERE/UNVERFERTH 1700/330 LOT NUMBER 13 (A53084)
JOHN...
2019 JOHN DEERE 8295R LOT NUMBER 183 (A53084)
2019 JOHN DEERE...
48" Skid Steer Pallet Forks  (A52384)
48" Skid Steer...
 
Top