My Industrial Cabin Build

   / My Industrial Cabin Build
  • Thread Starter
#731  
I was expecting a sloped ceiling over all of it. Are those 8 foot walls for all of your rooms?

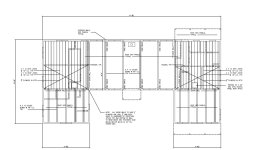
Eddie, on the framed in areas there is 8 foot ceilings with a small storage area over them. My wife wanted an area to store Christmas stuff, etc. it will be conditioned space( heated and cooled). in the two front bedrooms, the ceilings slope , with 6x12 timbers. Supporting the roof panels.
 
   / My Industrial Cabin Build
  • Thread Starter
#732  
IMG_5436.JPG
 
   / My Industrial Cabin Build #733  
Other people's experience may not match mine, but I found a drywall lift is cheaper than a drywall guy, and it gives you a lot of confidence since now you can have something hold the panels up without the muscle tension, for as long as you need (to chase a box of screws or whatever always seems to happen when you get a panel in the air). Makes one person ceilings almost relaxing. They have a tilt head so you can do sloped ceilings too. I got the HF one, works fine.

A crown stapler works well for metal corner bead, assuming that's what you like (some prefer the plastic or the stuff built into paper tape).

My drywall fit-up skills aren't the best, so I had a lot of gaps, especially where new met old. If that sounds familiar, look up "hot mud". It is a powder you mix up into compound in small batches, just enough to fill your "mud pan" to a usable amount. It starts to set in the amount of time in the name. So "easy sand 45" sets up (or at least gets unworkable an more) in 45 minutes (there are other brands too, like "fast patch", but I haven't used them). That's about right time to put up half a pan full with fiberglass tape with a 4" trowel. The joy of this stuff is it hardens in place without shrinking, even in big gaps and thick layers for quick build-up. Come back over it with a steel trowel the next day to knock off the high spots rather than sand. Then grab a bucket of regular old drywall mud ("green lid"?) and your next bigger size trowel and finish in thin coats like normal.

It's easy to spend forever going back over it, so at some point tell yourself "good enough" and stop. Paint the ceiling with a very flat ceiling paint to hide the rest.
 
   / My Industrial Cabin Build
  • Thread Starter
#734  
Other people's experience may not match mine, but I found a drywall lift is cheaper than a drywall guy, and it gives you a lot of confidence since now you can have something hold the panels up without the muscle tension, for as long as you need (to chase a box of screws or whatever always seems to happen when you get a panel in the air). Makes one person ceilings almost relaxing. They have a tilt head so you can do sloped ceilings too. I got the HF one, works fine.

A crown stapler works well for metal corner bead, assuming that's what you like (some prefer the plastic or the stuff built into paper tape).

My drywall fit-up skills aren't the best, so I had a lot of gaps, especially where new met old. If that sounds familiar, look up "hot mud". It is a powder you mix up into compound in small batches, just enough to fill your "mud pan" to a usable amount. It starts to set in the amount of time in the name. So "easy sand 45" sets up (or at least gets unworkable an more) in 45 minutes (there are other brands too, like "fast patch", but I haven't used them). That's about right time to put up half a pan full with fiberglass tape with a 4" trowel. The joy of this stuff is it hardens in place without shrinking, even in big gaps and thick layers for quick build-up. Come back over it with a steel trowel the next day to knock off the high spots rather than sand. Then grab a bucket of regular old drywall mud ("green lid"?) and your next bigger size trowel and finish in thin coats like normal.

It's easy to spend forever going back over it, so at some point tell yourself "good enough" and stop. Paint the ceiling with a very flat ceiling paint to hide the rest.

Thank you for the insight. It is definitely something to consider. I cant wait till I have a roof on the place so I can start getting the windows installed.
 
   / My Industrial Cabin Build #736  
Other people's experience may not match mine, but I found a drywall lift is cheaper than a drywall guy, and it gives you a lot of confidence since now you can have something hold the panels up without the muscle tension, for as long as you need (to chase a box of screws or whatever always seems to happen when you get a panel in the air). Makes one person ceilings almost relaxing. They have a tilt head so you can do sloped ceilings too. I got the HF one, works fine.

A crown stapler works well for metal corner bead, assuming that's what you like (some prefer the plastic or the stuff built into paper tape).

My drywall fit-up skills aren't the best, so I had a lot of gaps, especially where new met old. If that sounds familiar, look up "hot mud". It is a powder you mix up into compound in small batches, just enough to fill your "mud pan" to a usable amount. It starts to set in the amount of time in the name. So "easy sand 45" sets up (or at least gets unworkable an more) in 45 minutes (there are other brands too, like "fast patch", but I haven't used them). That's about right time to put up half a pan full with fiberglass tape with a 4" trowel. The joy of this stuff is it hardens in place without shrinking, even in big gaps and thick layers for quick build-up. Come back over it with a steel trowel the next day to knock off the high spots rather than sand. Then grab a bucket of regular old drywall mud ("green lid"?) and your next bigger size trowel and finish in thin coats like normal.

It's easy to spend forever going back over it, so at some point tell yourself "good enough" and stop. Paint the ceiling with a very flat ceiling paint to hide the rest.

One comment I will add on his "hot mud". Don't over fill. It is very hard to sand. And realize when good is enough. You will see your mistakes, but you don't need to point them out to everyone. After we hung our drywall, I used the hot mud style (she mixed my batches and cleaned out the pans). Then she put on subsequence layers, along with sanding between coates. While I hung more drywall. Also look for a vacuum sander unit from the box stores. Hook it up to a shop vacuum and savess a lot of dust floating in the air. Have a dust deputy lid on a 5gal bucket of water between vacuum and sander. Use drywall bags over the vacuum filter. This saves the shop vac filter and keeps its inside cleaner. I have heard of some pouring the water off the dust buxcket and reusing the mud. I just disposed of it. Keep up the good work. Jon
 
   / My Industrial Cabin Build #737  
And depending on the desired finish, if mud is properly applied, there will be minimum sanding. My crew didn't clock more than a couple hours of sanding time. Almost no dust mess. I know, I cleaned up the floor when they were done. I shop vac'd along the wall/floor seam because I'm OCD.

One note. We laid down paper covering on the floors. Caught all of the mud. Very easy cleanup.

Sheetrock mud will stick to your concrete floor like glue!!!!
 
   / My Industrial Cabin Build #738  
One comment I will add on his "hot mud". Don't over fill. It is very hard to sand. And realize when good is enough.
that is one thing I found. The hot mud dries to be very hard.


Have a dust deputy lid on a 5gal bucket of water between vacuum and sander. Use drywall bags over the vacuum filter. This saves the shop vac filter and keeps its inside cleaner. I have heard of some pouring the water off the dust buxcket and reusing the mud. I just disposed of it. Keep up the good work. Jon
A friend made up a bucket that I used when we did patchwork in our house before painting.
He just drilled two holes in the lid, then put a PVC adapter from a female slip fit to a threaded male fitting through the hole from the top, and put a threaded 90 on the inside. You hook your vacuum to that.

On the other side, you put a piece of PVC pipe that is almost as tall as the bucket, you put a female slip fit to male threaded adapter on that and another female slip fit to threaded male fitting down from the top. You hook your hose that goes to vacuum up dust to this side. Put 4-6" of water in the bottom (enough to generously cover the bottom of the piece of PVC pipe) and start vacuuming. Then all the sheetrock dust ends up staying in the water in the bottom of the bucket and none of it reaches your vacuum.

Aaron Z
 
   / My Industrial Cabin Build #739  
One of the best decisions I made on my build was contracting out the drywall. Best money I spent! I did the drywall for my garage rooms.
 
   / My Industrial Cabin Build #740  
One of the best decisions I made on my build was contracting out the drywall. Best money I spent! I did the drywall for my garage rooms.

I agree.
 

Tractor & Equipment Auctions

2021 Fleco DX140 24in Tooth Bucket Excavator Attachment (A52377)
2021 Fleco DX140...
CUMMINS ENGINE CO. N-855F DSL TIRE PUMP MOTOR (A51406)
CUMMINS ENGINE CO...
2012 VOLVO VNL TANDEM AXLE SLEEPER (A52576)
2012 VOLVO VNL...
2013 Ford F-650 Flatbed Truck (A51692)
2013 Ford F-650...
12 Yard Rolloff Container (A51573)
12 Yard Rolloff...
New/Unused AGT MX-MRT14 Mini Skid Steer Loader (A51573)
New/Unused AGT...
 
Top