Only in Texas, Don and Harv doing

   / Only in Texas, Don and Harv doing #51  
Don,

I realize your building something I'm not familiar with so it's very interesting to me how you're going about it. The process and sequence of events.

I also realize my suggestions come from different types of construction, so they aren't ment as anything other than comparisons at best. Apples to Oranges type of thing.

As to cutting the poles level after you get them into place, I wouldn't. I've found it very dificult to get them all exact by working my way around them while they are just standing there.

I would wait until you start putting on your purlins.

Start at a corner and work your way around making sure each purlin is perfectly level. Not knowing how it works, I don't know the terms either. But the top perlin that supports your roof truss will have to be perfect. The other perlins can be off a degreeor two and it wont matter, but the top is critical.

If you cut your posts and make the smallest mistake now, it will affect everything.

There is no advantage that I know of to cut them now and especially no advantage to cut all of them!!!!!!

Again, that's just my experience with wood. I don't have any with what your doing. /forums/images/graemlins/grin.gif

Eddie
 
   / Only in Texas, Don and Harv doing #52  
Don, don't make the same mistake I did when buying a corded screw gun. Look for one that is 2500 rpm or less.

I came home with a 4000 rpm one. A screw gun is a screw gun, right. Wrong! /forums/images/graemlins/frown.gif It's for drywall and doesn't work well on tek screws. It will also burn up tek screws and itself faster. I now have a Dewalt 2500 rpm deck and drywall screw gun. It does a fine job.

James
 
   / Only in Texas, Don and Harv doing #53  
</font><font color="blue" class="small">( That sounds tempting but it also sounds like a LOT of work in the heat of the summer Texas sun. I think most TBNer's would, like me, (if I had a choice) would probably prefer helping online in their cool home at the beginning or end of their day. )</font>

Your probably right Don. But as far as I'm concerned, a bad day building something in the Texas heat is better that anyday behind a computer.

James
 
   / Only in Texas, Don and Harv doing #54  
<font color="blue"> "I would wait until you start putting on your purlins. " </font>

Eddie, thanks for your suggestions, you really get me thinking. I can't think of a reason why the poles need to be cut before the top wall purlin is set and level. Harvey what do you think?

James, thanks for the tip on the rpm corded drill gun. You are right about the Texas heat and building.

The screws are in the mail.

The gravel for the slab and carport were delivered.

We had a bit of a mystery on the farm today. We had one too many calves. It took a bit but we finally figured it out. See attachment. Apparently the calf that was born last week had a hidden twin brother. /forums/images/graemlins/wink.gif

Well one thing lead to another and before you know it the day is gone. Do other retirees find that there is a day that you are determined to get things done and then suddenly it's night? /forums/images/graemlins/confused.gif

Stay tuned for that "after" picture. /forums/images/graemlins/smile.gif
 

Attachments

  • 878413-twins.jpg
    878413-twins.jpg
    59.1 KB · Views: 491
   / Only in Texas, Don and Harv doing
  • Thread Starter
#55  
James you hit that puppy right on the nose. /forums/images/graemlins/blush.gif The screws I'm using and Don has ordered don't like high speed at all. I've stopped using the corded screw gun because one high speed spin and the edge is gone off the bit.

I've found the eighteen volt Hitachi drill perfect for these screws. It turns slow on it's high speed and goes through like grass through a goose.

Needless to say I'm disappointed in the screws but since I have a couple of thousand of them I've adjusted my technique for installation.

My Milwaukee is the slow speed drill. When I got it out I noticed the cord was frayed so I'll try to repair the cord this morning and see if it makes a difference.

I'm framing up the barn-horse stall on the fence job.

BTW Don I've came up with an installation tool that's working pretty good for aligning the brackets. I'll fine tune it and then try to get you a copy before you get started framing up your barn.

On cutting the purlins, Eddie works from the framer's perspective, cutting's easy and walking a level around the perimeter cutting as you go is the way they've (carpenters) have done it forever.

With the pipe I've found using a laser to mark a reference line on every post makes it so much simpler, no need to carry a level.

Since Don's pipe has been painted I suggest picking up a silver Sharpie. Yup, Sharpies now not only come in red and black at HD-Lowes, but some of the stores are now stocking silver too.

I'd mark every post with the level line from the laser. I'd mark the line three hundred and sixty degrees or all the way around the pipe, which ever works easiest. This is the baseline.

This means you can build your form for your concrete and use the baseline to keep it level. When you start attaching the brackets you can do the same thing. Measure up and or down from the baseline to locate the brackets and they will be level with the concrete.

Once you have the baseline in place then you can cut for height at any time.
 
   / Only in Texas, Don and Harv doing
  • Thread Starter
#56  
</font><font color="blue" class="small">( Don, don't make the same mistake I did when buying a corded screw gun. Look for one that is 2500 rpm or less.

I came home with a 4000 rpm one. A screw gun is a screw gun, right. Wrong! /forums/images/graemlins/frown.gif It's for drywall and doesn't work well on tek screws. It will also burn up tek screws and itself faster. I now have a Dewalt 2500 rpm deck and drywall screw gun. It does a fine job.

James )</font>

James you'll be happy to know that I fixed the cord on the Milwaukee and that cured the screws being defective. My life became a lot better and a little easier. /forums/images/graemlins/grin.gif
 
   / Only in Texas, Don and Harv doing
  • Thread Starter
#57  
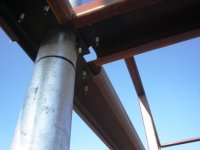
Eddie I do the pipe and purlin construction a little different than I would with lumber or conventional metal building methods.


After the posts are set I go in and shoot a baseline. The only thing about this baseline I care about is it's on a level line across all the posts.

I can then decide where I want grade to be, where my height will end up and have a place to measure from for all my horizontal rails. Here's a shot of the baseline on a post.
 

Attachments

  • 878973-DSC02680.JPG
    878973-DSC02680.JPG
    91.6 KB · Views: 455
   / Only in Texas, Don and Harv doing
  • Thread Starter
#58  
Yesterday at lunch I started installing brackets and laying out rails. I had some help cutting the rails but basically this has been a one man job.

I've been going slow and trying to figure out how best to explain the system.

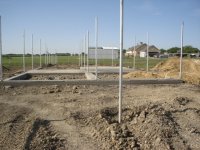
Here's a shot of what we had after the posts were set and concrete was poured.
 

Attachments

  • 878980-DSC02650.JPG
    878980-DSC02650.JPG
    66.2 KB · Views: 437
   / Only in Texas, Don and Harv doing
  • Thread Starter
#59  
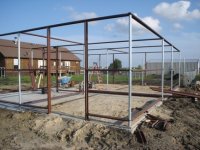
This is going to be a twenty four by thirty two horse barn with twelve foot overhangs.

This is view from the north west corner showing one of the three stalls. The concreted floor to the left is the twelve by twelve tack room.

The stalls have a cushion sand floor and the doors to the outside paddocks will be sliders.
 

Attachments

  • 878987-DSC02671.JPG
    878987-DSC02671.JPG
    83.5 KB · Views: 400
   / Only in Texas, Don and Harv doing
  • Thread Starter
#60  
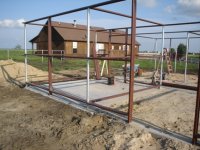
The layout and construction of the tack room is going to be close to the way Don is going to build his storage area.

The biggest difference is I have suggested Don use more posts. His are set on seven foot centers and the barn here I used twelve foot centers.

All of the walls on this barn will have a three quarter inch plywood interior wall. So I didn't feel we needed having the extra posts.

Another consideration was the fronts of the stalls will be shop made as will the divider between the south end stalls. That way the south pair of stalls can be opened up to one stall for events like foaling.
 

Attachments

  • 878992-DSC02672.JPG
    878992-DSC02672.JPG
    85.8 KB · Views: 380

Tractor & Equipment Auctions

2016 Ford F150 Ext. Cab Pickup Truck (A50323)
2016 Ford F150...
2014 Dynapac CC4200 Tandem Vibratory Roller (A51039)
2014 Dynapac...
66in Light Material Bucket Skid Steer Connection (A51039)
66in Light...
2010 Case 660 Trencher (A50322)
2010 Case 660...
2017 FREIGHTLINER CASCADIA TANDEM AXLE SLEEPER (A51222)
2017 FREIGHTLINER...
80in HD Tooth Bucket with Side Cutters ONE PER LOT (A51039)
80in HD Tooth...
 
Top