txdon
Super Star Member
MF1455v said:Don, those look great. I think you should call them "Jimfingers". James
That's what I was thinking!
")
MF1455v said:Don, those look great. I think you should call them "Jimfingers". James
MF1455v said:Don, those look great. I think you should call them "Jimfingers".
Don't tell my wife about this, okay? txdon said:Harvey, I have a few questions.
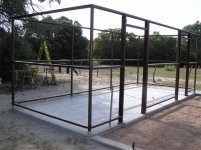
1. Do you see any problems with using two "L" connectors on the corner of the storage area? One to be used as a backing inside the skin and the other to be used to hold the purlin. (This will only be on one side, the other side will have a doorway) see attachment.
2. Should I end the last pole of the carport with a "Pass-through" connector or the end connector? The reason I am asking is because I don't know how the end trim will be connected and I thought I might need to attach a "L" bracket to the "pass through connector" to attach the end trim. see attachment.
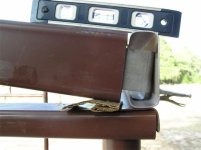
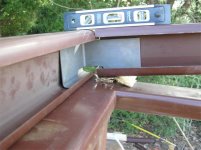
3. For the roof edge purlin should I attach it at the edge of the top plate? How did you attach the "L" bracket at an angle? Did you attach the purlin at an angle or did you leave a space at the bottom of the "L" bracket? see last two attachments.
Thanks!!!!!
wroughtn_harv said:...we were occupied yesterday...