Pole Barn Project

/ Pole Barn Project
  • Thread Starter
#21  
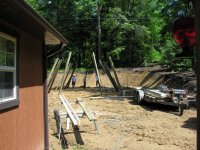
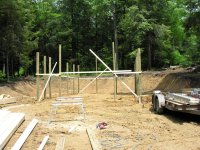
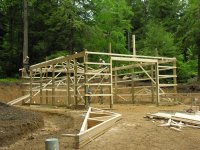
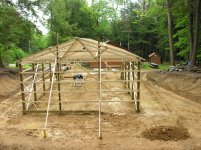
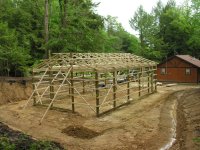
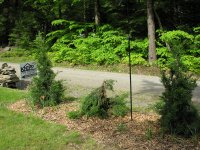
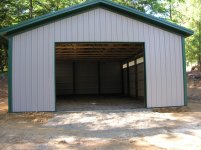
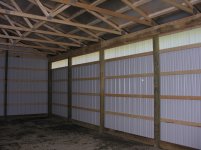
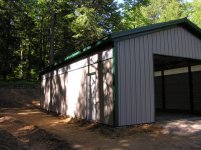
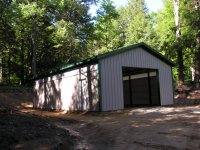
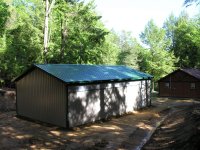
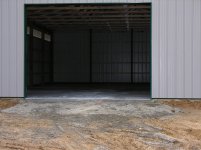
Well the long awaited barn got off to a great start today. What you see was done in about 7 hours. There have been some chnages since this thread was started. It is now 24' X 40' but no-lean to. Adding the lean-to counted toward square footage of the building and by going over 1000 sq. ft. the building permit would have gone from $10.00 to "several hundred" and I would had to file a storm water plan. We will build this now and plan another open shed later instead of the lean-to. Also the overhead door will be 12' X 9'. And Mr. Bear came back and finished off our conical juniper.
 

Attachments

  • DSCN3968.jpg
    DSCN3968.jpg
    1,012.4 KB · Views: 330
  • DSCN3971.jpg
    DSCN3971.jpg
    1 MB · Views: 297
  • DSCN3975.jpg
    DSCN3975.jpg
    1 MB · Views: 289
  • DSCN3977.jpg
    DSCN3977.jpg
    1 MB · Views: 335
  • DSCN3983.jpg
    DSCN3983.jpg
    1 MB · Views: 360
  • DSCN3985.jpg
    DSCN3985.jpg
    1 MB · Views: 484
  • DSCN3989.jpg
    DSCN3989.jpg
    1.1 MB · Views: 337
/ Pole Barn Project #22  
Looking great. That's a nice amount of production for a single days work. Keep the pics coming. I should be building about the same size pole barn this summer.
 
/ Pole Barn Project #23  
Thank you for sharing your photos. Just being curious, can you look at the grade stamps on one of the wall framing members (girts) and let me know if they are graded #2 or Std? Even better, if you can shoot a digital photo.
 
/ Pole Barn Project #24  
Materials delivered last weds, the crew from National Barn will start putting it up mon. looks like they got a good week of weather to build. Picture 010.jpgPicture 011.jpgPicture 013.jpg
 
/ Pole Barn Project
  • Thread Starter
#26  
I was out to the site Saturday 6/1/13 and did the rough in for the electrical service. Today, 6/3/13 the contractor finished up the main building, roughed in the floor drain and got the site ready for the floor pour. A sub will pour the concrete floor and another will install the overhead door. Then I will take over to do electrical, finish drain and start setting up the interior. Very happy with our color choices.
 

Attachments

  • DSCN3991.jpg
    DSCN3991.jpg
    1 MB · Views: 285
  • DSCN3997.jpg
    DSCN3997.jpg
    998.8 KB · Views: 260
  • DSCN3998.jpg
    DSCN3998.jpg
    928.5 KB · Views: 207
  • DSCN3999.jpg
    DSCN3999.jpg
    781.2 KB · Views: 217
  • DSCN4000.jpg
    DSCN4000.jpg
    497.2 KB · Views: 254
  • DSCN4001.jpg
    DSCN4001.jpg
    673 KB · Views: 295
  • DSCN4002.jpg
    DSCN4002.jpg
    966.4 KB · Views: 187
  • DSCN4003.jpg
    DSCN4003.jpg
    998.2 KB · Views: 191
  • DSCN4004.jpg
    DSCN4004.jpg
    1,018.7 KB · Views: 269
/ Pole Barn Project #29  
Posts, girts and trusses are up on the third day, but now rain is slowing things up a bit.Picture 024.jpgPicture 026.jpgPicture 027.jpg
 
/ Pole Barn Project #30  
I am part of the "you can never build too large a garage/barn" crowd, but I also realize part of that is because given enough time, you will acquire enough stuff to fill all available space.

The rule is, "Your worldly possessions will expand to fill up all of the available space, plus 10%"
 
/ Pole Barn Project #31  
A regular 8' ohd will not give 8' of clearance to the floor when open. They usually hang down in the opening by 3-4 inches. That can be remedied I suppose, but it would take careful installation measures and spring tension to get the full 8' of clearance.

Only if improperly installed would an overhead door hang down into the door opening. For a residential overhead door, the clear height will be 1" less than the door call out height, for a commercial door, it will be full height.
 
/ Pole Barn Project #32  
Two observations....

If the roof insulation is typical reflective insulation with white vinyl one side, aluminum reflective face on the other side, it should be installed with the reflective side up.

Maybe it is just the angle of the photos, but it appears the bottom chord bracing is missing from the trusses.
 
/ Pole Barn Project
  • Thread Starter
#33  
Two observations....

If the roof insulation is typical reflective insulation with white vinyl one side, aluminum reflective face on the other side, it should be installed with the reflective side up.

Maybe it is just the angle of the photos, but it appears the bottom chord bracing is missing from the trusses.

The bottom chord truss braces are there! The roof insulation is the more expensive version that has foil on both sides!! Double-Bubble-Insulation
 
/ Pole Barn Project #35  
From what I can tell from the photos, looks like the crew did a great job on taping all of the seams on the insulation as well. Takes some skill to get them all tight and have the insulation lay nice and smooth.

Am sure you will get lots of enjoyment from your new building.
 
/ Pole Barn Project #37  
Very nice. I really like the panels on top of the wall to let light in.

Eddie
 
/ Pole Barn Project
  • Thread Starter
#40  
The floor has been poured. Now I just need the overhead door installed and then the rest is up to me. Up first is electrical, apron and finish grading.
 

Attachments

  • DSCN4005.jpg
    DSCN4005.jpg
    761.1 KB · Views: 261

Marketplace Items

2007 International 7400 T/A Altec D4050A T 50ft Insulated Digger Derrick Truck (A60352)
2007 International...
2022 SANY SY35U EXCAVATOR (A59823)
2022 SANY SY35U...
2021 MULTIQUIP 25 WHISPERWATT DIESEL GENERATOR (A59823)
2021 MULTIQUIP 25...
2019 ALLMAND LIGHT PLANT (A60736)
2019 ALLMAND LIGHT...
60'' SKID STEER BUCKET (A56857)
60'' SKID STEER...
2014 FREIGHTLINER CASCADIA (A60736)
2014 FREIGHTLINER...
 
Top