Step by step photos of new garage

   / Step by step photos of new garage #281  
"Doug, I check with insurance company and any kind of wood or pellit heat is out. I would love to heat by wood, I do my house go figure. I am thinking of doing the siding myself just got to find a book on how."

I would think the insurance companies are concerned with open flames near materials ... such as gasoline in your car ... saw dust in wood shops and so on ... makes sense to me ...
Leo
 
   / Step by step photos of new garage
  • Thread Starter
#282  
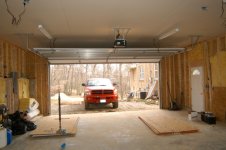
Well my new garage door is in (18x8). The lower garage door is in (9x7).

For the 1st time in 2 months I was able to start moving more dirt to the side of the garge after the frost left the dirt pile.

I got the south wall boxed in on the inside and now I have to start thinking of where to run the wire for a welder.

My question is where is the best spot to run the out to. I was thinking of droping a line out of the box and running to the front of the garage about 4 ft. The box is 10 ft from the 8x16 door.

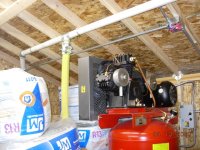
Then there is the line for the air compressor. Where is the best location for the stand up compressor on wheels. With the air compressor I figure I can run lines just about any where I want air.

Any ideas.

Thanks

Roger
 
   / Step by step photos of new garage #283  
Roger

NEC says you can put 2 outlets on one circuit for one machine. It says this so you can move a machine around to different places. I would go for one in the back and one in the front. You should check local codes to make sure that they allow this as well.

As far as air lines make sure that they are high enough that they do not get bumped and broken (if you use PVC I would use no less than sch 80 1") I used sch 120 drop pipe and threaded all connections. I also used 2". I wanted high flow because I have a 5hp 28cfm compressor and tend to use hi volume tools for painting and sand blasting.
 

Attachments

  • Compressor.JPG
    Compressor.JPG
    116.7 KB · Views: 321
   / Step by step photos of new garage #284  
ehchvac said:
if it was mine to build,...
big doors tall and wide.
max ceiling height.
pitch the floor out not to a drain.
either trusses or a steel beam so there would be no lally columns.
if trusses still some kind of heavy beam for lifting.
put radiant in the floor even if you cant afford to hook it up now.
large cement apron in front with more radiant, no shoveling in front of doors.
max electric service for welders, big compressor, a/c, etc.
piping for remote compressor air usage.
max outlets 110v and 220v.
lots and lots of lights, nothing is worse than too little light.
plumbing roughs for future hot and cold water, bathrooms, dog wash station, etc.
separate walk in door less heat loss than thru the overheads.
fire code sheet rock even if its not required, welding sparks etc.
if its going to have live water in it overhead sprinklers are real cheap.
secure locks, dead bolts.
no windows, not even on the doors.
thats just off the top of my head, seen to many regrets from homeowners after the fact.
woulda, coulda, shoulda, gets real expensive after the fact.
this list brought to by caffine,... and 30 plus years in new construction.


+1 good points
insulate under radiant if you put it in, ceiling height is important, storage and for that car lift! i'm at over 12' and wish it was higher. mechanical contractor for over 30 years
 
   / Step by step photos of new garage
  • Thread Starter
#285  
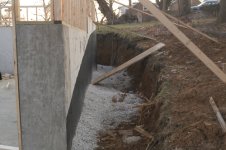
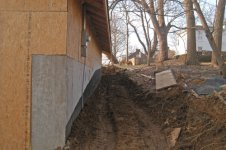
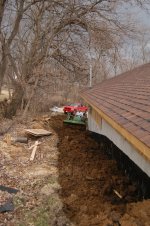
Well with the nice weather (80 dr) I was able to back fill the west side of the garage. With the post is a before back fill and a after back fill showing about 80% done. Still need to bring it up about 2 ft.

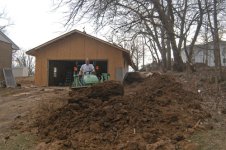
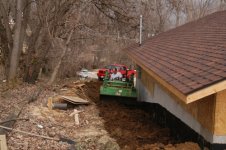
This had to be the most scary thing I have done with my tractor: 24 horse jd with bucket.

The ground was uneven and I had to make a larger opening on the right so I could drive in over the fill as I went up hill. The trouble was the opening was just wide enough to get the bucket and back rear blade in. ( I use the blade for counter weight)

The soil on the left was very soft and the tractor wanted to settle in on the left. The soil on the right was harder because it was not cut into as much. So every 4 loads or so I would place a half bucket more on the left to bring it up more so I would stay level. A few time the wheel went down and the bucket would pin its self againist the wall. Oouch.

I had at time just 1 inch to play with.

3 hours later I was done and I turned off the lights and sat down glad it was over.

Roger
 

Attachments

  • 1.jpg
    1.jpg
    176.5 KB · Views: 368
  • 2.jpg
    2.jpg
    113.6 KB · Views: 337
   / Step by step photos of new garage
  • Thread Starter
#286  
this evening I finihsed the back filling of the west side and south side of the garage, or until it settles and I need to top it off some.

About a hour later the neighbor came over with his bobcat and doug out the area for the pad and the drive. He did it in a hour, it would of taken me two days with my tactor. He might have another hour or two of digging.

I am hoping that I can get the gravel in on Fri.

One step at a time. I guess.

Roger
 

Attachments

  • 1.jpg
    1.jpg
    128.8 KB · Views: 327
  • 3.jpg
    3.jpg
    119.1 KB · Views: 295
  • 4.jpg
    4.jpg
    670.7 KB · Views: 302
  • 5.jpg
    5.jpg
    108.5 KB · Views: 309
   / Step by step photos of new garage
  • Thread Starter
#287  
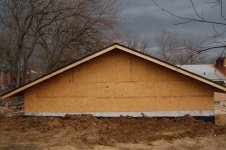
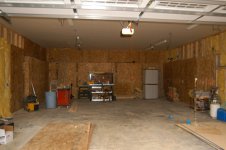
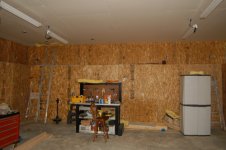
step by step I am getting closer to having the garage finished. I am about half way in getting the osb up and I have some out side wiring to finish before I can place the rest of the osb up on the inside to close in the walls.

Then I have to figure out the siding and the brick work on the front.

I have laid the 1st of the gravel down only to find the guy that cut the dive did not cut it wide enough. So over the next few night I will widen it myself. Tring not to dig up to much of what is down already.

I can now see all my work will soon pay off.

The weather is much better and I can work late now.

Roger
 

Attachments

  • 1g.jpg
    1g.jpg
    89.7 KB · Views: 295
  • 2g.jpg
    2g.jpg
    88.6 KB · Views: 262
  • 3g.jpg
    3g.jpg
    89.1 KB · Views: 246
  • 4g.jpg
    4g.jpg
    127.3 KB · Views: 279
   / Step by step photos of new garage #288  
roermo said:
step by step I am getting closer to having the garage finished. I am about half way in getting the osb up and I have some out side wiring to finish before I can place the rest of the osb up on the inside to close in the walls.

Then I have to figure out the siding and the brick work on the front.

I have laid the 1st of the gravel down only to find the guy that cut the dive did not cut it wide enough. So over the next few night I will widen it myself. Tring not to dig up to much of what is down already.

I can now see all my work will soon pay off.

The weather is much better and I can work late now.

Roger

I am jealous that you are about done. I had to stop all work on the garage and go to work on rental houses. I probably wont be able to get back on it seriously until around may.
 
   / Step by step photos of new garage
  • Thread Starter
#289  
gemini: When you are finished working on your rentals you can come on over to Hannibal and work on mine. I have one rental and sell realestate for a living. I know how it much time rental can take up. I hope you get back to working on your project soon.

Roger
 
   / Step by step photos of new garage #290  
Roger,

Thank you for the offer. I have 6 rentals and I also have my real estate agent license. If I ever get in the mood to study I have the paperwork to take the test for my brokers license.

I have been doing some upgrading on my rental houses. I had several empty about the same time and so am taking advantage of them being empty to make some changes. I am getting rid of every piece of carpet in all the houses. I am going to tile in the kitchen, baths, hallways, Then laminate in all the other rooms. With all the new awareness of allegens a lot of renters seem to like the idea of having no carpet and they can get throw rugs if they want them.

In addition to selling real estate and managing the rental houses I also work at a 40 hour a week job doing maintenance for a company. I told my wife that I am going to start taking one day a week and one weekend a month and devoting that strictly to working on the garage until it is done. Yours looks good though. I do not remember if you have your doors on yet. If not what type of door are you getting and what type of door opener.

In addition to the above I am also a local and state union officer. I also advocate for the union in arbitrations. I was in St. Louis for most of the week last week. How far is that from you ?
 

Tractor & Equipment Auctions

2015 JOHN DEERE 1050K WH CRAWLER DOZER (A52705)
2015 JOHN DEERE...
2014 Chevrolet Tahoe SUV (A52377)
2014 Chevrolet...
Behlen 150 Gallon Premium Stock Tank (A55218)
Behlen 150 Gallon...
2013 Ford F-250 Ext. Cab Pickup Truck (A51692)
2013 Ford F-250...
2009 KENWORTH T6 SERIES SLEEPER (A53426)
2009 KENWORTH T6...
Quick Attach EZ Axe Skid Steer Tree Shear (A53473)
Quick Attach EZ...
 
Top