OP
EddieWalker
Epic Contributor
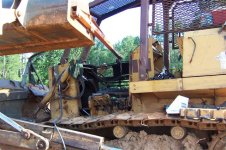
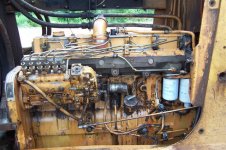
One of the things that had me the most hesitant about this project was how to get the head off and then back on again. Lots of wild ideas that were way to complicated and involved until I realized that my cherry picker would do the job.
I showed it when I took the head off, but it's such a great solution that I wanted to share it with you again. /forums/images/graemlins/laugh.gif
I was actually able to position it and lower it onto one pin on the back of the block. Then I had to back up half a foot and was able to lower it onto the pin on the front of the dock.
Eddie
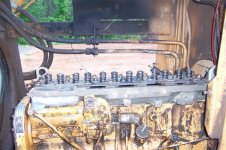