scott_vt
Super Member
- Joined
- Oct 5, 2004
- Messages
- 7,444
- Location
- east wells,vt
- Tractor
- 1986 MF 1040, 1942 Farmall A, 1949 Farmall Super A
Afternoon Mike,
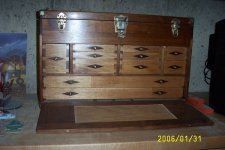
Very nice ! I just want to jump on the template bandwagon") I use templates with my router and my laminate trimmer quite frequently. A few years ago I put rosewood diamond inlays in the drawfronts on a toolmakers chest. I made a overlay template for the draw fronts and used a follower guide on the bottom of my hand held laminate trimmer to cut out the pockets. All I had to do after that was trim the 1/16" radius from the corners and glue in the rosewood inlays.
I use templates with my router and my laminate trimmer quite frequently. A few years ago I put rosewood diamond inlays in the drawfronts on a toolmakers chest. I made a overlay template for the draw fronts and used a follower guide on the bottom of my hand held laminate trimmer to cut out the pockets. All I had to do after that was trim the 1/16" radius from the corners and glue in the rosewood inlays.
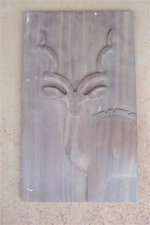
You might try your hand at chip carving also, thats alot of fun also.
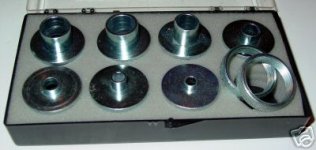
PS You can use your lathe to make follower bushings !
Very nice ! I just want to jump on the template bandwagon
I use templates with my router and my laminate trimmer quite frequently. A few years ago I put rosewood diamond inlays in the drawfronts on a toolmakers chest. I made a overlay template for the draw fronts and used a follower guide on the bottom of my hand held laminate trimmer to cut out the pockets. All I had to do after that was trim the 1/16" radius from the corners and glue in the rosewood inlays.You might try your hand at chip carving also, thats alot of fun also.
PS You can use your lathe to make follower bushings !