Workable Headlights

   / Workable Headlights #31  
There is absolutely no reason to weaken (albeit perhaps ever so slightly) your roll bar just to get lights on it. You can install them just as neatly and securely without drilling anything. Since this is the case, why even take a chance?
 
   / Workable Headlights #32  
I was planning to re route the wires through the ROPS in the spring and I will cover the connectors etc. But I'm intrigued about the 10amps through the ignition. What will I ruin by doing that?

The switch may be rated to take that much amperage, or more, but it would be better to wire the lamps on their own dedicated circuit. There may be wires going back there, but I would check out the wiring diagram to see exactly how Mr Kioti ran them. You do have the option to leave it as is of course, and it will likely be OK.
There isn't any tractor wiring "code" I'm aware of, so I tend to fall back on my marine wiring ethic for outdoor power equipment since it tends to get more abuse than regular automotive. With this in mind, I like to keep high amp draws separate from existing circuits. I would see if there is an open fuse hole on the panel. Fit it with a 15 amp fuse. Run wire to the line terminal of your solenoid, and the load side to your lights. The switched power hot comes from a toggle switch you put somewhere convenient, and is a very low draw so it can be a hot tap from the light switch or your IGN ON. On my boat I would just run the whole thing thru a 15 amp circuit breaker.
I use marine grade tinned wire, adhesive lined heat shrink crimp ring terminals, and tinned bus bars from genuinedealz.com. They'll have the split loom too, or you can use the 14/2 duplex marine grade wire they sell. Good stuff. They also have battery cabling, terminal boots and supplies to upgrade the (junk) that came from the factory.

Can you help me understand how exactly the damage is done. I made an error I guess of assuming since the pigtail was located such to run a rear facing light, it would be OK to use it.

Don't know whether Mr Kioti thought to use one small 10 watt lamp or two 55 watt or what, so don't know what the circuit can take. Damage will be to the wire as in meltdown or fire ( Ohm's Law...resistance equals heat). The device (lamps) may not fail before the wire does, so that's why we need circuit protection. Assume nothing.

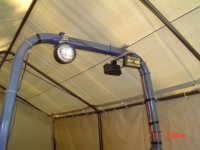
If you drill your holes in the center of the bar it will not diminish the strength in the least. Protect the holes with the properly sized rubber grommet to avoid chafe.
 
   / Workable Headlights #33  
The 15A customer-use circuit is controlled by the ignition switch. Not sure if the ignition switch is controlling a relay or if it is directly switching the circuit. Anyway 15A at 12V isn't all that much juice anyway. Many switches (possibly even the ignition switch) can handle that directly with ease.

I directly switch the 15A through a marine grade toggle switch rated for 20A. There is no need to complicate things by using a relay, and a fuse is much cheaper and easier to install than a circuit breaker. Relay is a bit "safer", but a fuse is all you need for protection. Just make sure all components in the circuit (including the wire) can handle the current.
 
   / Workable Headlights #34  
I'm going to add lights similar to what you guys are doing.
Here are my thoughts: Any lights draw a significant # of amps that may strain the alternator for power needed to run the crucial circuits like the ignition, dash instruments, etc. Rather than compromise what amps go where, most autos and other vehicle manufacturers used auxiliary light circuits that have fused and relay protected wiring from fuse through to ground. This protects from overloads damaging the circuits in the alternator as well as providing a safety in the specific circuit so if something goes wrong the wires are less likely to burn.

My plan is to create a angled bracket that runs under the rops and is attached to it by large u-bolts. I plan to use a PVC material called Kleer which will allow me to put one side of the angle piece facing the FEL and the other leg of the angle facing the ground. Attached to the underside of the Kleer angle piece; actually a left over piece of premanufactured 'corner board', the lights will be attached. The U-bolts will likely face the rear of the tractor with the U portion going across the bottom and top of the ROPS.
From the left light to the right light the wiring will run in a small plastic loom and then will run down the inside edge of the ROPS to connect to the switch, relay and fuse. All wiring connections will be spliced with marine grade connectors and heat shrink wrapped with dielectric grease on the inside of the shrink tubing.
BTW, dielectric grease is similar to what auto stores sell for ignition grease. In worse case scenario one could use Vaseline. The idea is to reduce/prevent corrosion, which coating the connectors with grease will accomplish better than no coating.
If there is room I will put the switch in the blank spot above the PTO switch on the right side of the steering column.
If one is searching for electrical connectors marine grade ones can be found at places like West Marine's web site, for one example. Anchor is a manufacturer of connectors and sells kits with the connectors, a crimping tool, etc. High quality connectors are more expensive but are worth it; doing it once the right way.
 
   / Workable Headlights #35  
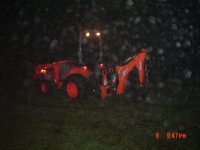
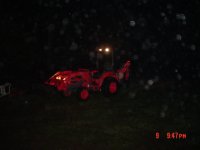
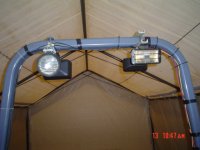
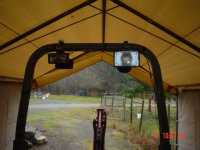
My CK 35 HST was sure great last year when we had about 5 feet of snow. The most since 1996. It did a good job clearing around the house and barn as well as ¾ mile of private road. When I lifted the bucket full of snow at night the headlights were pretty useless. I had Superior Tractor put on a rear working light on the ROPS before he shipped it to me in June of 2008. I have put three more lights on the ROPS, one facing back and two forward. Two are fog lights (one facing front the other back) I picked up at a garage sale years ago and the other a new halogen facing front. I did a large burn pile on Saturday and used my Woods backhoe to repile the brush as it burnt down. Nice to have the lights, first time I had used them at night. I have them on two separate toggle switches and will not work if the key is not on.
 

Attachments

  • CK35Worklight.jpg
    CK35Worklight.jpg
    147.5 KB · Views: 254
  • 670DecemberPics 050.jpg
    670DecemberPics 050.jpg
    152.2 KB · Views: 207
  • 670DecemberPics 051.jpg
    670DecemberPics 051.jpg
    143.7 KB · Views: 144
  • 670DecemberPics 052.jpg
    670DecemberPics 052.jpg
    134.2 KB · Views: 135
   / Workable Headlights
  • Thread Starter
#36  
Mousefield, please describe how you hooked them all up. I am assuming the dealer hooked the work light into the rear pigtail. Did you jump off that for some of the lights, or use another source?
 
   / Workable Headlights #37  
I took a couple more pics this morning regarding the extra lights on the ROPS.
Superior Tractor had put the rear round work light on for me before it was delivered.
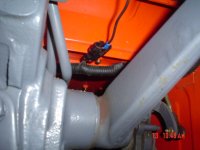
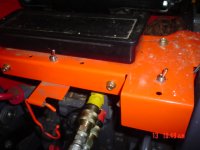
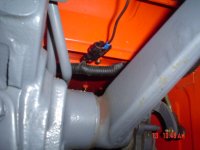
I put the two fog lights on and put then on the same wire as the round work light. Blew a fuse. Then did some digging and found what I believe is the customer use 15 amp circuit. Added the rectangular halogen light to the front. The two fog lights and rectangular halogen are on the same circuit. So one toggle works the round light and the other toggle works the other three. The toggle switches are located behind the tool box. If grading our road I put the lights on just in case of traffic as it is a one lane road. By having them on a toggle switch I don't have to have them on when doing things on my property in daylight.
 

Attachments

  • 670DecemberPics 062.jpg
    670DecemberPics 062.jpg
    152.3 KB · Views: 166
  • 670DecemberPics 063.jpg
    670DecemberPics 063.jpg
    152.5 KB · Views: 137
  • 670DecemberPics 064.jpg
    670DecemberPics 064.jpg
    136.3 KB · Views: 176
  • 670DecemberPics 065.jpg
    670DecemberPics 065.jpg
    145.2 KB · Views: 196
Last edited:
   / Workable Headlights
  • Thread Starter
#38  
Thanks for the pictures and the info. The fuse blowing episode is exactly what I and others needed to know. I am still in the planning stages, and know a better approach now, knowing that the rear light pigtail will not handle but one light.
 
   / Workable Headlights #39  
To clarify my earlier post of today. This picture shows the "customer use" wire that I have the 3 lights on. It is rated for 15 amps. Located at the right rear as you are looking forward. The gray arm on the right of the wire is the 3 point hitch arm, this should help you with the location of the conection.
 

Attachments

  • 670DecemberPics 064.jpg
    670DecemberPics 064.jpg
    136.3 KB · Views: 184
   / Workable Headlights #40  
Hey Mousefield,
great pics!
Can I suggest you add your make and model to your avatar area,( sorry, I can't remember what its actually called). This will help people know which model you're using and if there's is different or the same...

Thx,

CM
 

Tractor & Equipment Auctions

Wolverine Quick Attach Screening Bucket (A50514)
Wolverine Quick...
(2) METAL SPOOLS W/ SOME DURALINE 4" PVC PIPE (A51244)
(2) METAL SPOOLS...
UNUSED FUTURE SKID STEER QUICK ATTACH SWEEPER (A51244)
UNUSED FUTURE SKID...
EZ-GO MPT 1000 Electric Utility Cart (A51694)
EZ-GO MPT 1000...
2014 MACK GU713 WATER TRUCK (A51243)
2014 MACK GU713...
NAMCO GRAIN-O-VATOR GRAIN WAGON (A51243)
NAMCO...
 
Top