Building a Shop

/ Building a Shop
  • Thread Starter
#81  
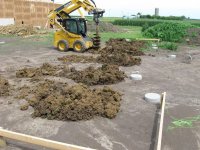
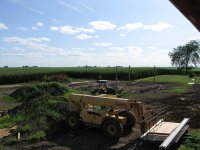
Oh, by the way. The Deere 317 was exactly like dad's so no problem working out the controls. The safety stuff is the same pain in the rear too. Start up process is:

1) Crawl into machine
2) Start engine
3) buckle seat belt (I leave it snapped across the seat and don't actually put it on, just unsnap and resnap)
4) Disengage park brake and hydraulic locks (one button on the overhead dash)
5) Operate.

Then when you need to get off the machine to do something (open a gate, move something out of the way, etc):

1) come to a stop.
2) hit park brake button
3) Exit machine and do whatever you need to
4) Crawl back into machine
5) Unsnap and resnap seat belt
6) Disengage park brake and hydo locks
7) Continue working.

It's made worse by the all-weather windshield they put on this one. It opens and closes like the old one-piece wood garage doors, so when it's open, it's above your head. That's fine, except it blocks access to the overhead dashboard (including the park brake switch and ignition key) when open. So, in between a lot of the above steps, this particular 317 requires you to pull the windshield partially closed so you can get at the park brake switch, then open it back up...
 
/ Building a Shop #82  
Looking good so far. Good to see some more pics and I'm sure your glad to have some progress. By the way, us folks down south would sure take some of that rain off your hands so you can do your thing!:D

Jay
 
/ Building a Shop
  • Thread Starter
#83  
Slow going...

I've run into water table issues on this project. I drilled the holes Thursday and hit saturated yellow clay about a foot down that would stick to and plug up the auger on the PHD. The holes will partially fill with water overnight or sometimes faster. I'd have to drill a hole, dig the clay out of the auger, then drill another one. As a result, none of the holes turned out especially clean. They almost all have some junk in the bottom of the hole that either didn't clean out or fell back in. Between that and the water, setting posts is a slow process.

The advice from the Cleary rep based on what they've done on similar jobs in this area was to clean out the muck at the bottom of the hole, pump out the water, drop in the cookie/footing, set the pole and brace it in place, then dump 3 or so bags of quickcrete and tamp that in at the bottom, then fill the rest of the way with dirt or gravel. The idea being that any water absorbed by the quickcrete woudl make it set up and hold the footing and bottom of the post in place better.

I'm using the fast setting quickcrete because it is set up to actually allow dumping into a post hole and then adding water without mixing. So far it's been working to hold the bottoms of the poles in place. Over the weekend, my wife and I got 3 of the corner posts set, braced, and cemented. I went out tonight and tamped in gravel around those 3 most of the way up to hold them even better in case the weather kicks up tomorrow.
 
/ Building a Shop
  • Thread Starter
#84  
A few pics. One of the clumpy clay coming out of the holes, one of some of the poles set out near their eventual home, and a shot from the partially completed house looking at the 3 poles...
 

Attachments

  • IMG_0485.jpg
    IMG_0485.jpg
    188.1 KB · Views: 425
  • IMG_0486.jpg
    IMG_0486.jpg
    165.5 KB · Views: 357
  • IMG_0492.jpg
    IMG_0492.jpg
    117.7 KB · Views: 343
/ Building a Shop
  • Thread Starter
#86  
Yeah, the house will have a sump pump in the basement. The way it worked out, the house is built with the basement floor at or slightly above the level where the shop pad has been cleared out. We built the house up a lot mostly to avoid snow drifting due to the lot facing North and naturally being somewhat lower than the East-West road we're on. The one deepest frost footing trench for the house usually had some water in it, but it was hard to tell if it was rain or ground water since it rained a few times per week while that was open, plus the rest of the basement tended to catch rain and drain into that trench. The rock under the basement floor never seemed to get or stay wet, so that's a good sign on the house front.
 
/ Building a Shop #87  
A few pics. One of the clumpy clay coming out of the holes, one of some of the poles set out near their eventual home, and a shot from the partially completed house looking at the 3 poles...

Thanks for all the updates.. Its always fun to watch someone else doing this.
I have another question. What are the cross pieces on the end of the poles for in the second photo?

Wedge
 
/ Building a Shop
  • Thread Starter
#88  
The chunks nailed on the ends of the poles are anchor blocks. My kit came with just a single untreated chunk per pole, but a coworker recently put up a Cleary building (had it put up) and had a bunch of treated blocks left over since they used different anchor methods. So, On all but a couple of my posts, I was able to install double treated anchor blocks. The idea is to help with uplift in the wind since metal buildings make nice sails. That same coworker's neighbor had an older pole building lift up around 4' during a nasty wind storm a few years back. Nothing looked wrong but he found red paint marks on one of the poles down by the ground level inside. Then he noticed that the paint had come from the side of a red grain wagon parked in that corner! :eek:

The coworker put up a 50'x90' on top of a hill, so they did some more extreme (rebar and concrete) type of anchors...
 
/ Building a Shop
  • Thread Starter
#89  
Progress.

My brother came out to visit for a long weekend and helped, along with my wife, with the shop. This morning, my brother and I set the last pole. Pictures below, one from a distance Saturday night when we had all but 4 poles in and one from this morning with all the posts.
 

Attachments

  • IMG_0529.jpg
    IMG_0529.jpg
    81.2 KB · Views: 223
  • IMG_0530.jpg
    IMG_0530.jpg
    134.7 KB · Views: 396
/ Building a Shop
  • Thread Starter
#91  
Yes, it's good to be to the point where I can be working above ground again. Running into the water in the holes and all the mud and muck it left behind really slowed us down. I had hoped to have trusses set by the now, but it was about all we could manage to get the poles in this past weekend. Now maybe I can start playing catchup.
 
/ Building a Shop #92  
when you set your post over a period of weeks (which i'll have to do too), even with bracing, how much will they move and how hard will it be to pull them back to square and plumb....
 
/ Building a Shop #93  
when you set your post over a period of weeks (which i'll have to do too), even with bracing, how much will they move and how hard will it be to pull them back to square and plumb....

They shouldn't move much if braced in two directions properly. If they need some adjusting a come-a-long works great.

MarkV
 
/ Building a Shop
  • Thread Starter
#94  
90% of the treated grade board installed.

Got an hour, maybe an hour and a half in tonight after dinner. I'd gone out on Tuesday evening and set up my rotary laser and marked a level line on all the posts. Then I figured out which post was the shortest and determined where my grade line should be. For my building, Cleary considers it a 13' 4" building. That's the dimension from the grade line to the top of the pole. With their Energy Miser trusses, it provides an inside clearance of 12' from the bottom of the truss to the grade line. Of course, they figure on the concrete coming up 3 or 4" above the grade line, so I'll end up with a ceiling of about 11' 8" or 11' 9" once I put concrete in it. Had I paid closer attentiion, I'd have had them tweak it to a 13'8" height to end up with 12' between concrete and truss, but that's ok...

Went out tonight and cut and nailed up the 2x8 treated grade planks. Got all of those up except for the two 6' chunks on the front end on either side of the overhead door openning, just got too dark too quickly. Plus, I ended up with a brace 2x4 on the outside of the one short wall, so that'll have to be moved first anyway. The planks were nailed on with 20D ring shank nails, 3 per post per board.
 
/ Building a Shop
  • Thread Starter
#95  
Picture of the grade plank.
 

Attachments

  • IMG_0535.jpg
    IMG_0535.jpg
    81.9 KB · Views: 343
/ Building a Shop
  • Thread Starter
#98  
I have a nail gun borrowed from a friend. Problem is, I can't find the right type of nails for both the gun and the building. Cleary's specs offer a gun alternative for most of the nail joints, like "Three 20D ring shanks or six 3.5"x0.131" ring shank gun nails" or something. Problem is, for the nail gun I borrowed, nobody I've checked with in town has ring shank nails for it so far. I plan to look at the palm nailer tonight, might be a good solution. I can use the gun to tack the girts and things on in place to hold them, then come back and palm nail the big spikes in to make it solid...

Plus, the building kit came with all the nails, hate to not use them and buy others...
 
/ Building a Shop #99  
For sure look at a palm nailer given that the kit came with nails. They are not that expensive and sure do save in some situations. They are particularly good for joist hanger nails which are always a pain to hand nail.

MarkV
 

Marketplace Items

KUBOTA MX5800 TRACTOR (A62130)
KUBOTA MX5800...
2020 WIRTGEN WR200 XLI SOIL STABILIZER (A62129)
2020 WIRTGEN WR200...
2016 American Eagle S/A Self Loading Reel Trailer (A60352)
2016 American...
2014 Dodge Ram 4500 Versalift Bucket Truck (A60352)
2014 Dodge Ram...
Wilson Portable Conveyor (A60352)
Wilson Portable...
(INOP) 2002 CHEVROLET 3500 BUS (A59823)
(INOP) 2002...
 
Top