Creating a Workshop & Home

   / Creating a Workshop & Home
  • Thread Starter
#281  
Hi Larry,

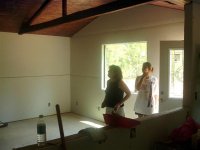
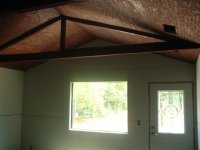
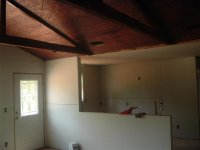
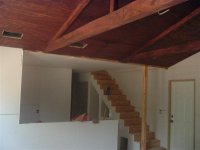
Thanks for the compliments on the beams. They are an expiriment thats turned out better than I'd hoped. I'm also going to do something similar on the stairs, but that's down the road.

The Dozer was plan B if the CUT didn't work out. I was trying not to tear up the roads any more then I had to.

My lease is up the end of this month where I'm living now, so I will be living in the house by then. I have two more weeks of work, then several days to move everything in. One way or another, I'll be living there by Sep 1. Steph and the kids will wait until the interior is all finished with carpet and appliances. I figure by the end of September.

I did think of building a fireplace, but decided against it. Limited space, time and financing for something I rarely ever used in homes with fireplaces. I do have a fire ring from Cabelas that we enjoy using outdoors. More rustic and fun to sit around a fire outdoors anyway. The kids love to have a stick to burn along with adding wood to the fire!!!

Eddie
 
   / Creating a Workshop & Home
  • Thread Starter
#282  
As my deadline approaches, I'm running in a dozen different directions. I have water in the main line coming in and the meter is in place. Next week I shoudl get the OK from the Health Departement when they finish testing the sample.

It's now time to run the 1 1/2 inch water line into the building.

I'm also running a one inch line back across the road in the oposite direction for a future sprinkler system at my entrance.
 

Attachments

  • 717689-Workshop 390 (Small).jpg
    717689-Workshop 390 (Small).jpg
    80.3 KB · Views: 439
   / Creating a Workshop & Home
  • Thread Starter
#283  
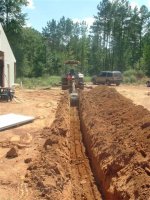
While digging the trench, my front tire blew out. I mean it really blew out. I put a tube in it a year ago, and it just exploded, forcing the tire off the rim. It was so powerful that it ruined the bead of the tire and I had to buy a brand new tire. $81 for a tire, $10 to install it and another $4 for a valve. Oh well.

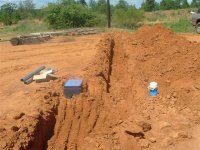
Here's the trench leading to the house. I only need to be a foot down, so it's pretty fast digging.
 

Attachments

  • 717692-Workshop 391 (Small).jpg
    717692-Workshop 391 (Small).jpg
    56 KB · Views: 473
   / Creating a Workshop & Home
  • Thread Starter
#284  
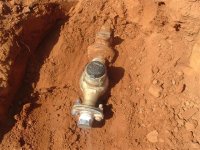
Here's the water meter. I've only seen them in the ground in a box, so it's interesting to see what one actually looks like.

The water district put the PVC fitting on it out of habbit and mentioned it to me after the fact. I need to replace it with a galvanized nipple for the back flow device.
 

Attachments

  • 717696-Workshop 392 (Small).jpg
    717696-Workshop 392 (Small).jpg
    85.1 KB · Views: 452
   / Creating a Workshop & Home
  • Thread Starter
#285  
Here's were it gets interesting. I'm familiar with residential construction and single family homes. No real experience with this bigger stuff and commercial applications, so things keep popping up that I didn't expect.

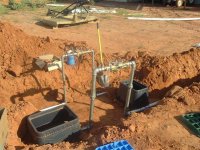
I knew I had to put a backflow device in to illiminate contamination back into the water mains. They do this for every customer. The one they want me to use is called a RPZ and must be installed above ground so it can discharge from teh bottom if there's a problem.

I have no idea how this happens, but understand that they want it installed in a certain way. No problem, tell me what you want and I will do it exactly that way. No thinking on my part. /forums/images/graemlins/grin.gif

The suprise came when I was told I had to have another RPZ for my sprinkler line "AFTER" the first one. Just because it doesn't make sense to me, doesnt' make any difference. If they want it, I'll do it. /forums/images/graemlins/wink.gif

The box on the left is for the meter. Then I went up an 18 inch nipple, a union and then a 12 inche nipple befor bringing it into the first 1 1/2 inch RPZ. I came back out the same way, then transitioned into Sch 40 PVC. I T'd that off down to one inch for the sprinkler line with a brass gate valve. That's int the box on the right.

The 1 1/2 inch PVC line continues to the house while the one inch line goes into another RPZ with the exact size fittings as the first one except one inch. It then crosses the road where it will remain caped until I get back to it.

Hope this makes sense. /forums/images/graemlins/confused.gif
 

Attachments

  • 717702-Workshop 395 (Small).jpg
    717702-Workshop 395 (Small).jpg
    87.8 KB · Views: 466
   / Creating a Workshop & Home
  • Thread Starter
#286  
I spent a little time on the tractor, and ALLOT of time with a shovel filling and smoothing. It's nice a pretty now, just needs to be tested and then I'll add building a doghouse to cover to my list of things to do. /forums/images/graemlins/frown.gif
 

Attachments

  • 717947-Workshop 397 (Small).jpg
    717947-Workshop 397 (Small).jpg
    59.8 KB · Views: 429
   / Creating a Workshop & Home
  • Thread Starter
#287  
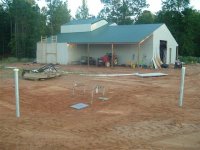
To make sure somebody really wants to drive into it, I put in two 4 inch poles to help them know when they are getting too close.

I'll paint them bright yellow too. /forums/images/graemlins/grin.gif
 

Attachments

  • 717954-Workshop 396 (Small).jpg
    717954-Workshop 396 (Small).jpg
    64.3 KB · Views: 472
   / Creating a Workshop & Home #289  
Eddie-

A question about your soil: from all the pictures I have seen of your trenches, the soil appears to be uniform all the way to the bottom of the trench and looks to be on the sandy side. Is this true? Is your soil typical for your area of Texas?

Thanks,

Bonehead
 
   / Creating a Workshop & Home
  • Thread Starter
#290  
Hi Bonehead,

I'd say my soil is 90% Red Clay. I've found one small patch of iron ore, which is in the middle of my vinyl fence I'm installing, and another patch of sand in some pines I've been taking out. Not good sand, but sandy for my conditions.

The Red Clay goes down to 4 feet in some places, and way past what I'm able to dig. Under the Red Clay is a layer of Gray Clay. This is weird stuff. Doesn absorb water at all. The bottom of my pond is this, and I've drove my backhoe across it, through it and all over it with a foot of water over it. Water does not penetrate this stuff. If there's any gray clay or sediment on top of it, I'm stuck. The tires will spin and I have to use the hoe stick to pull myself out.

Hope this answers your question.

Eddie
 

Tractor & Equipment Auctions

New 4-17.5 Forerunner Skidloader Tires (A50774)
New 4-17.5...
2006 Cat 963C Crawler Loader (RIDE AND DRIVE) (NICE) (A50774)
2006 Cat 963C...
New Kivel 4200 lb. Skidloader Forks (A50774)
New Kivel 4200 lb...
DROME EXCAVATOR SLIDE ATTEHMENT (A50322)
DROME EXCAVATOR...
2016 FREIGHTLINER 2500 SPRINTER VAN (A51222)
2016 FREIGHTLINER...
2016 VOLVO VNL TANDEM AXLE SLEEPER (A51222)
2016 VOLVO VNL...
 
Top